Flower meets granny
Please use #flowermeetsgranny and #bymimzan in social medias so I can find your lovely photos
If you like to support my work as a crochet designer, buy me a cup of coffee ☕
If you prefer an easier to print pattern that’s stored where you can refer to it any time, you can purchase a PDF for a small fee in my shops.
Ravelry
Etsy
PATTERN
SIZE: One Size
YARN: Scheepjes Whirl nr 552 Pink to Wink, 2 skeins, Scheepjes Whirlette nr 862 Grapefruit 1 skein.
HOOK: 3,5 mm, adjust the size of your hook if needed, my flowers meassures 4 cm (see the picture.)
STITCHTUTORIAL
ch – chain
st – stitch
dc – double crochet
slst – slip stitch
chsp – chain space
tr – treble
htr – half treble
dtr – double treble
ne – next
dtr3tog – double treble crochet 3 together
dtr4tog – double treble crochet 4 together
crabstitch – backwards double crochet
GOOD TO KNOW: The flowers are made in 3 rows. Every row of flowers will be joined with the previous row as you go.
PATTERN
Row 1:
Picture 1: Ch 3,
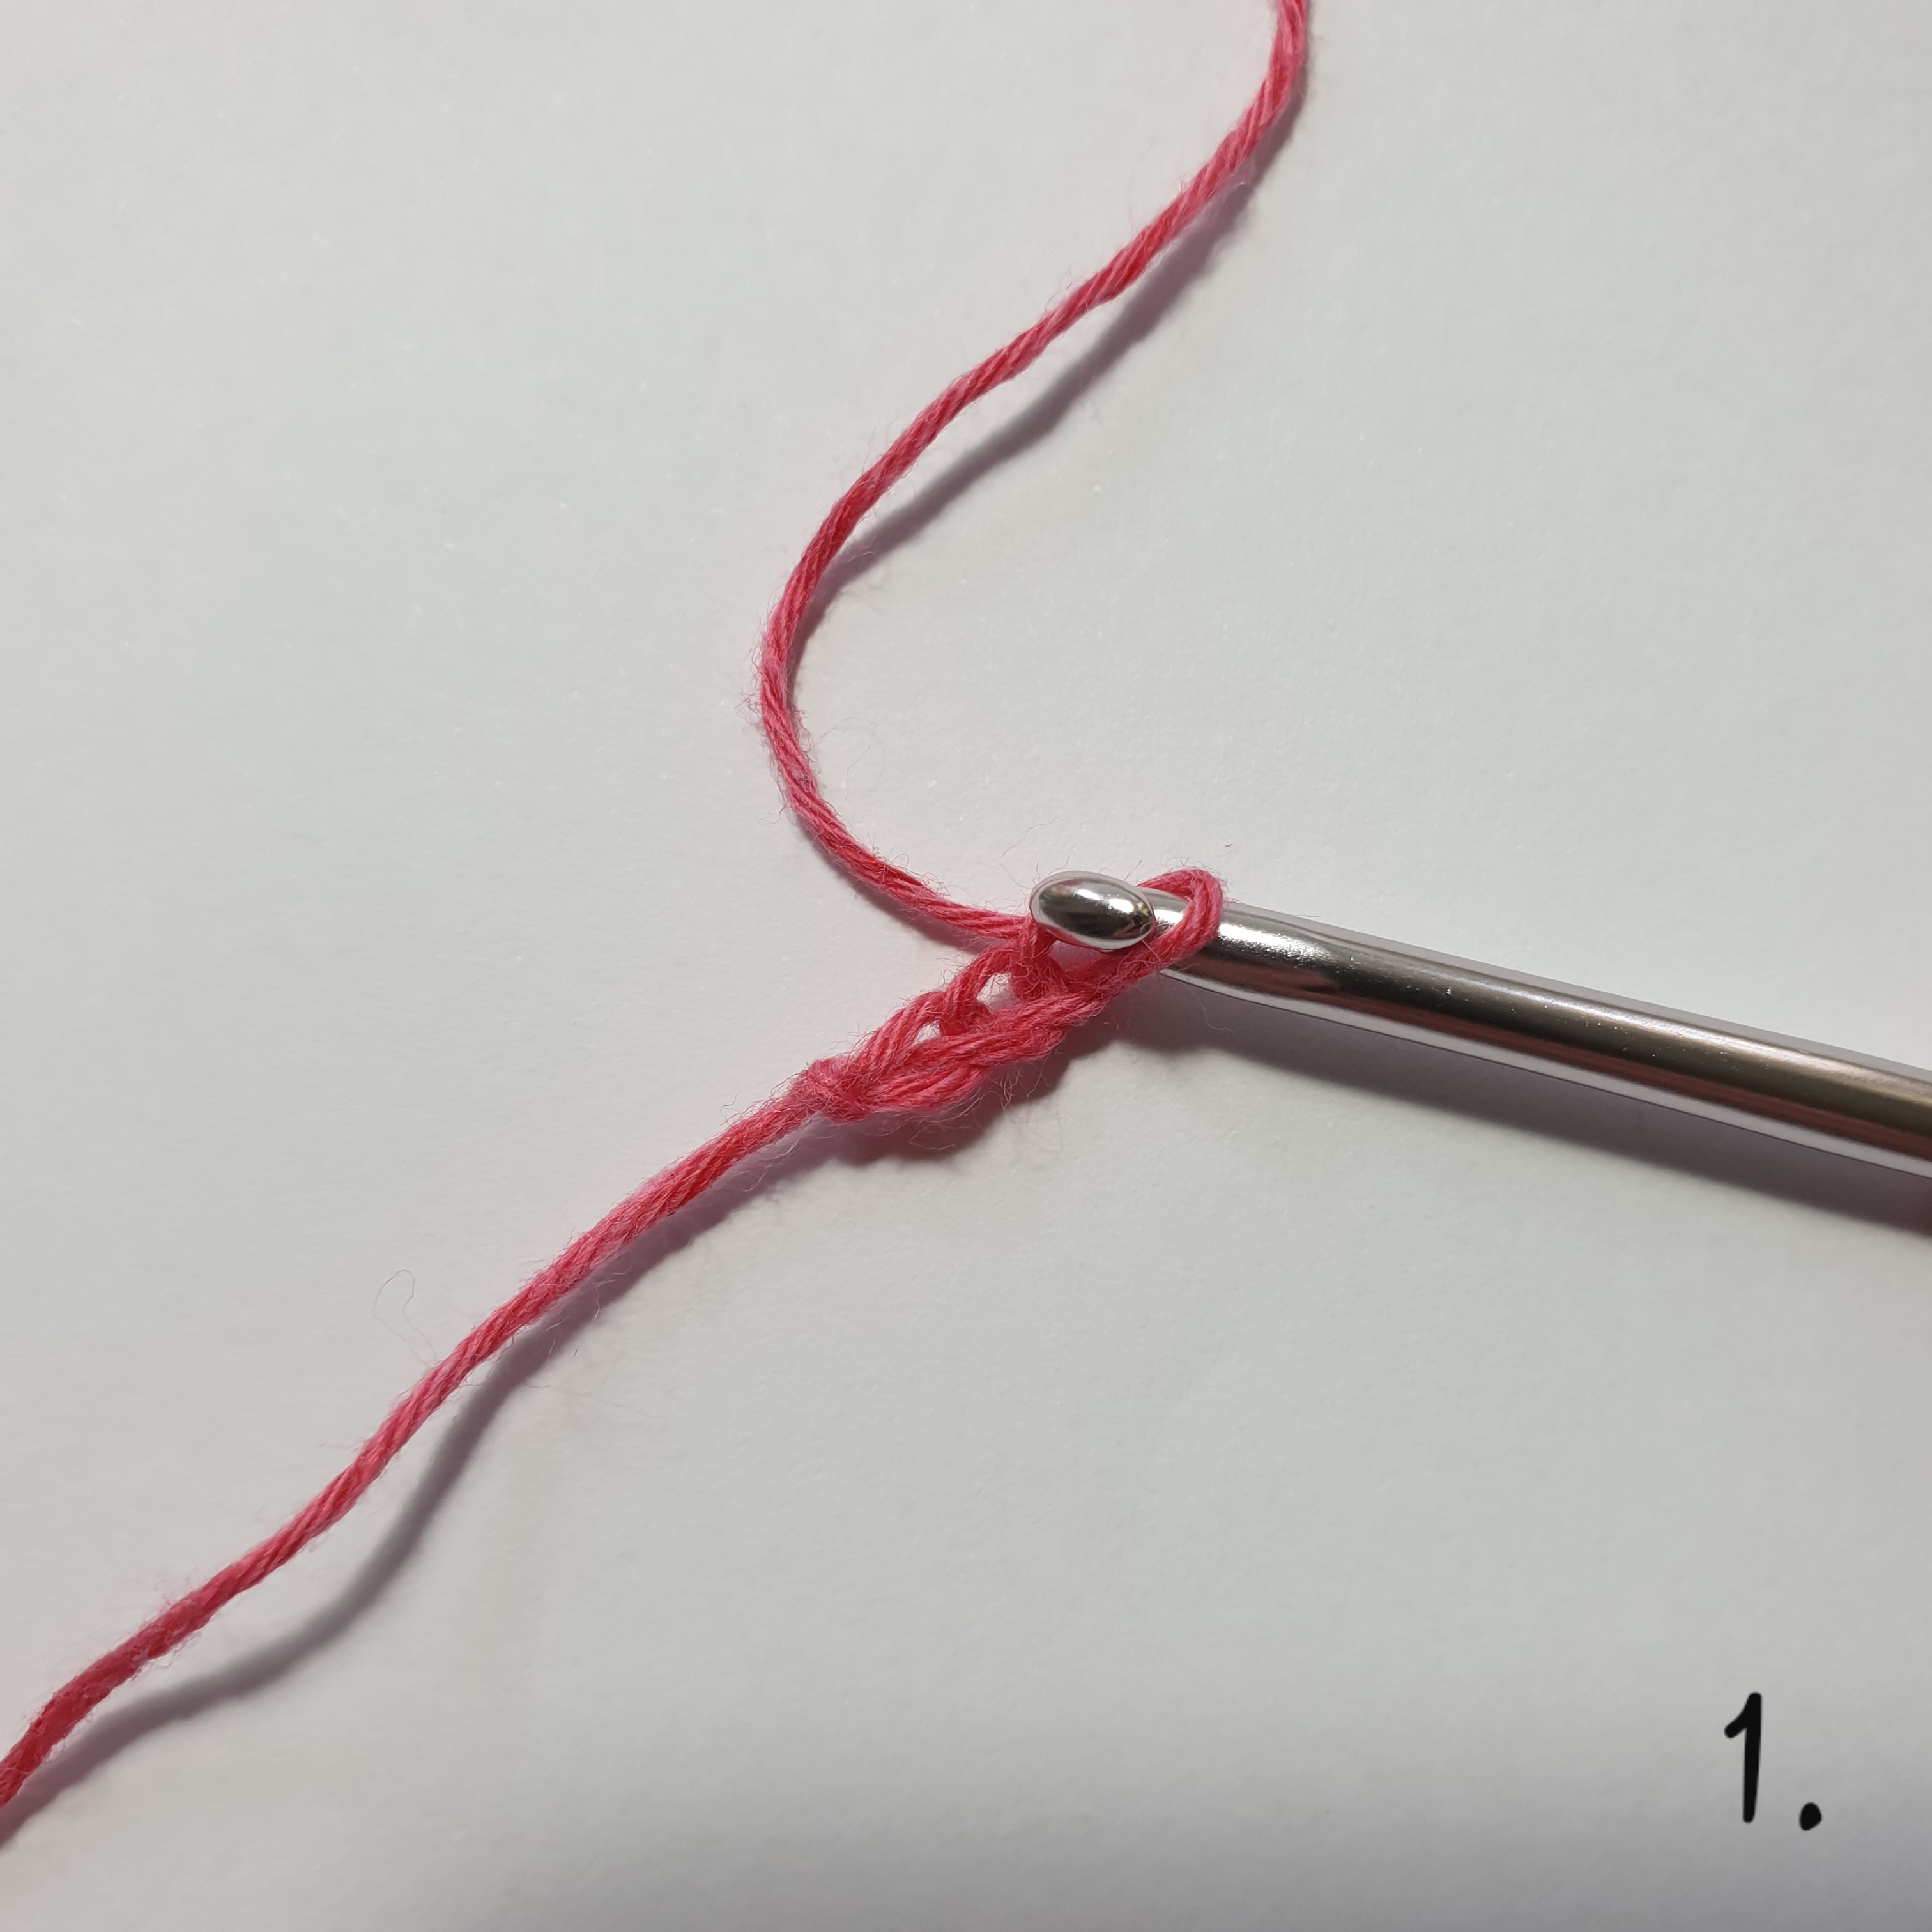
Picture 2: 1 tr in the 3rd ch from your hook (this will create the center of the flower),
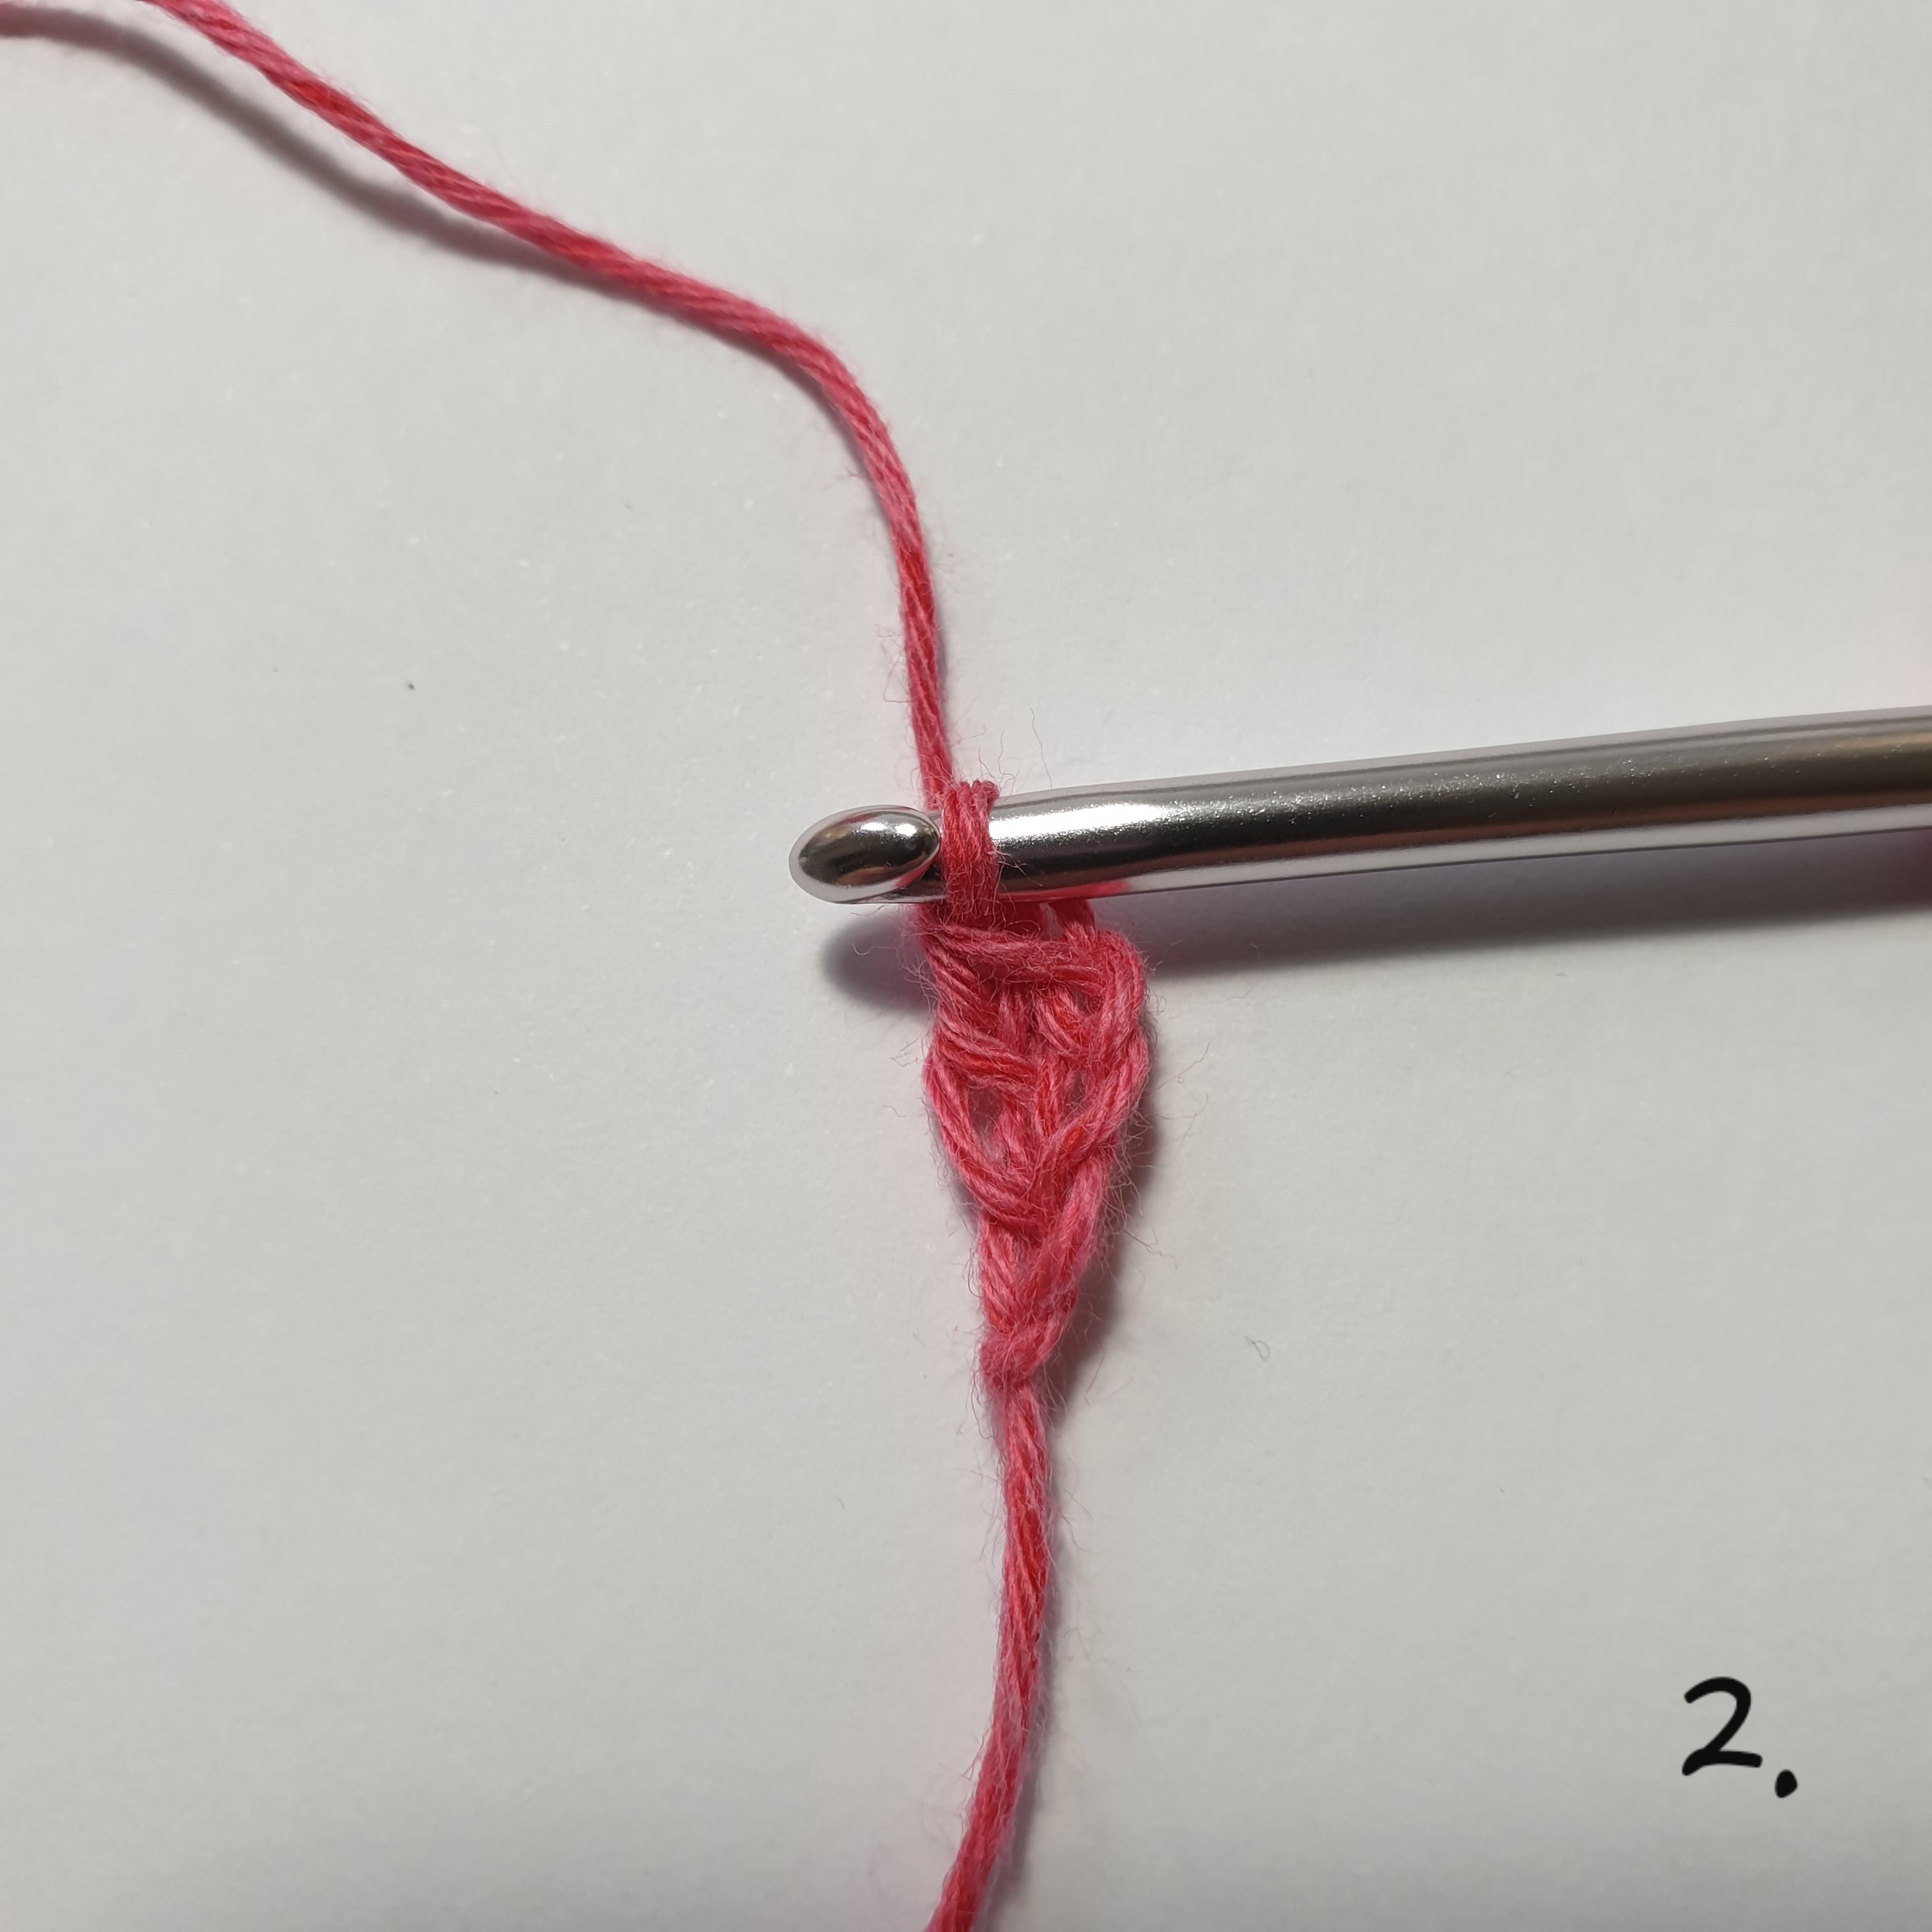
Picture 3: ch 3,

Picture 4: dtr3tog (petal) in the ring between the tr’s,
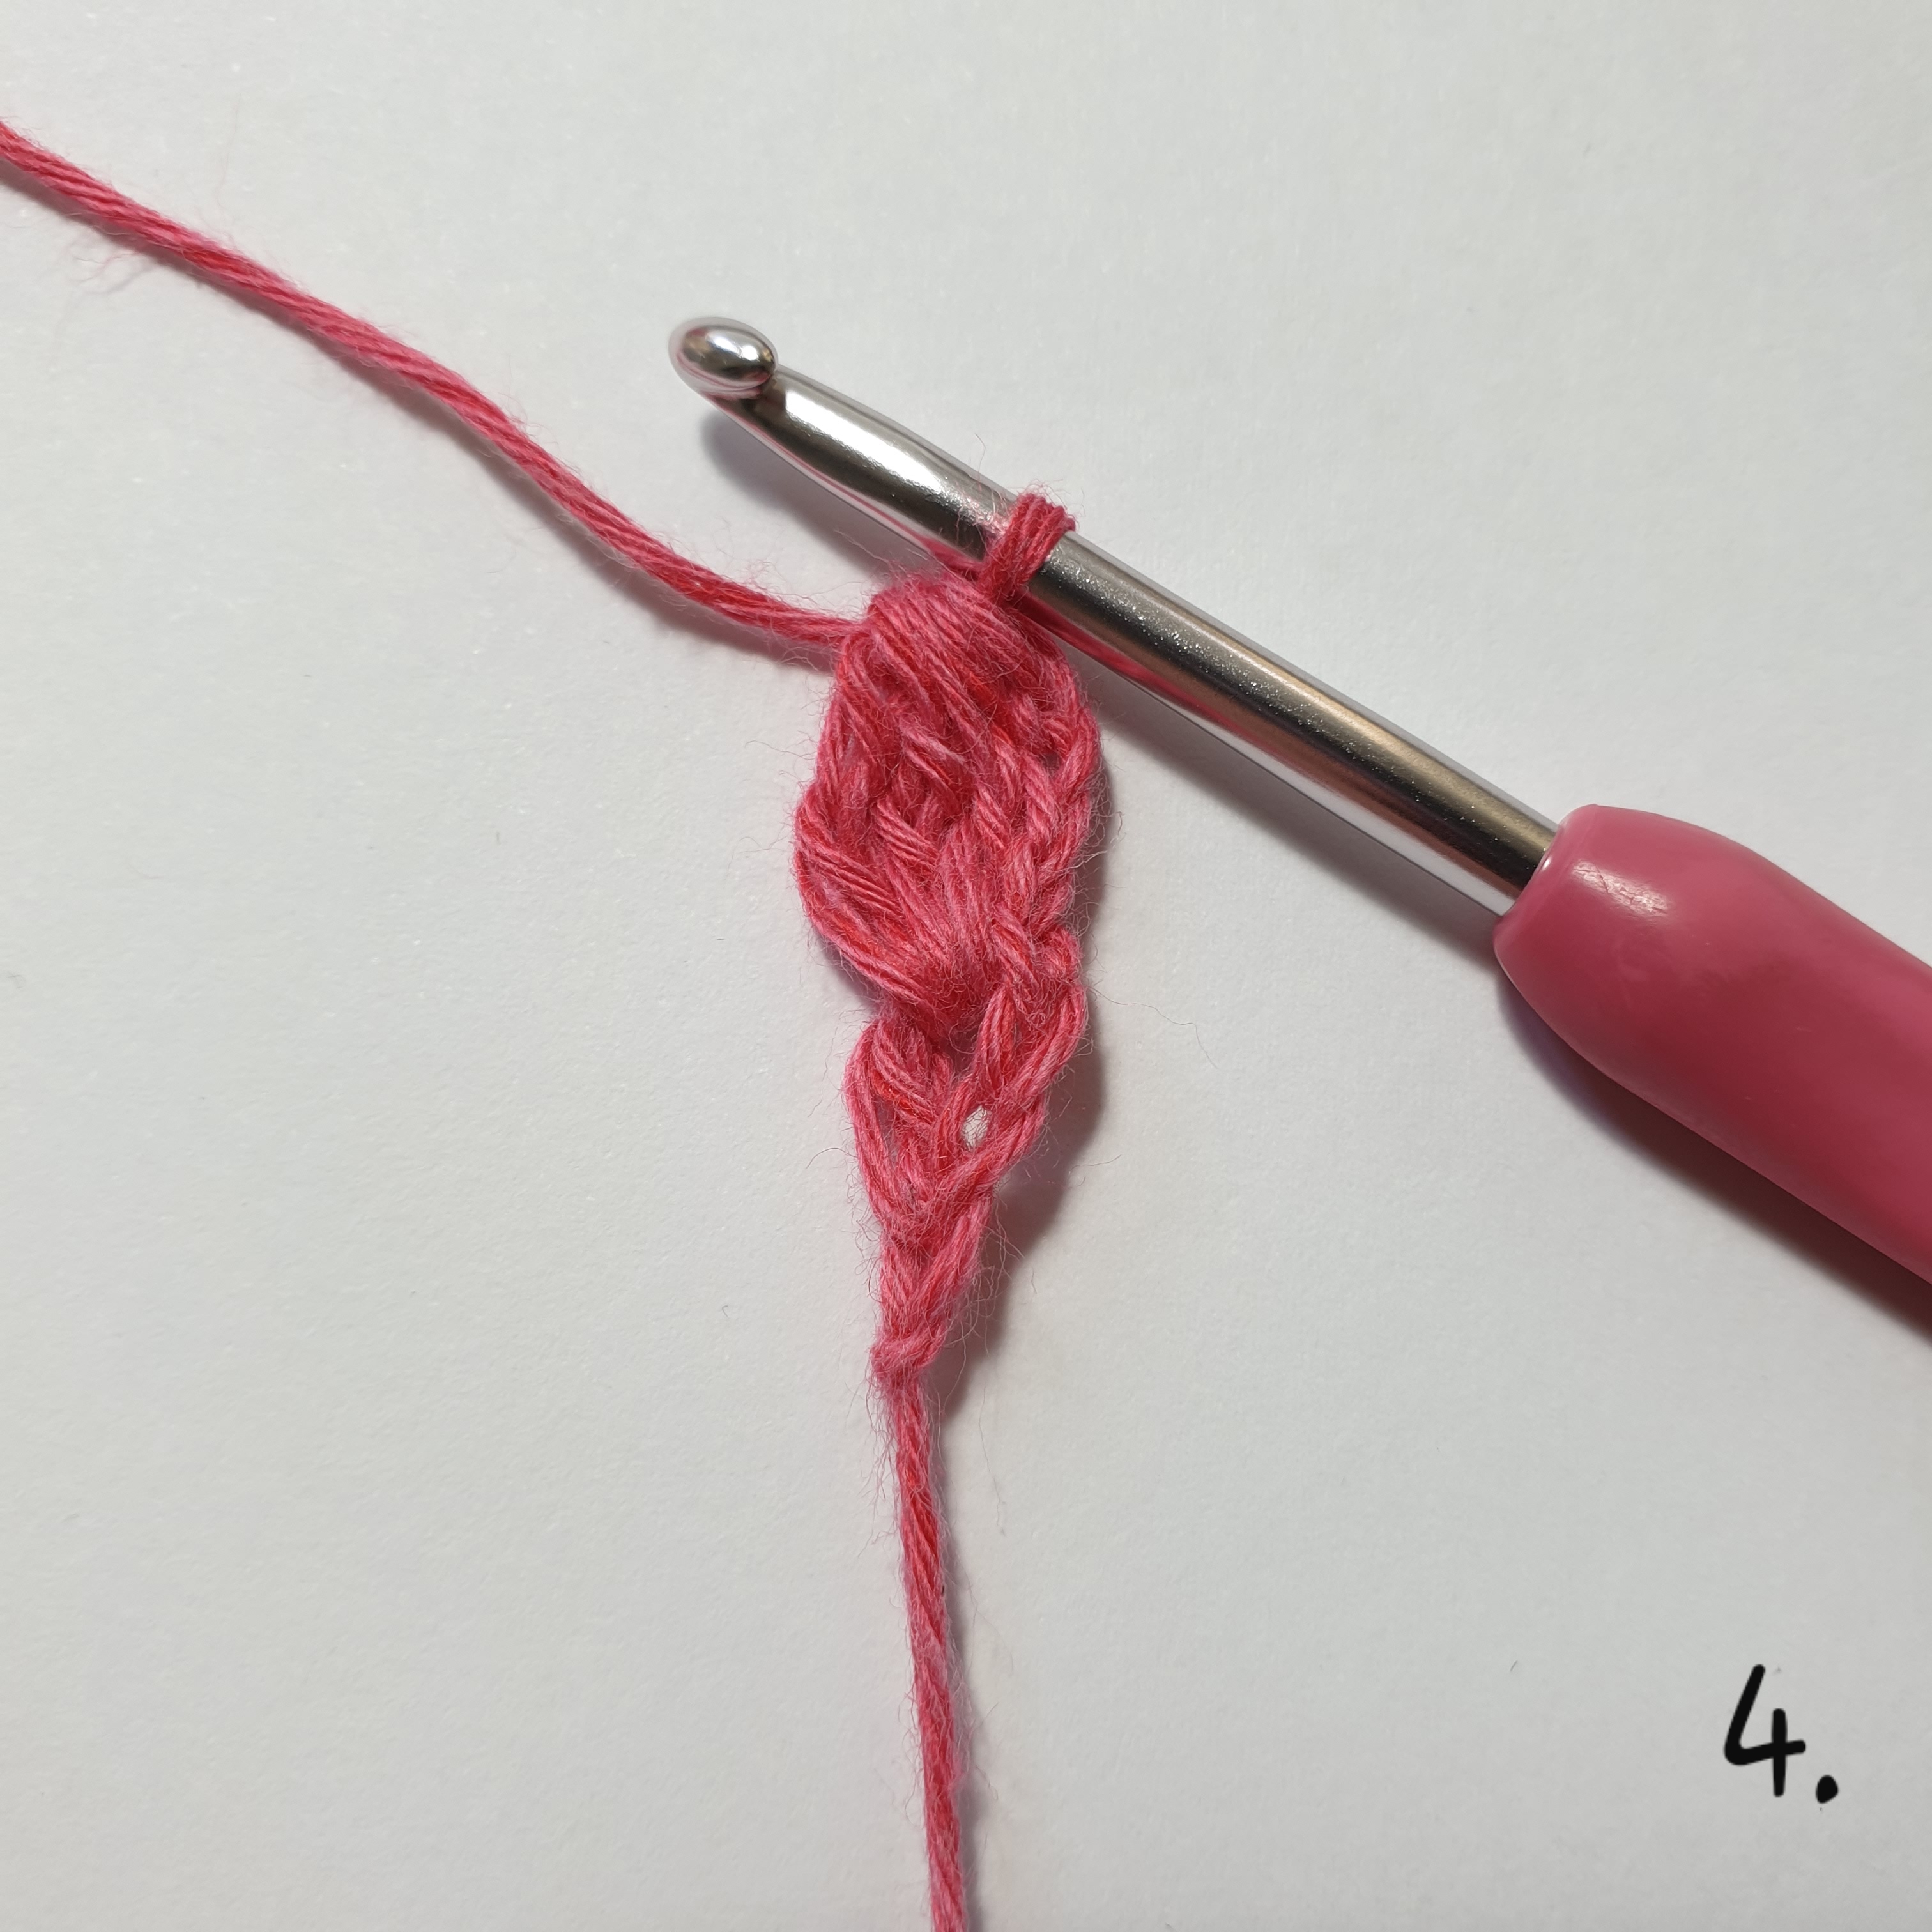
Picture 5: *ch 3, 1 tr in the 3rd ch from your hook,
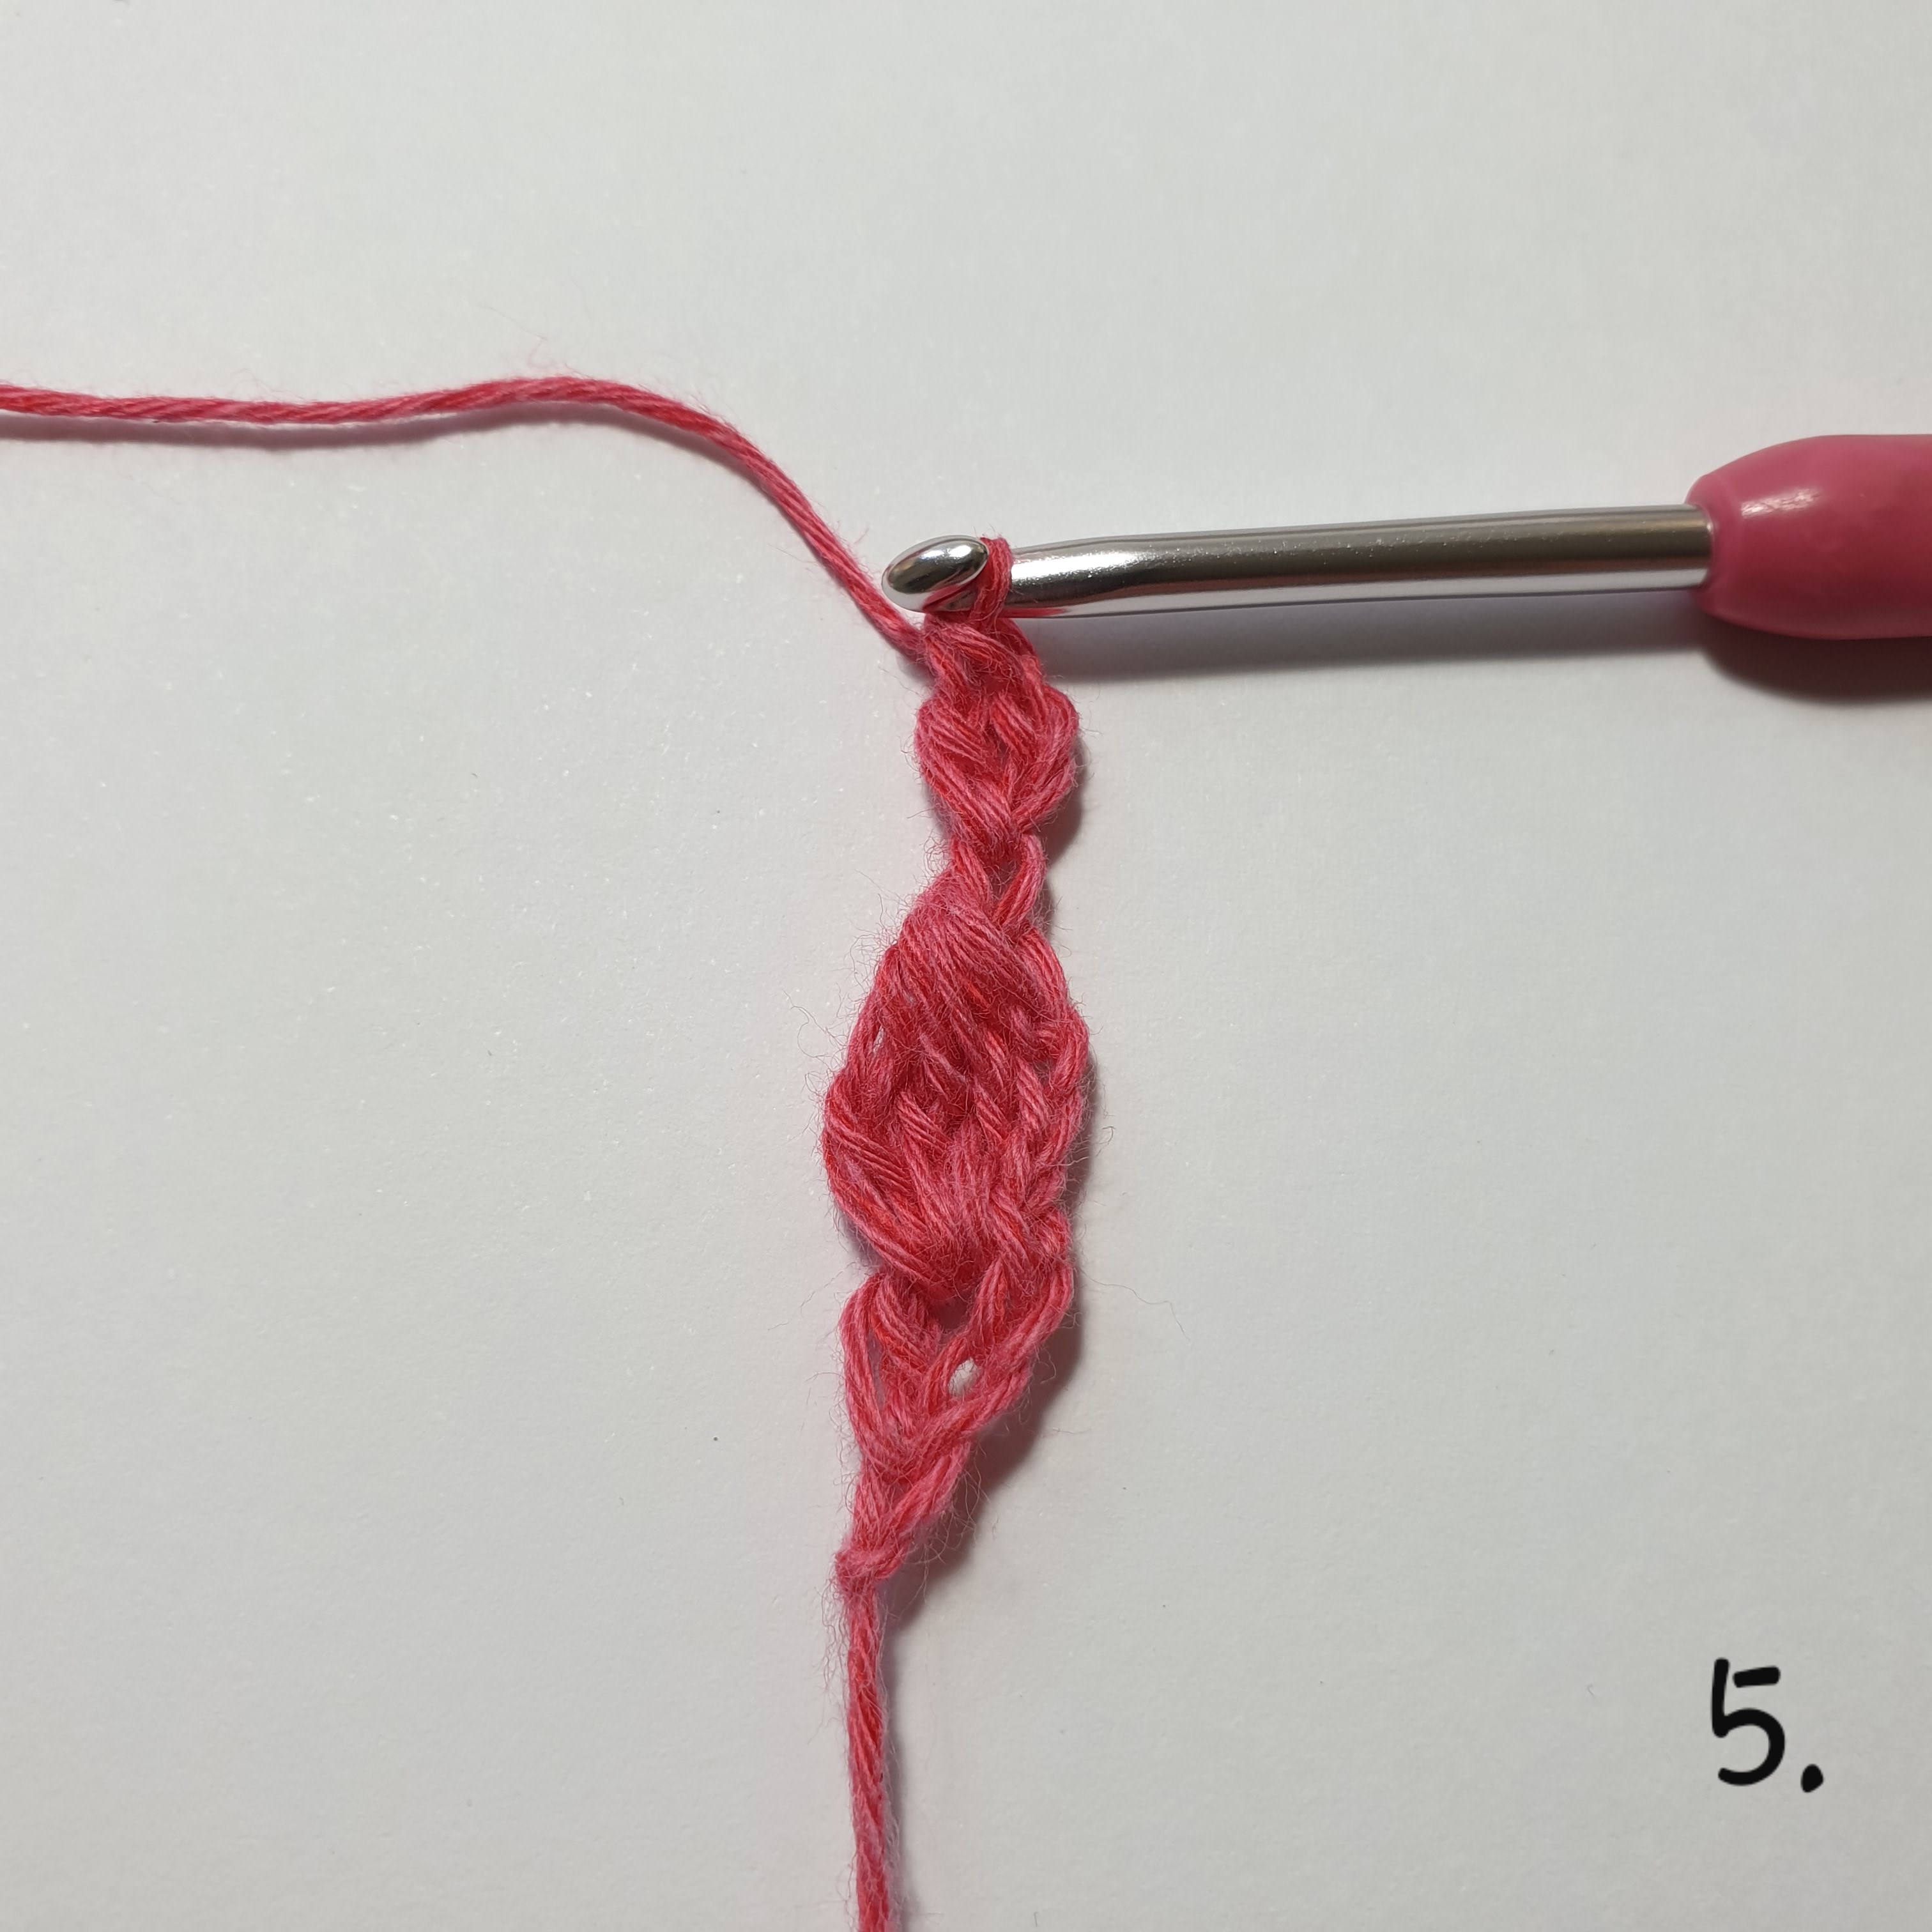
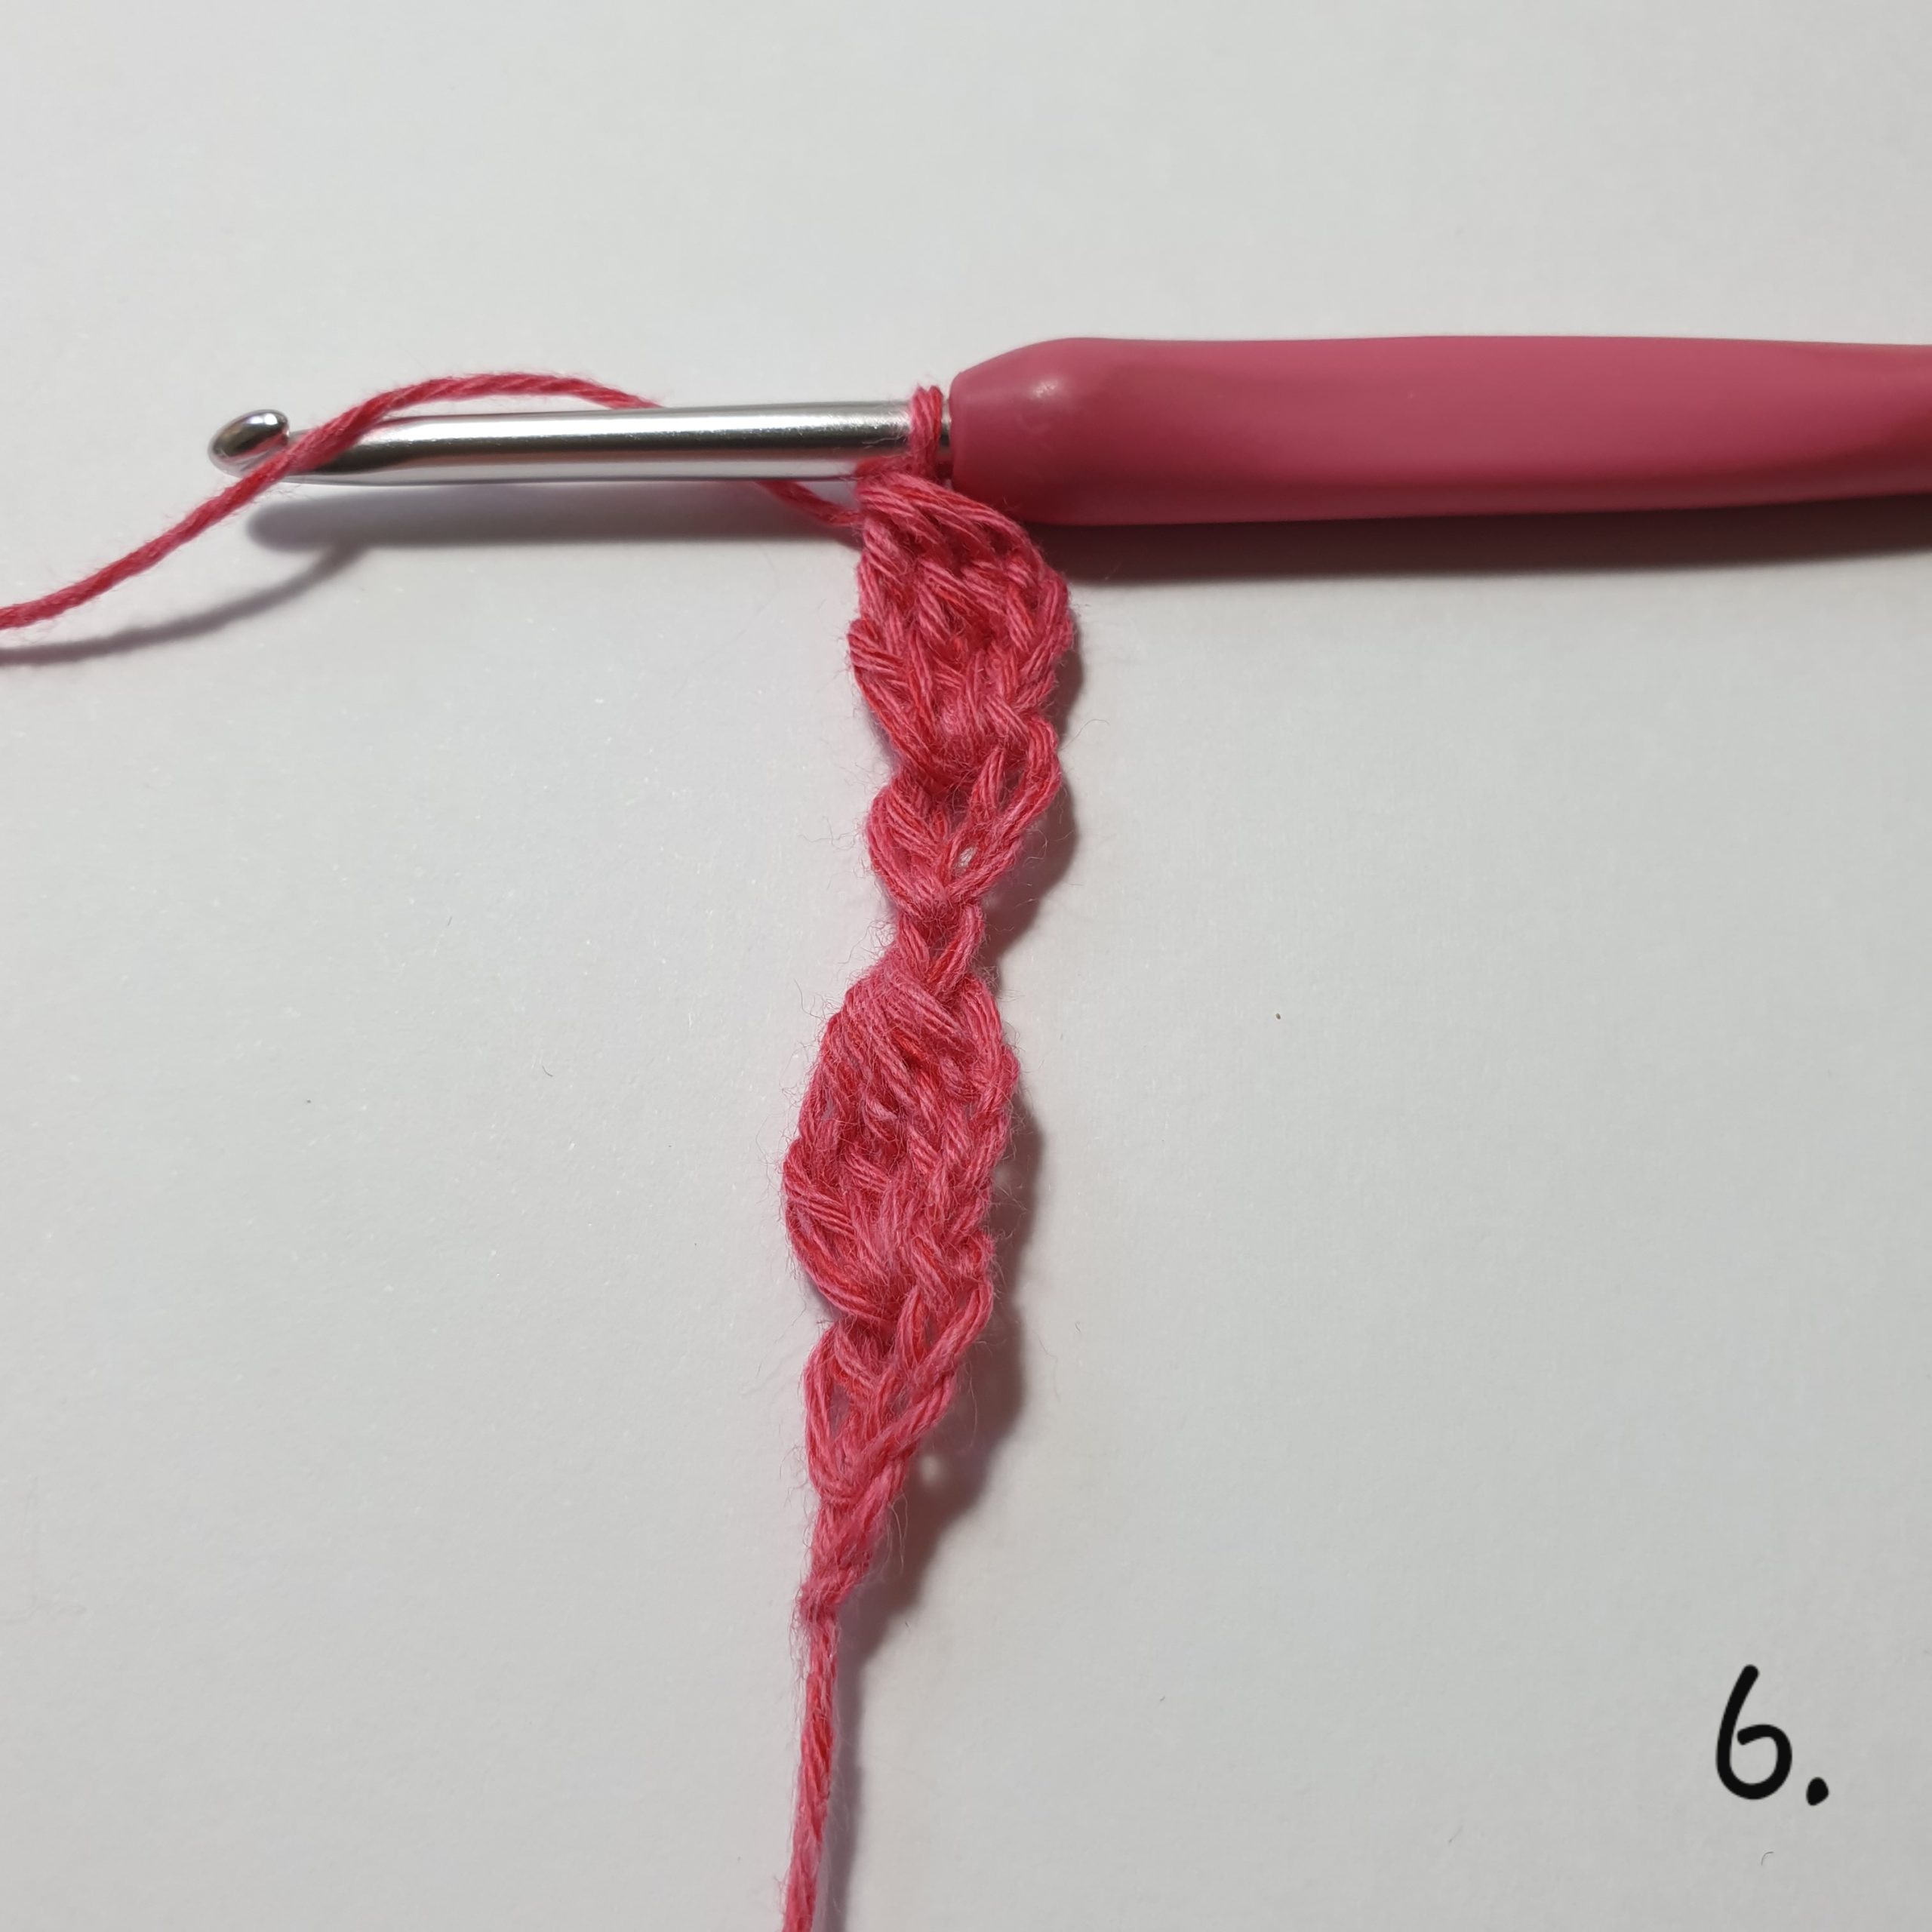
Picture 6: ch 3, dtr3tog in the ring between the tr’s*,

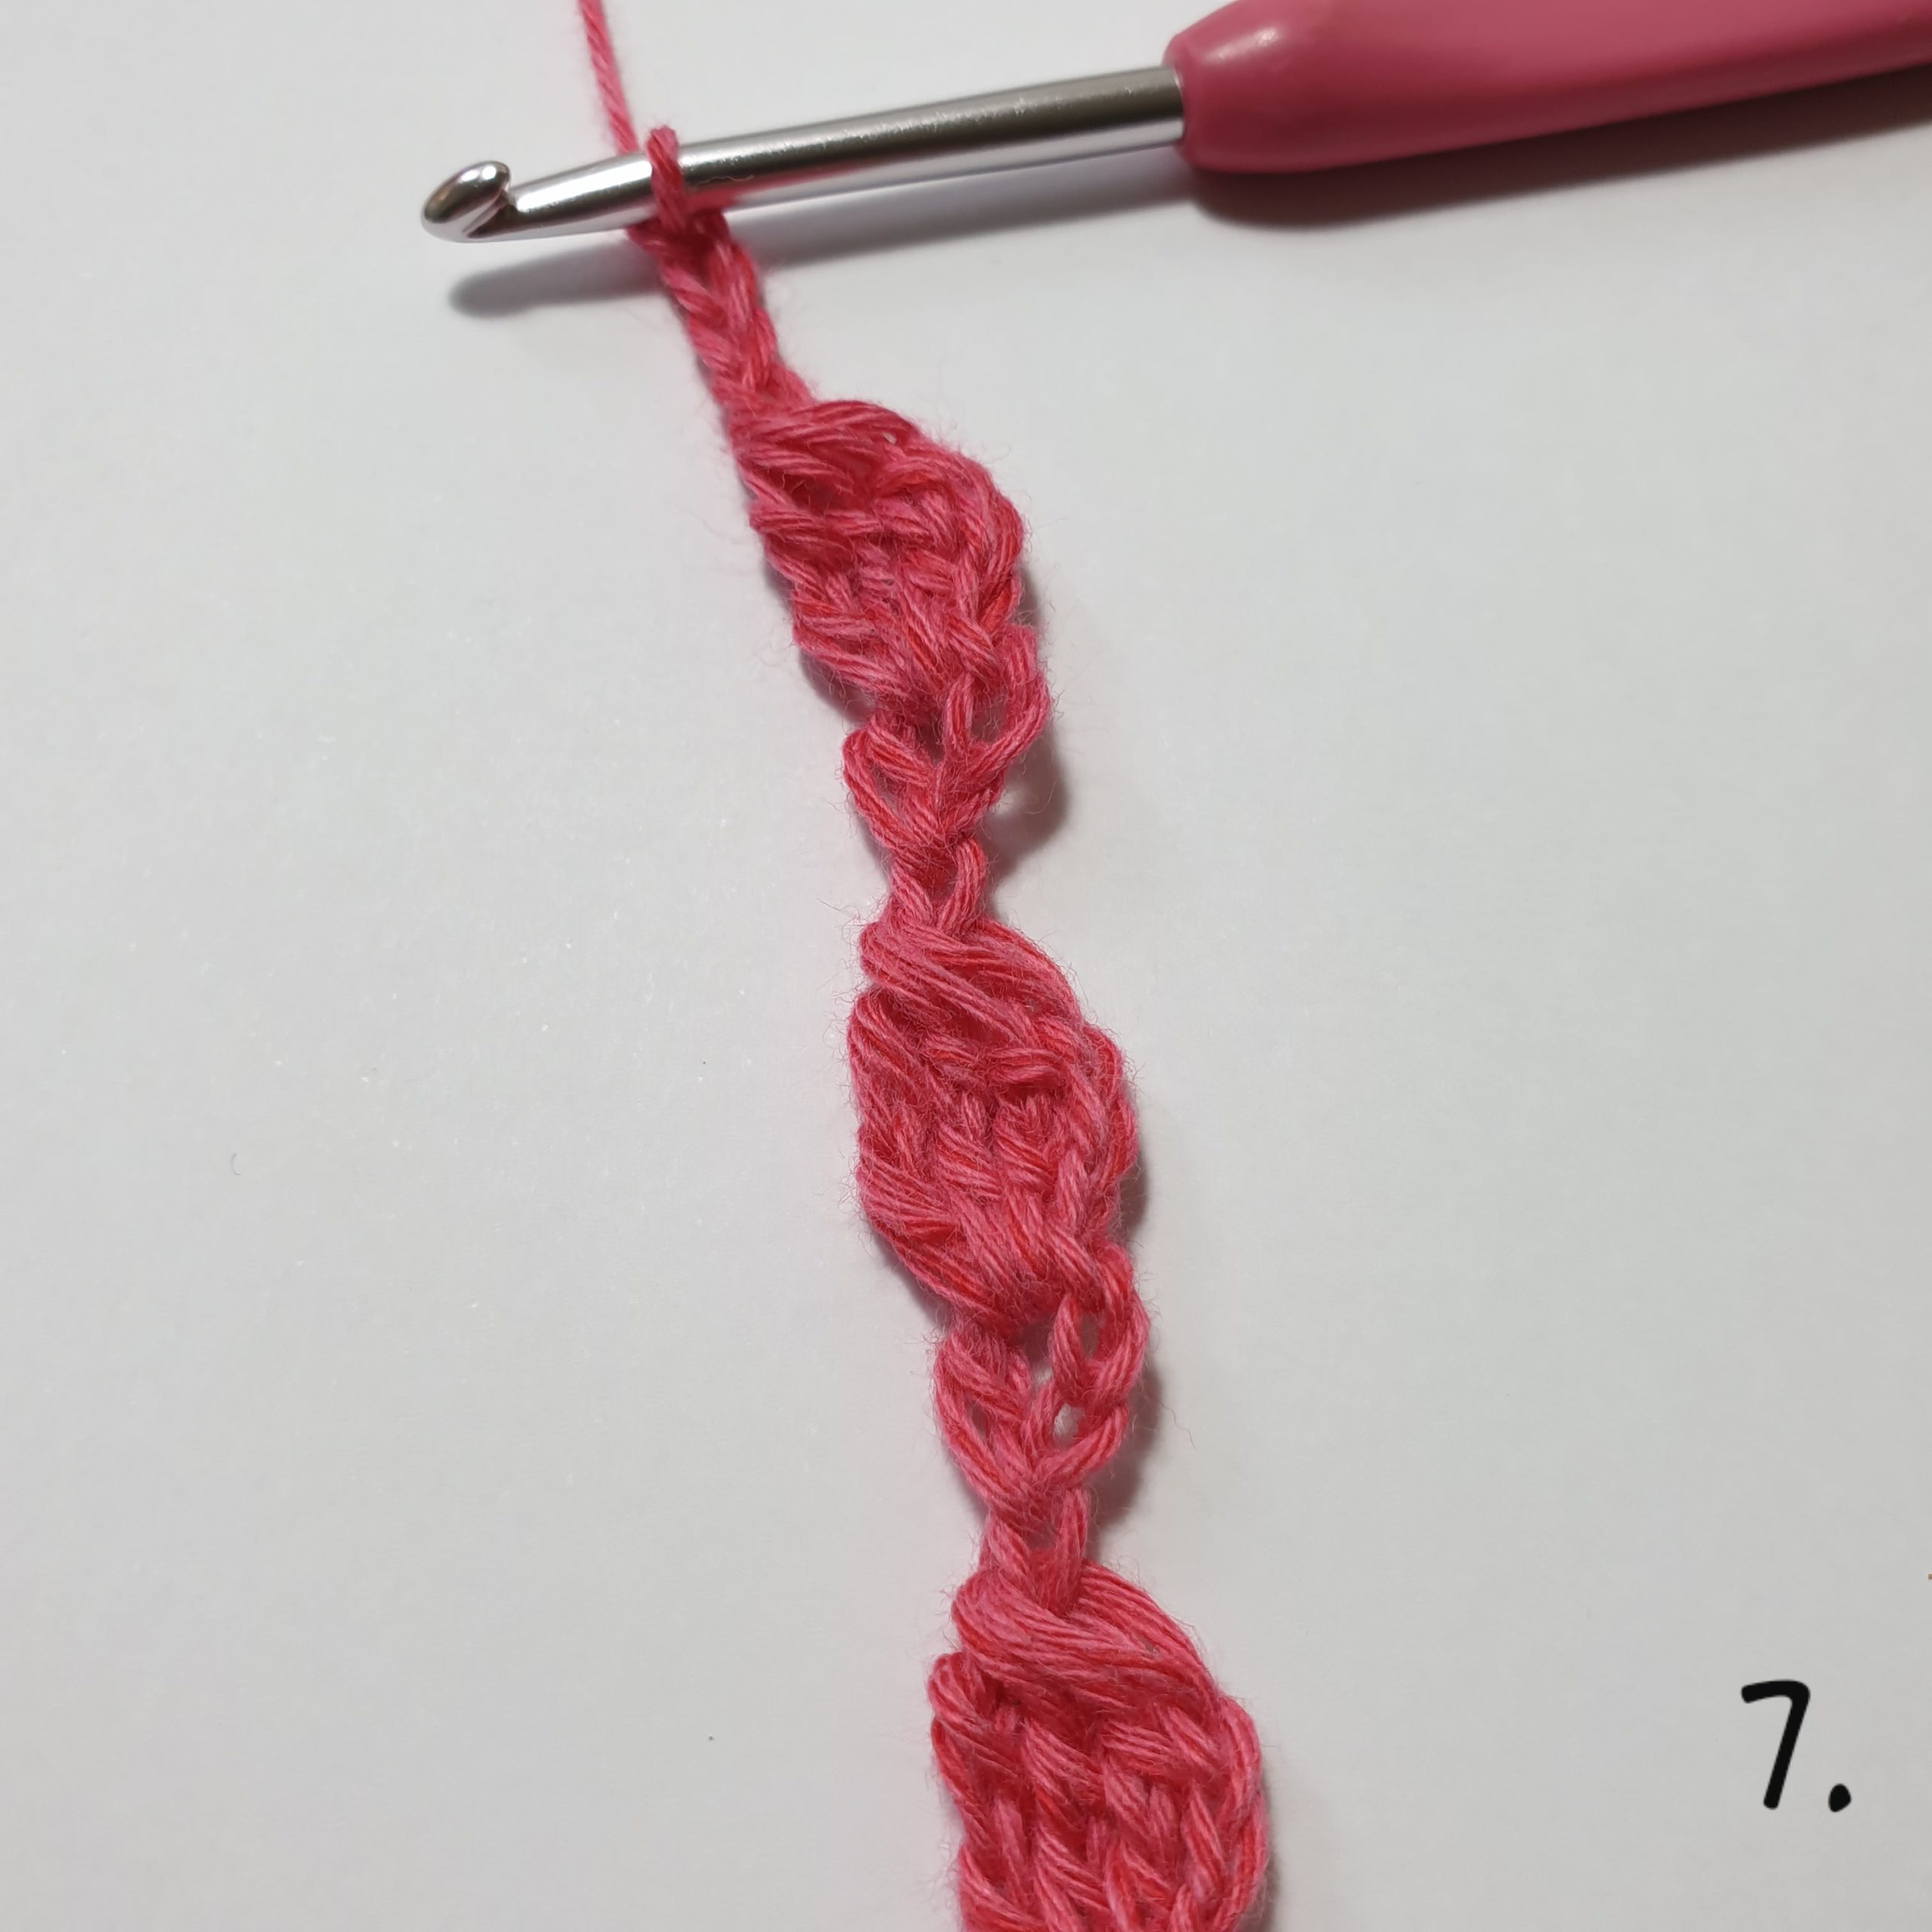
Picture 7: repeat between *-* until you got 45 petals, ch 4.
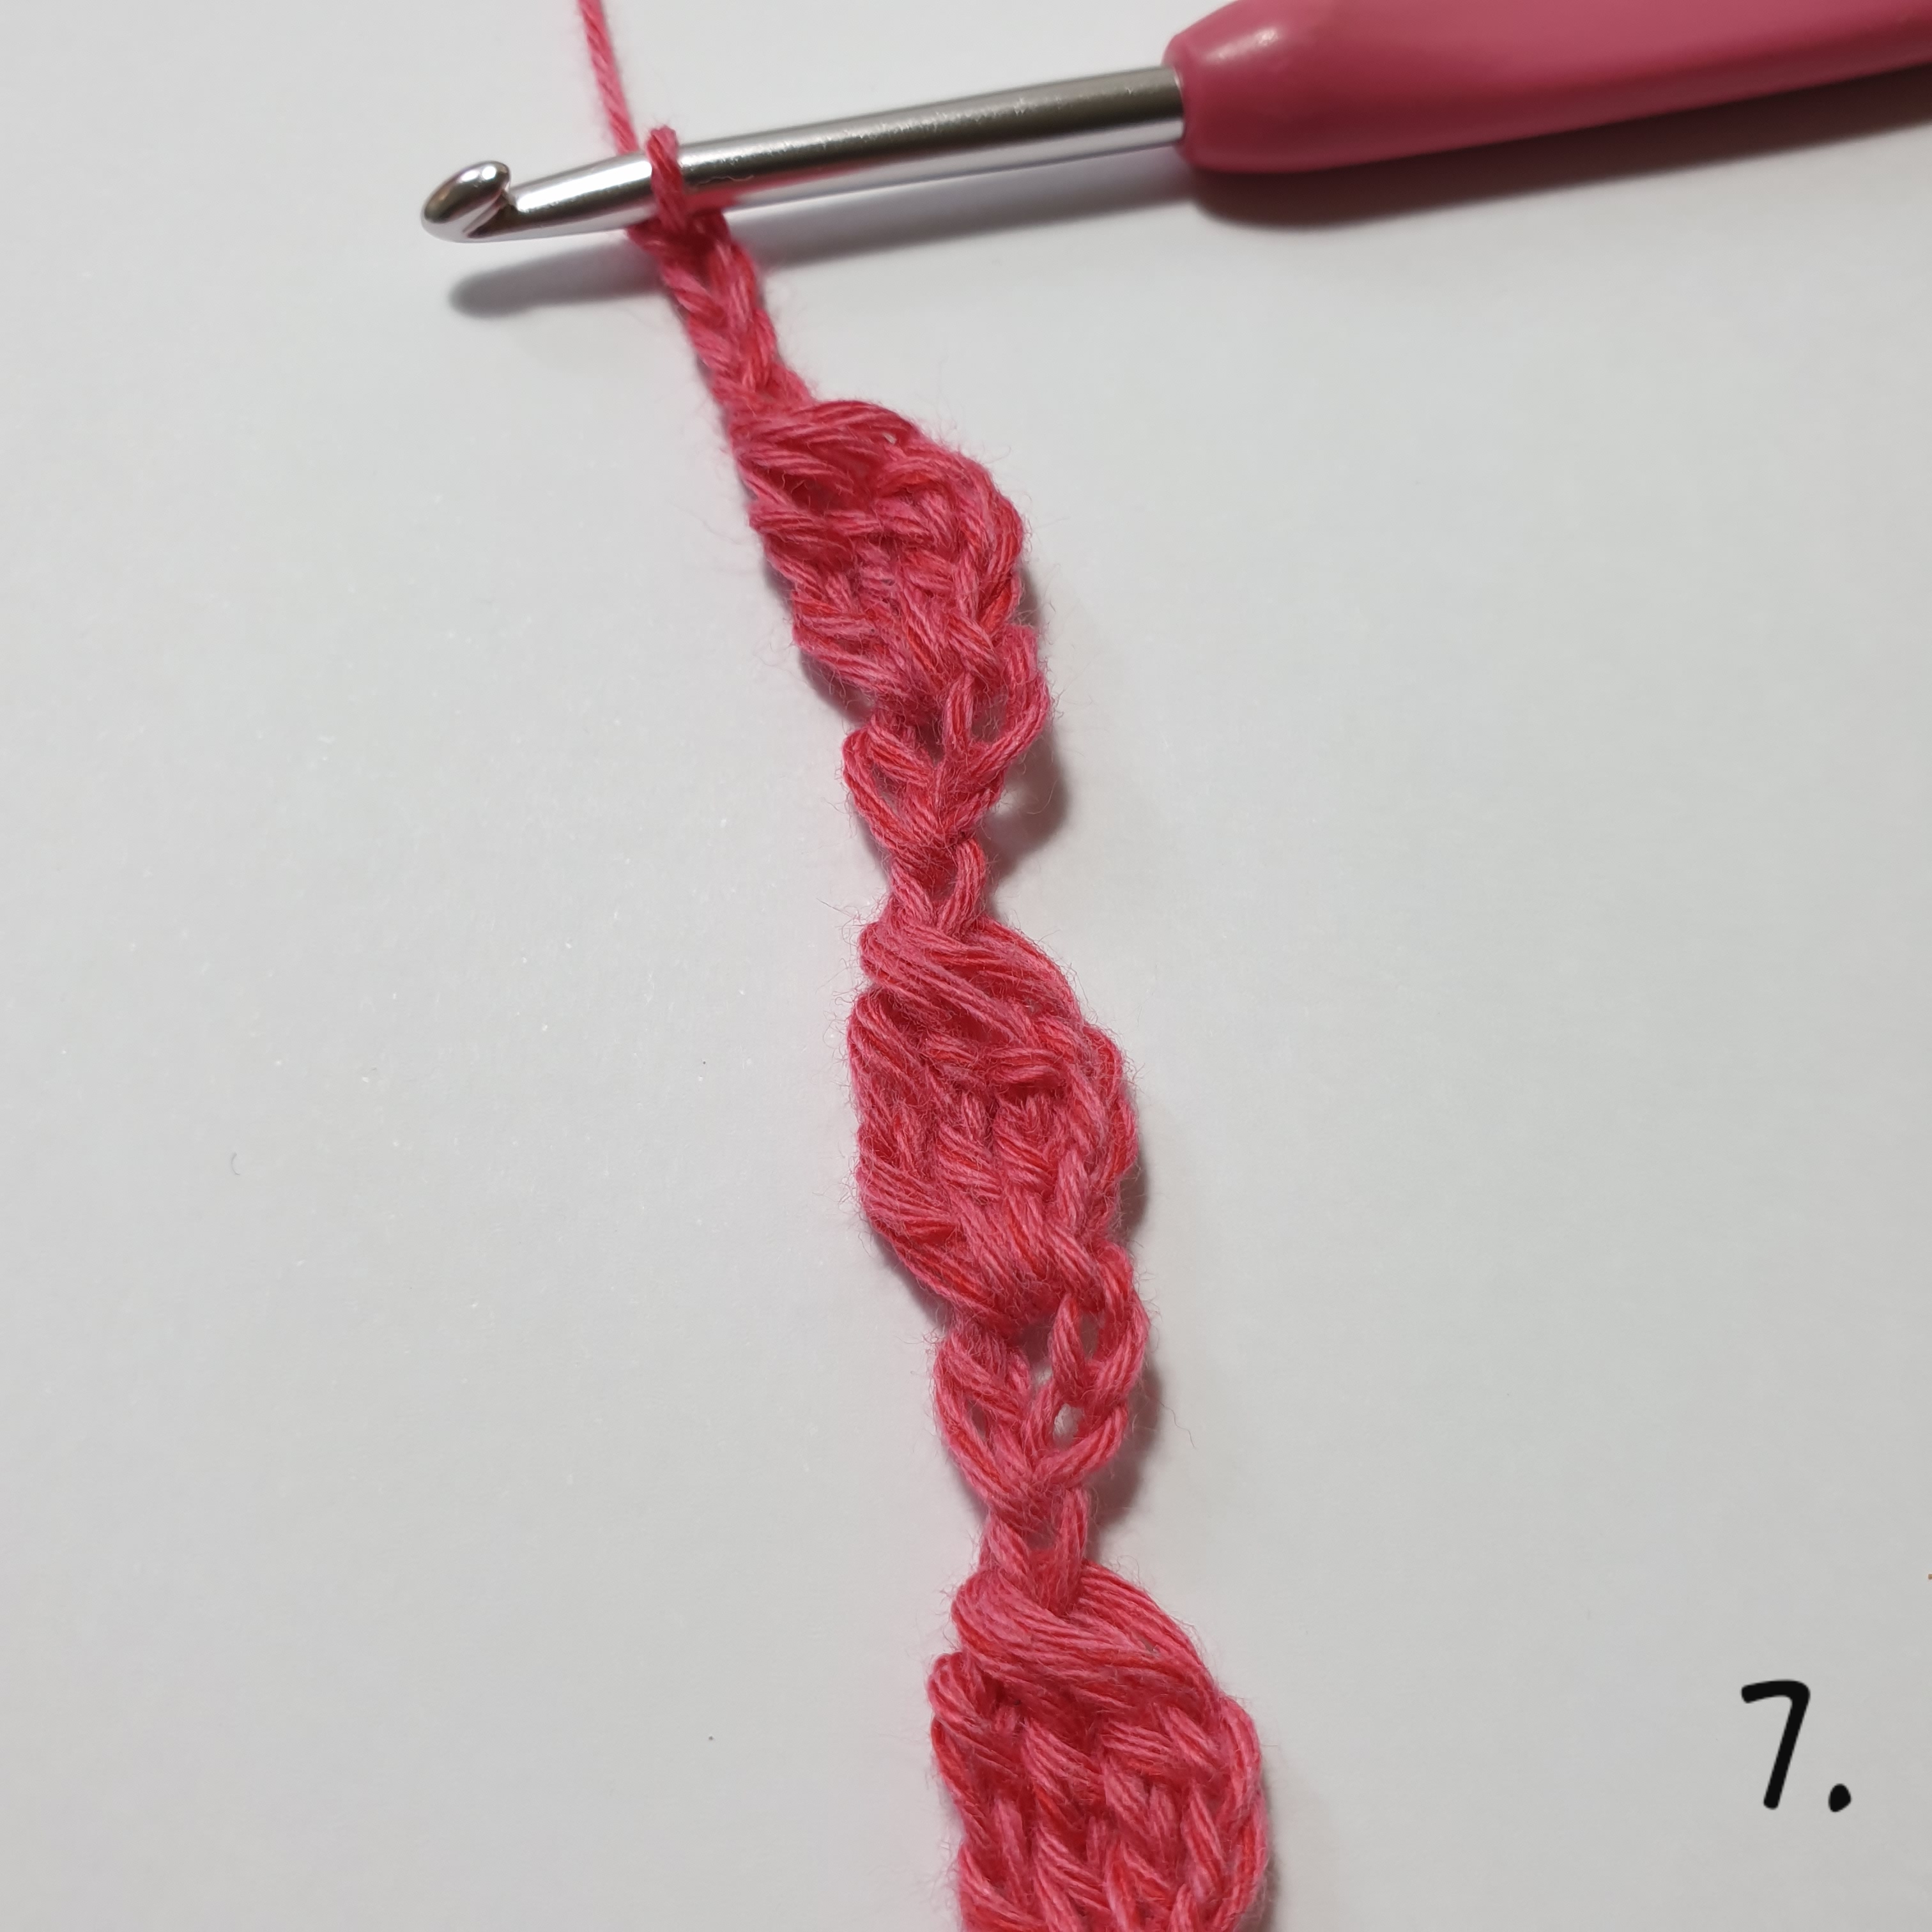
Row 2: Now we are working backwards along the upper side of the petals.
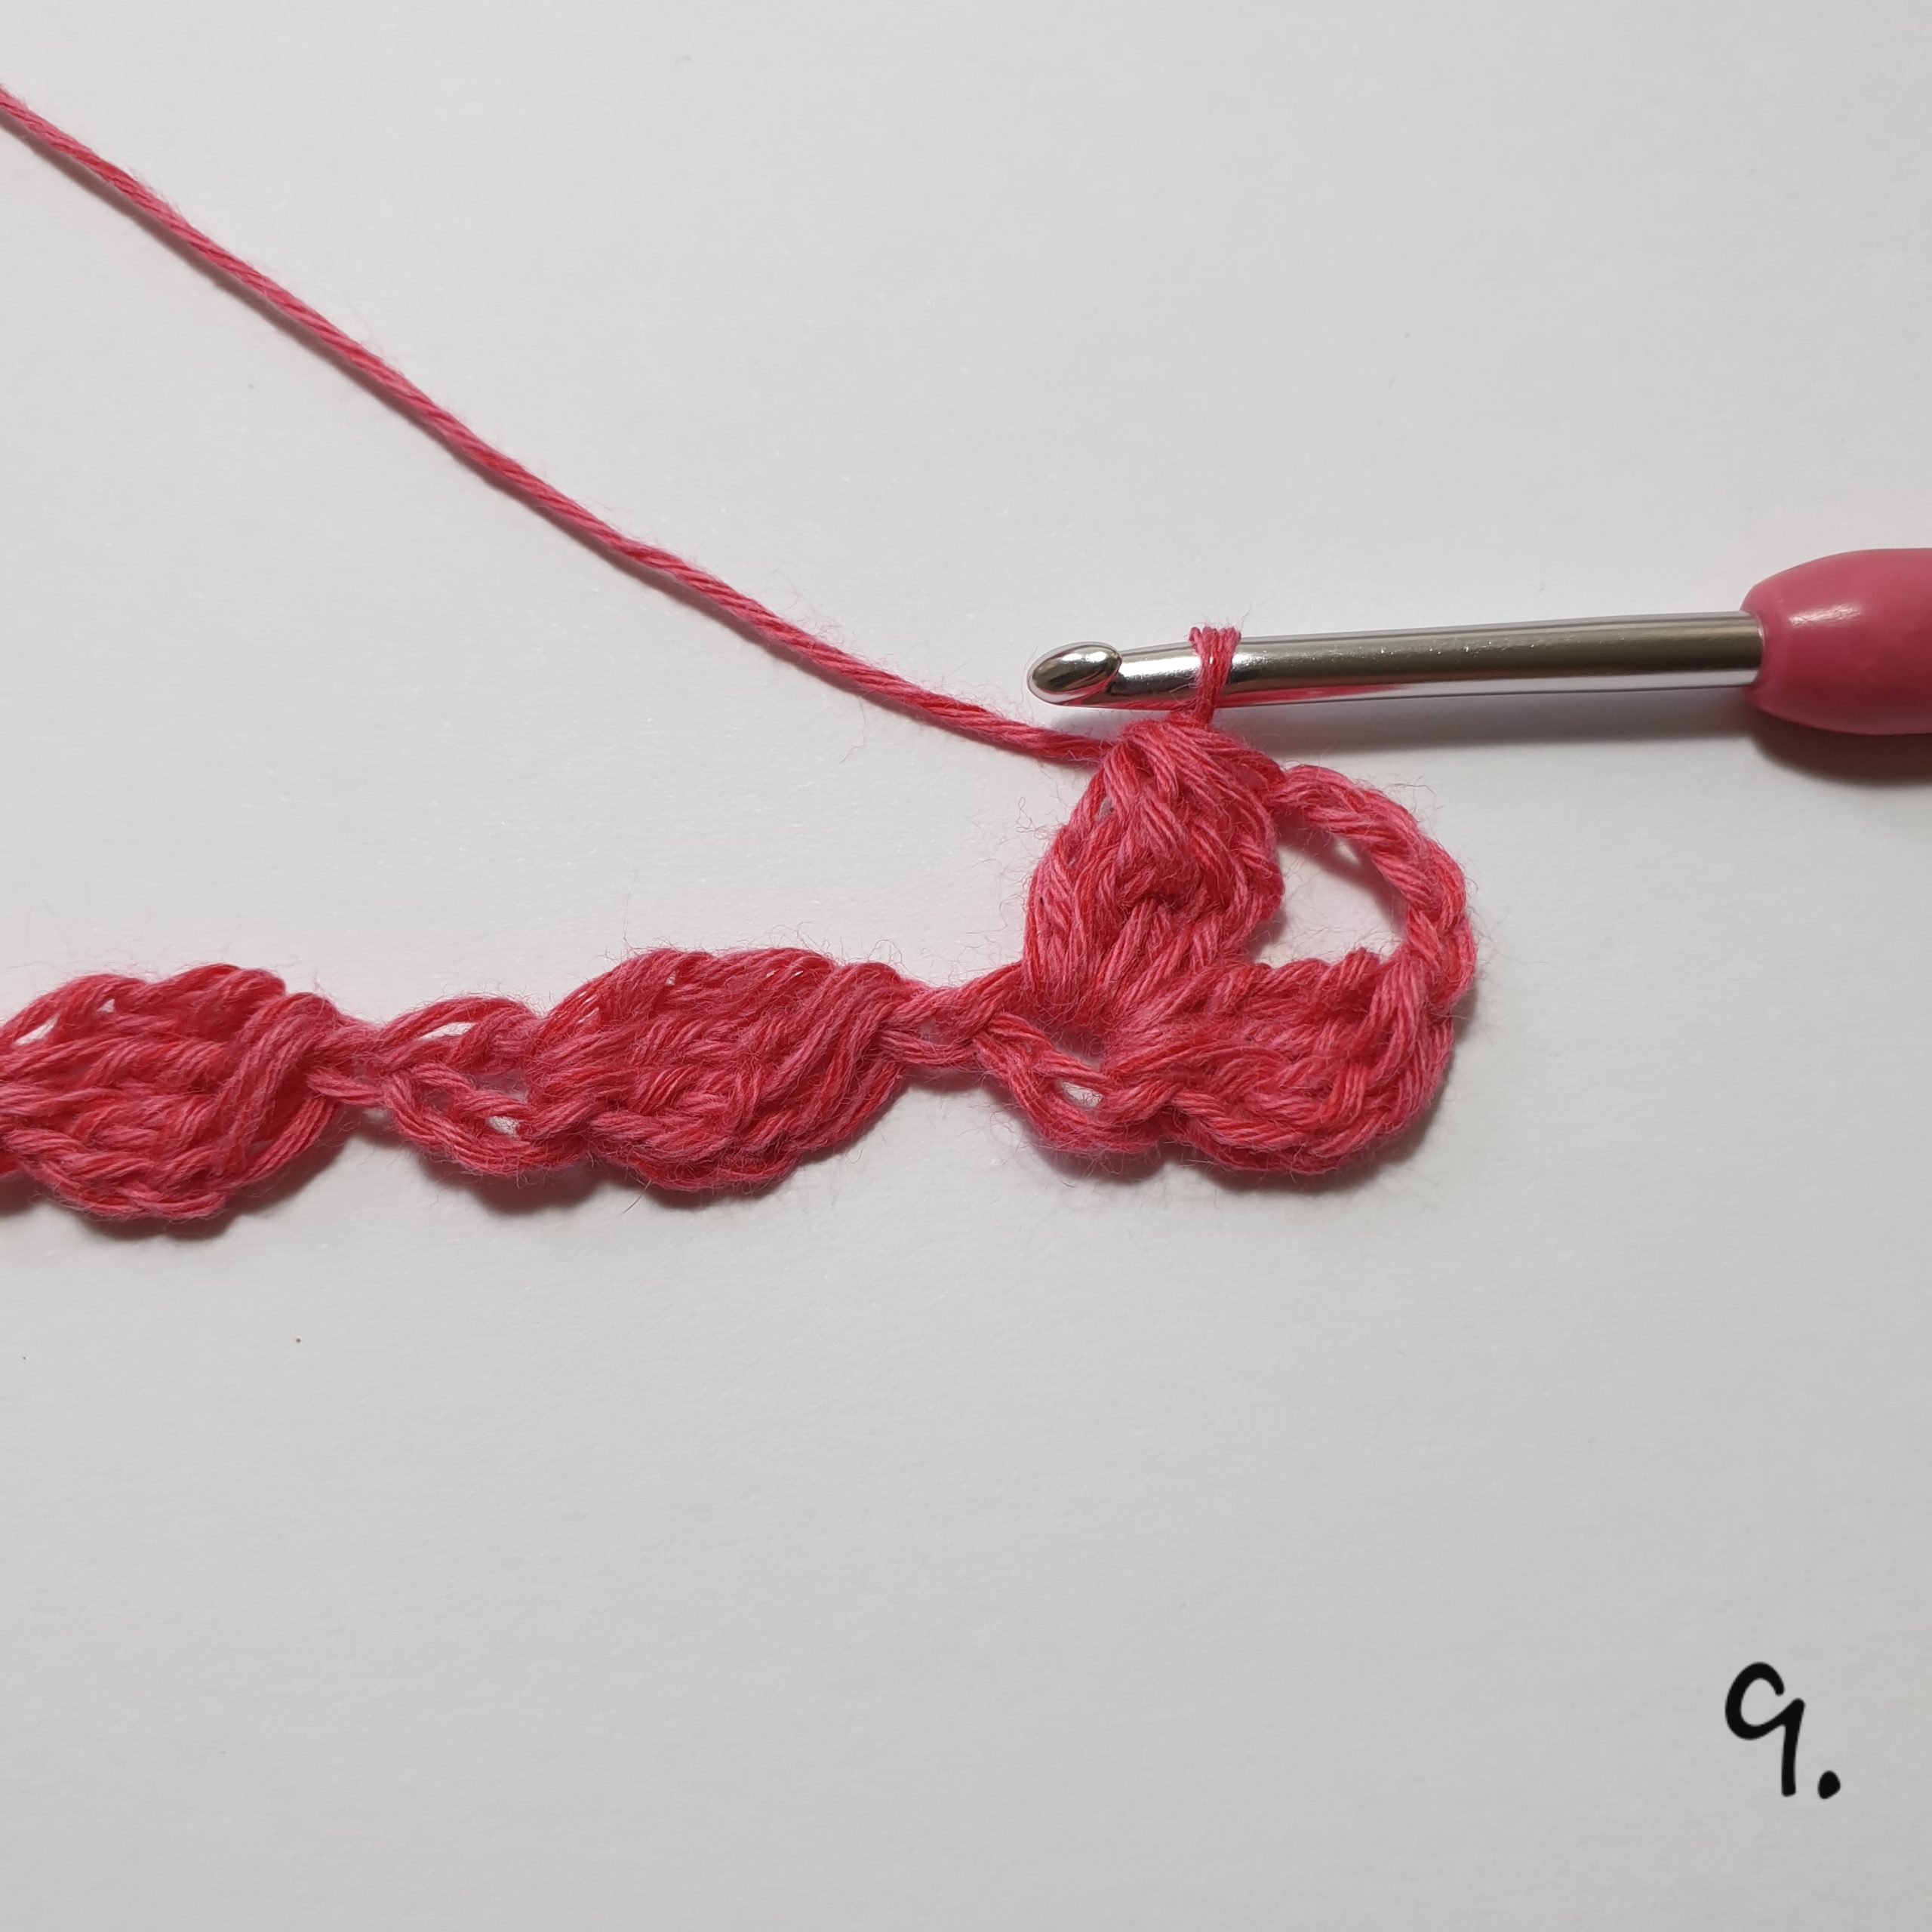
Picture 8 and 9: dtr4tog in the last ring you made,
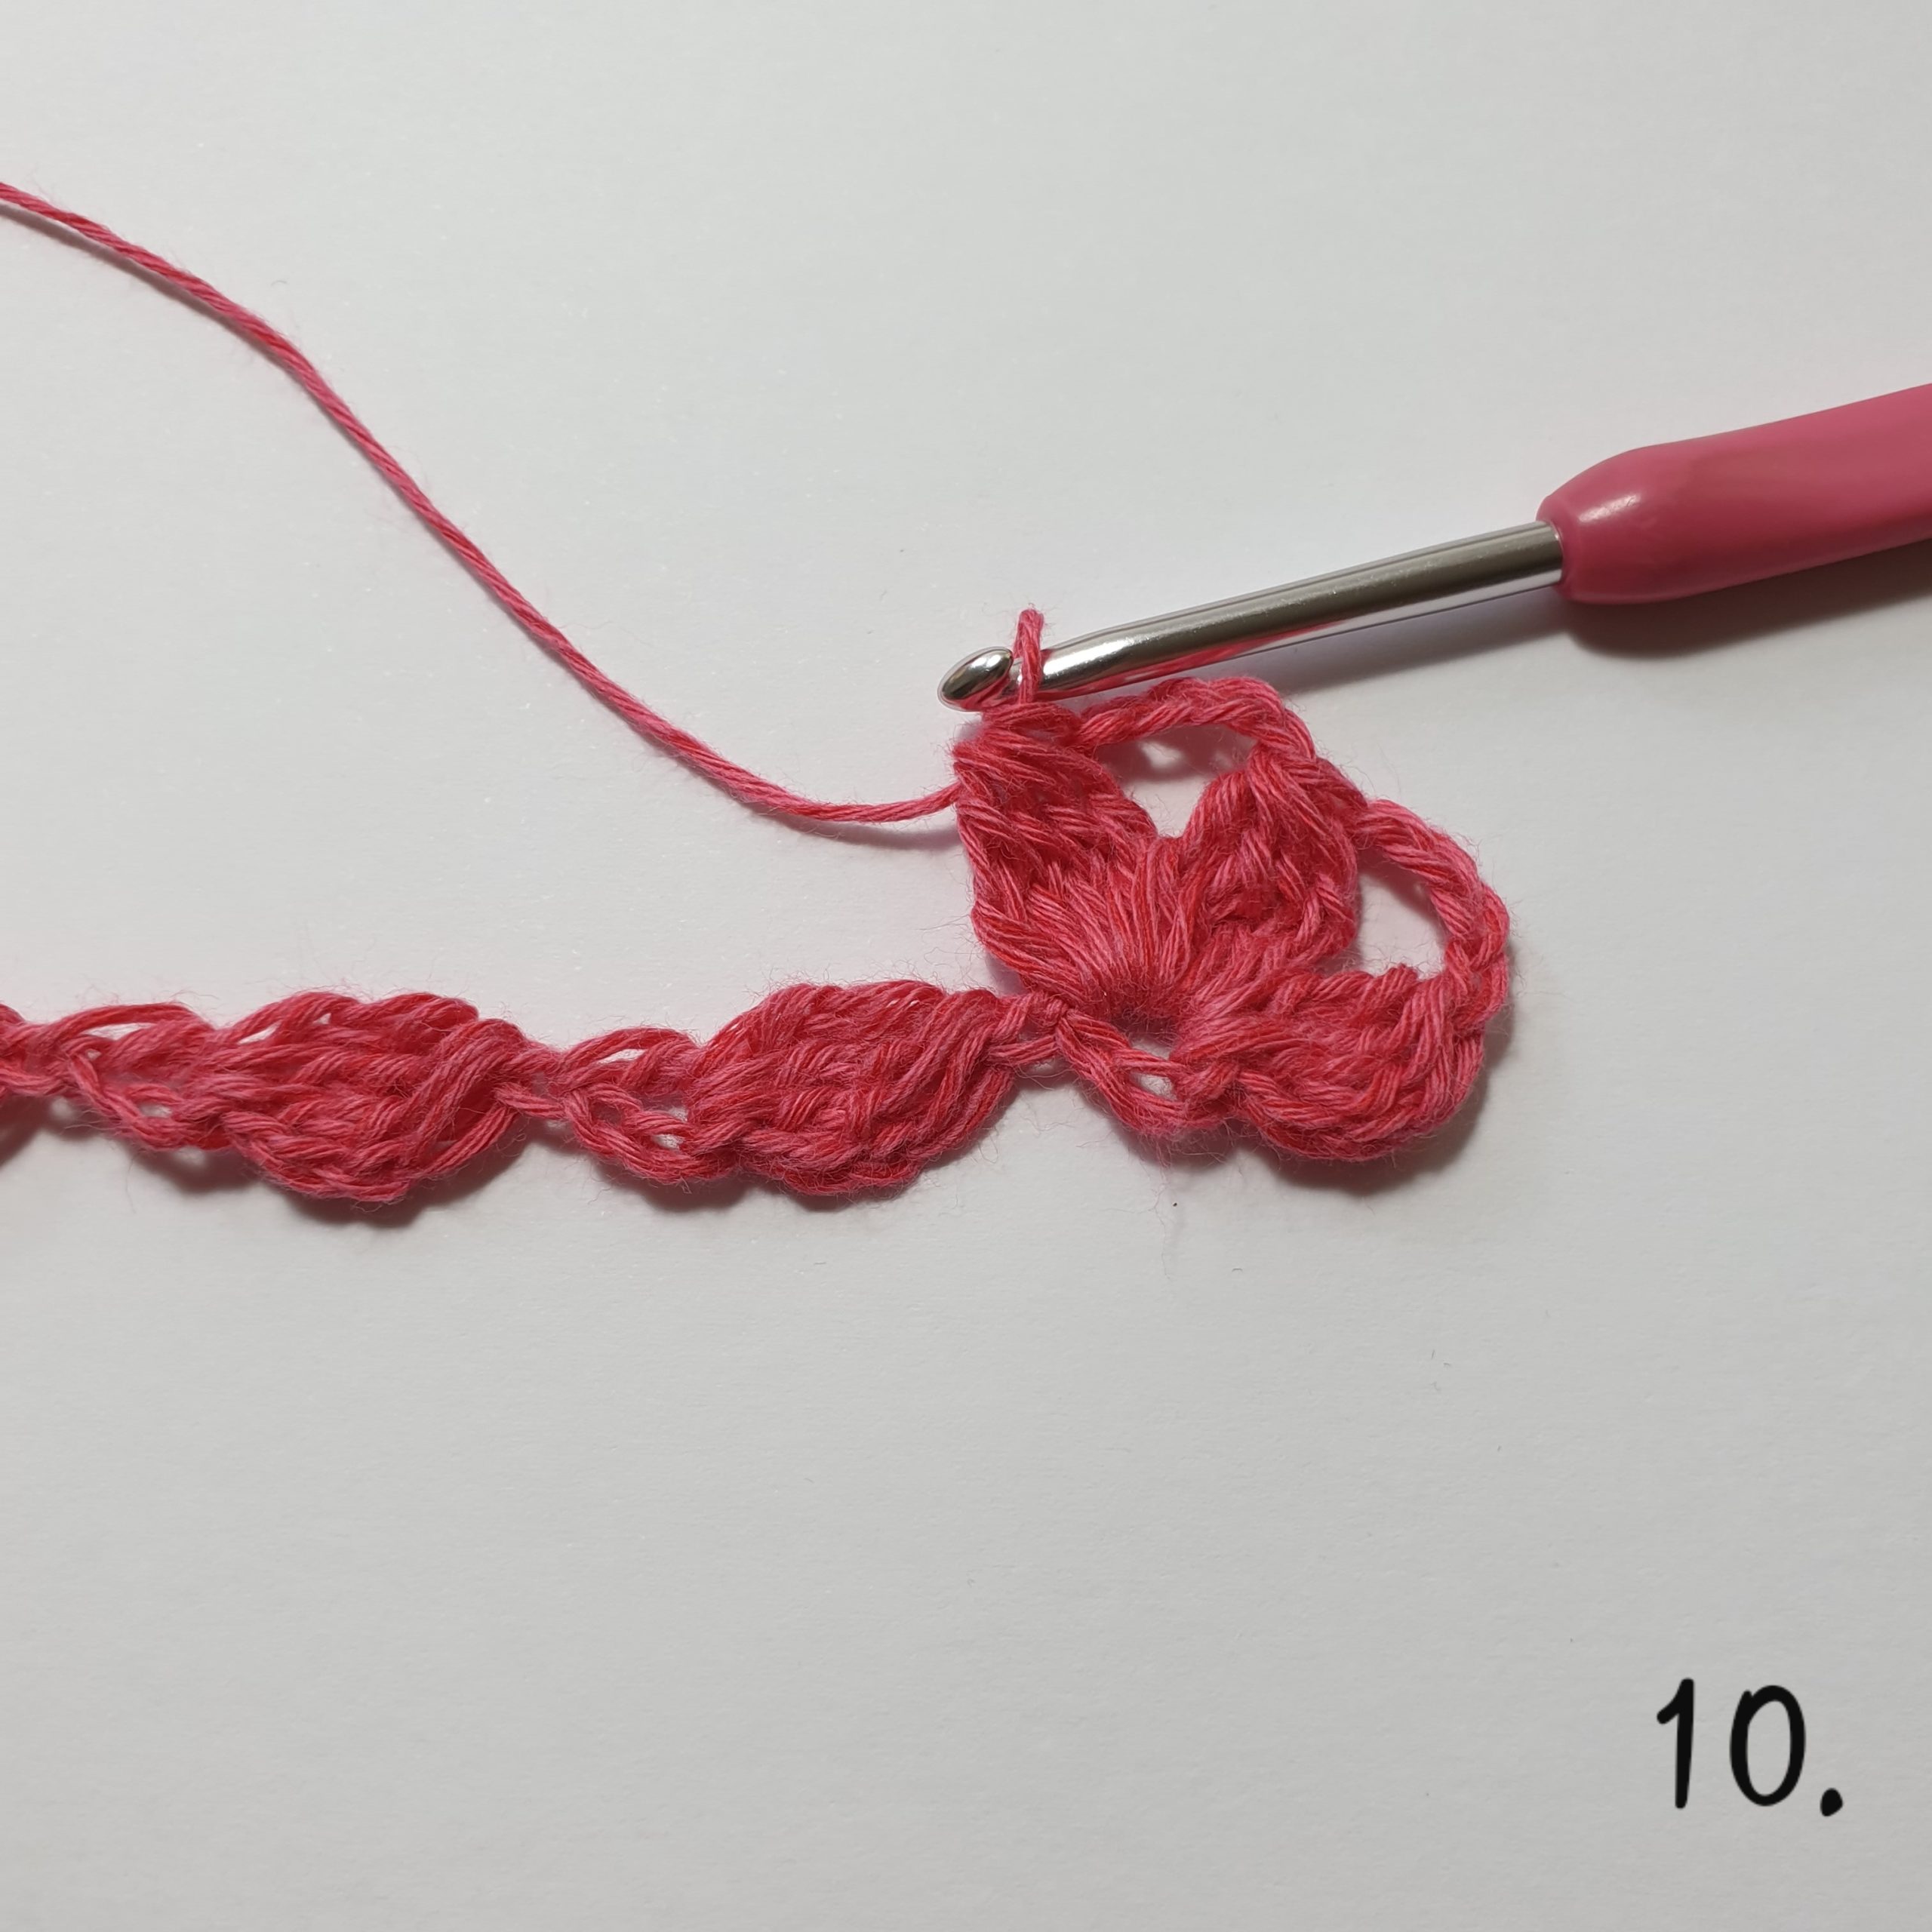
Picture 10: ch 4, dtr4tog in same ring, (3 petals in the ring),
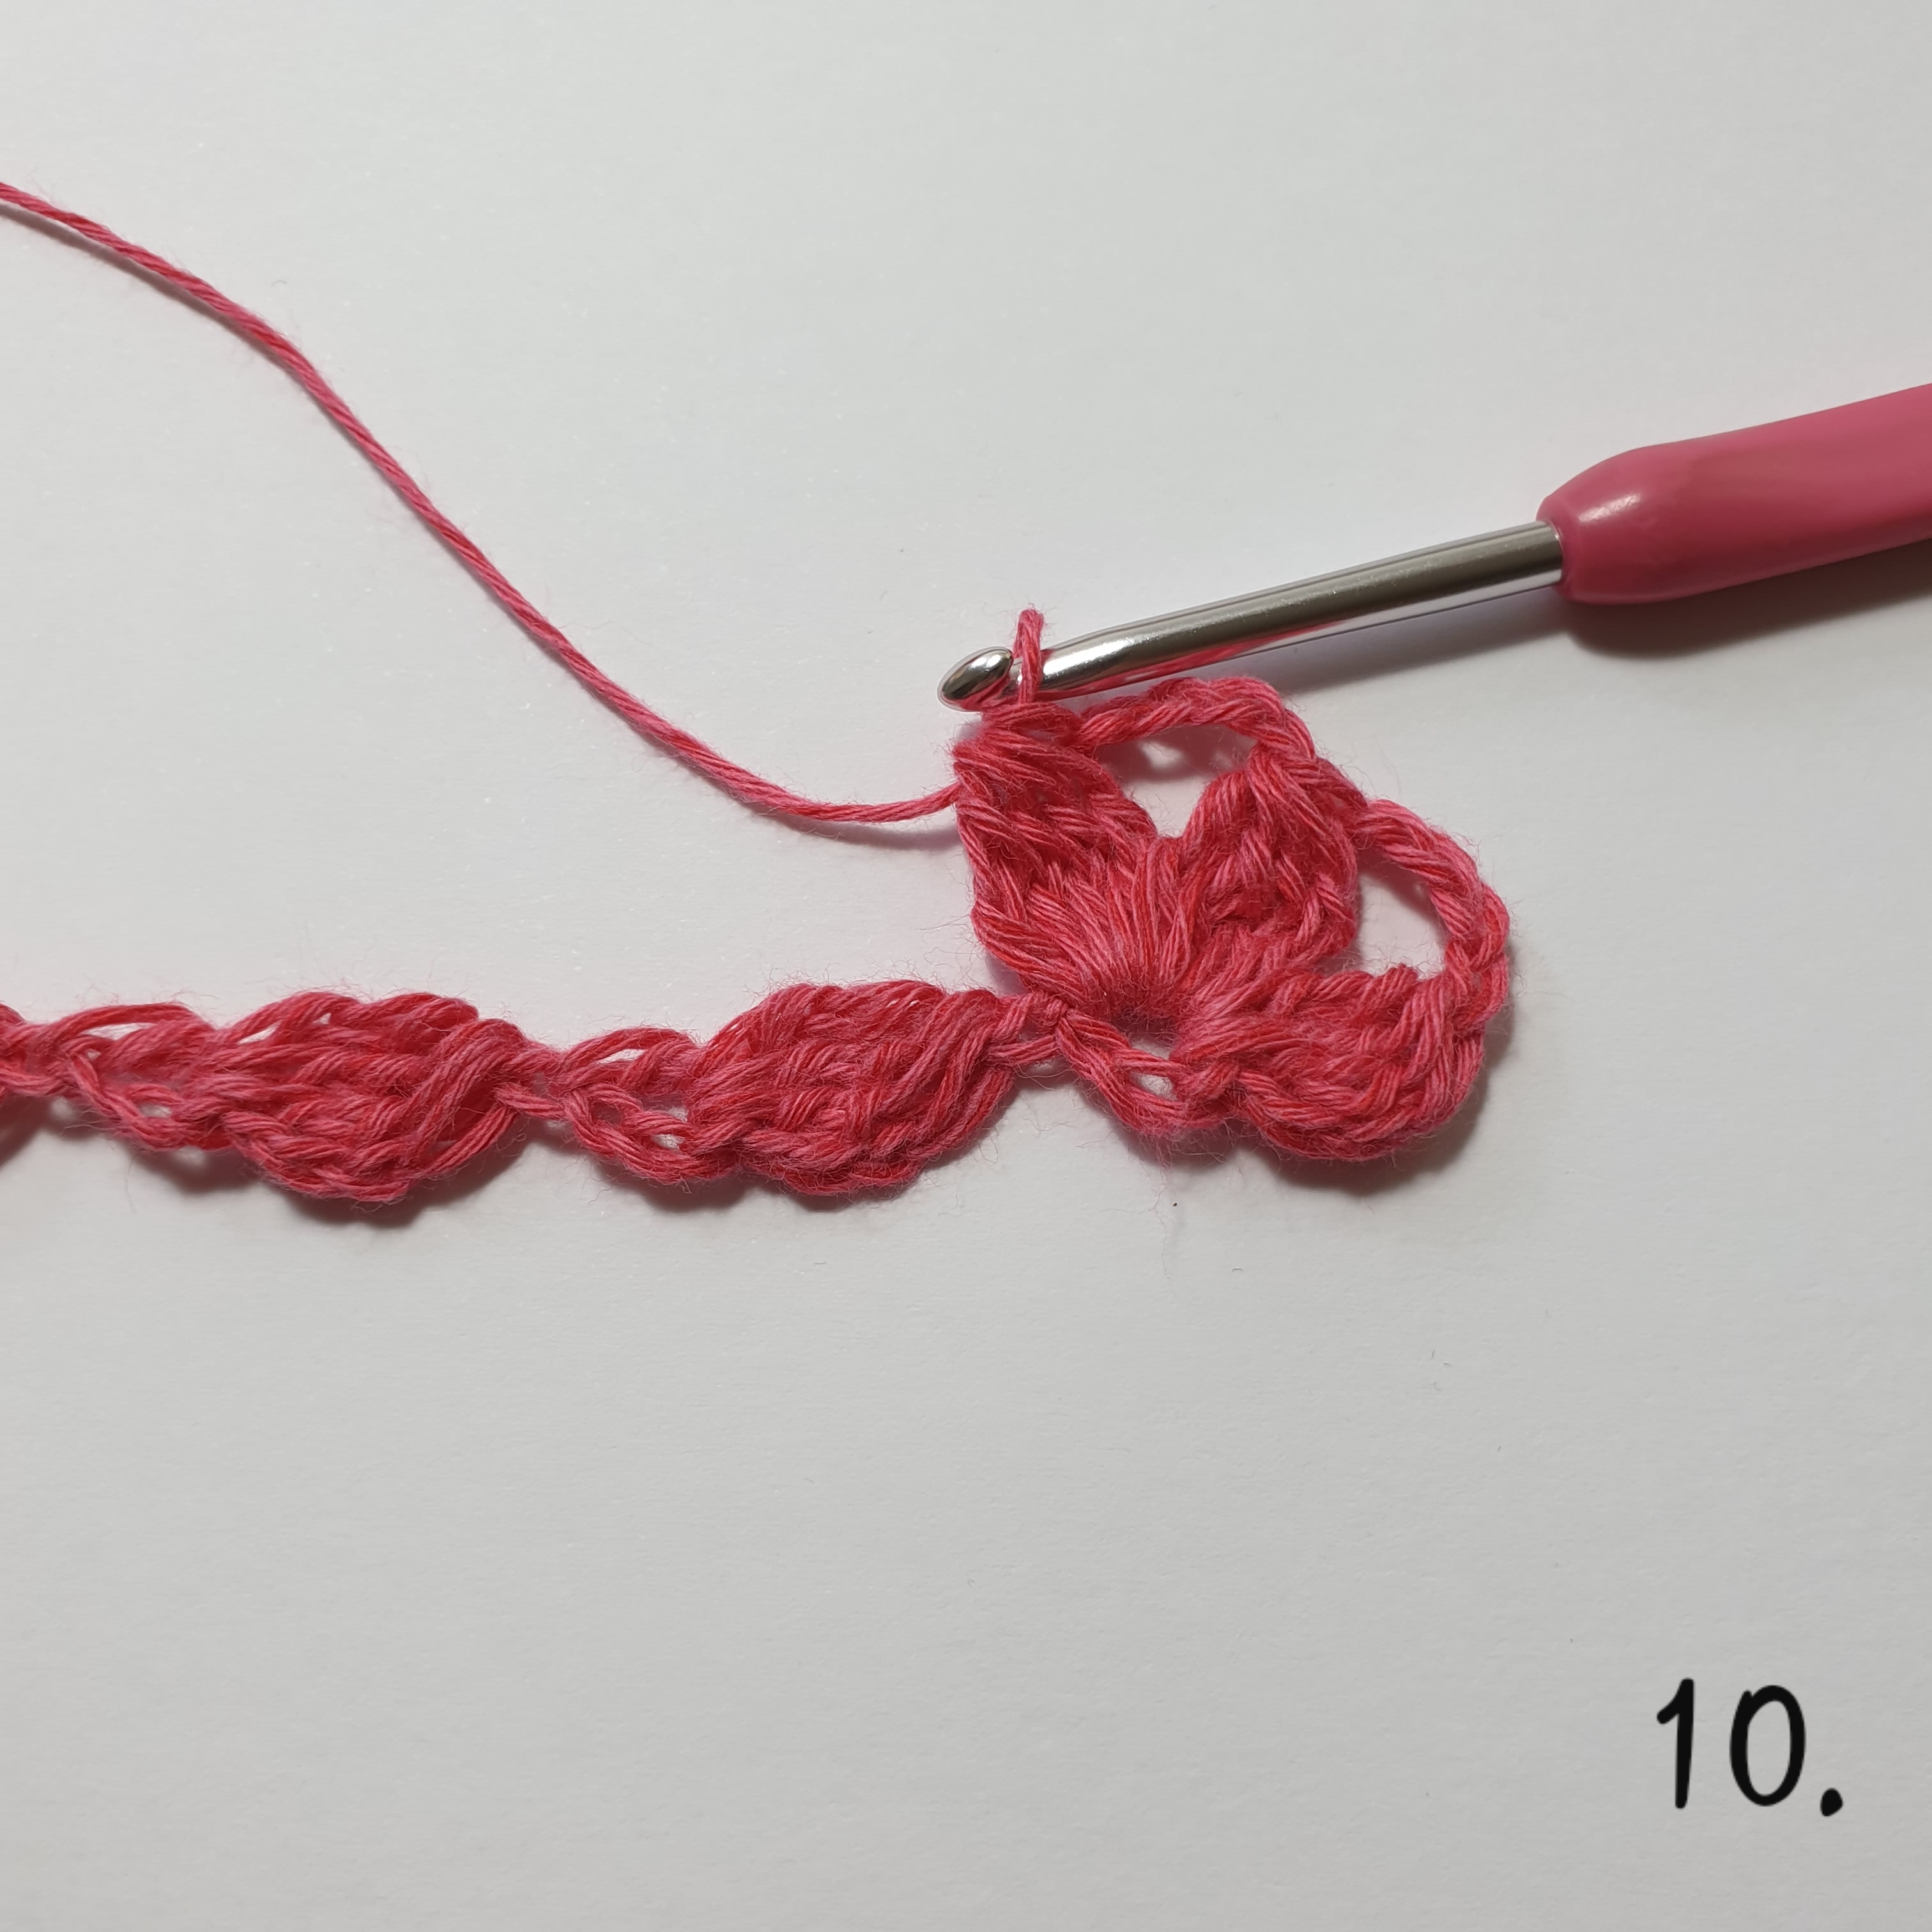
Picture 11 and 12: *(dtr4tog, ch 4, dtr4tog) in ne ring*,
Picture 13: repeat until you reach the first ring you made, (dtr4tog, ch 4, dtr4tog),
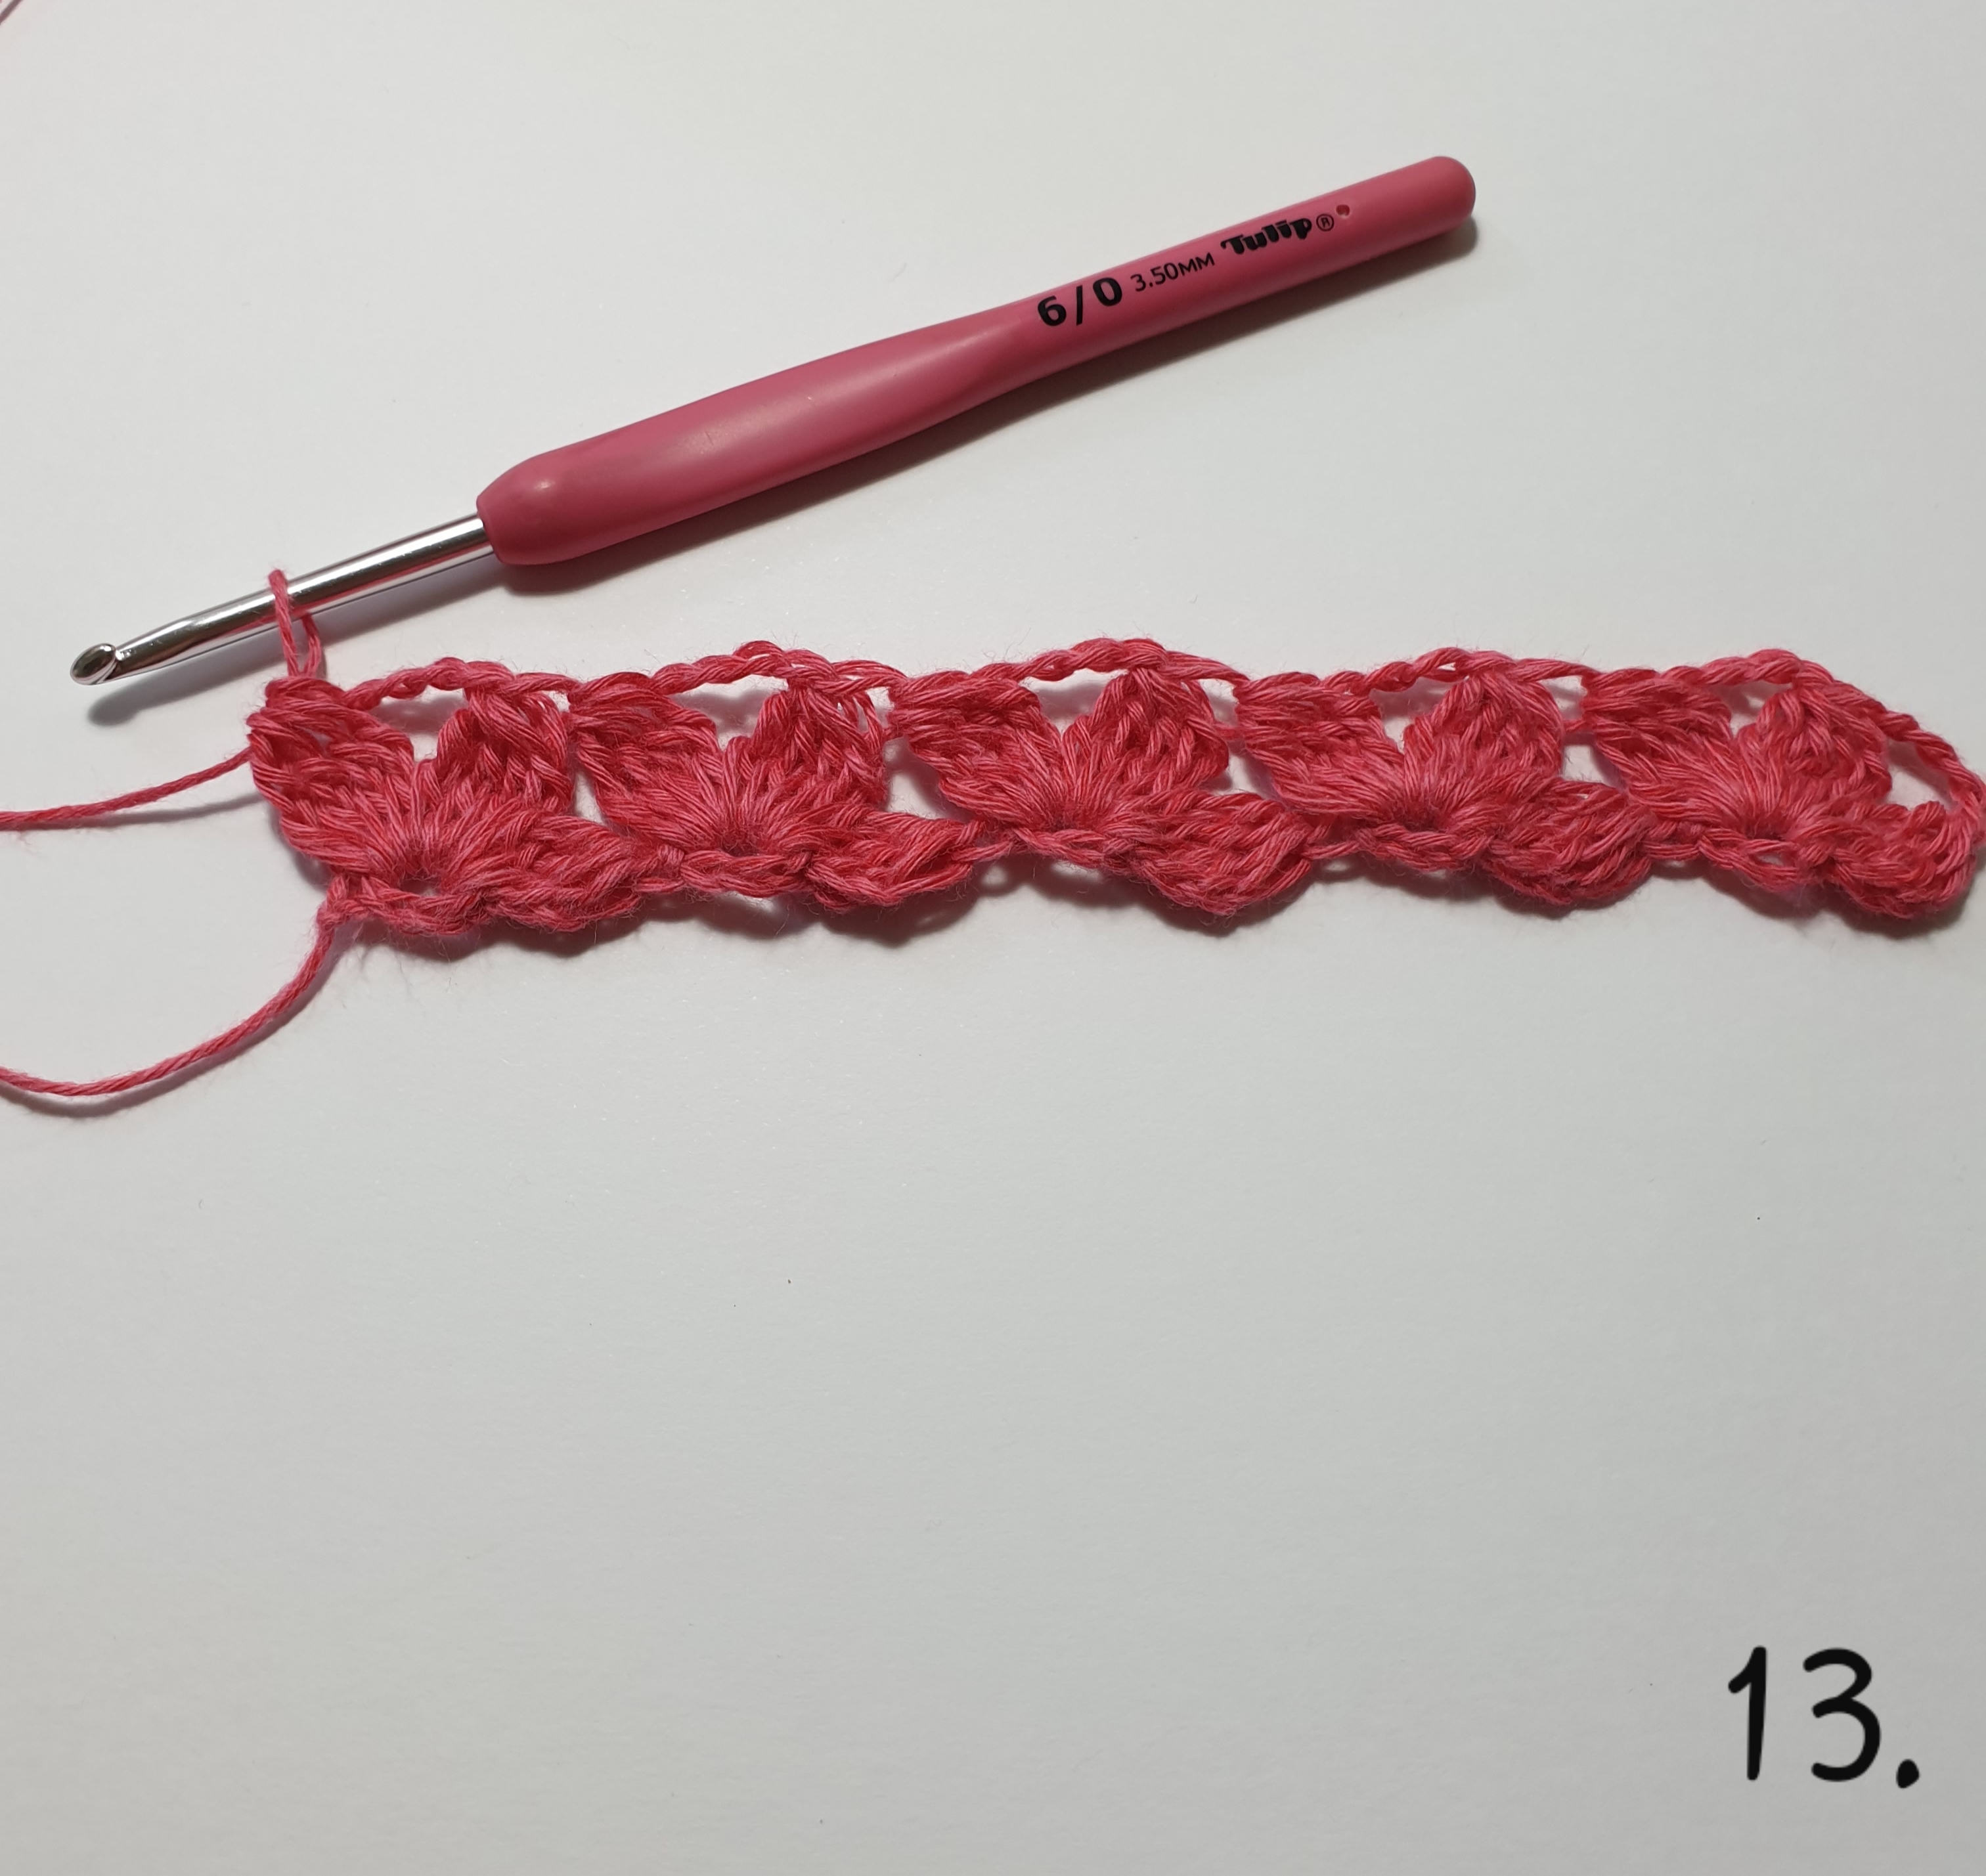
Picture 14 and 15: ch 4 (turn your work and work in the opposite side of the petals), dtr4tog, ch 4, dtr4tog, ch 4, dtr4tog) in same ring.
Row 3:
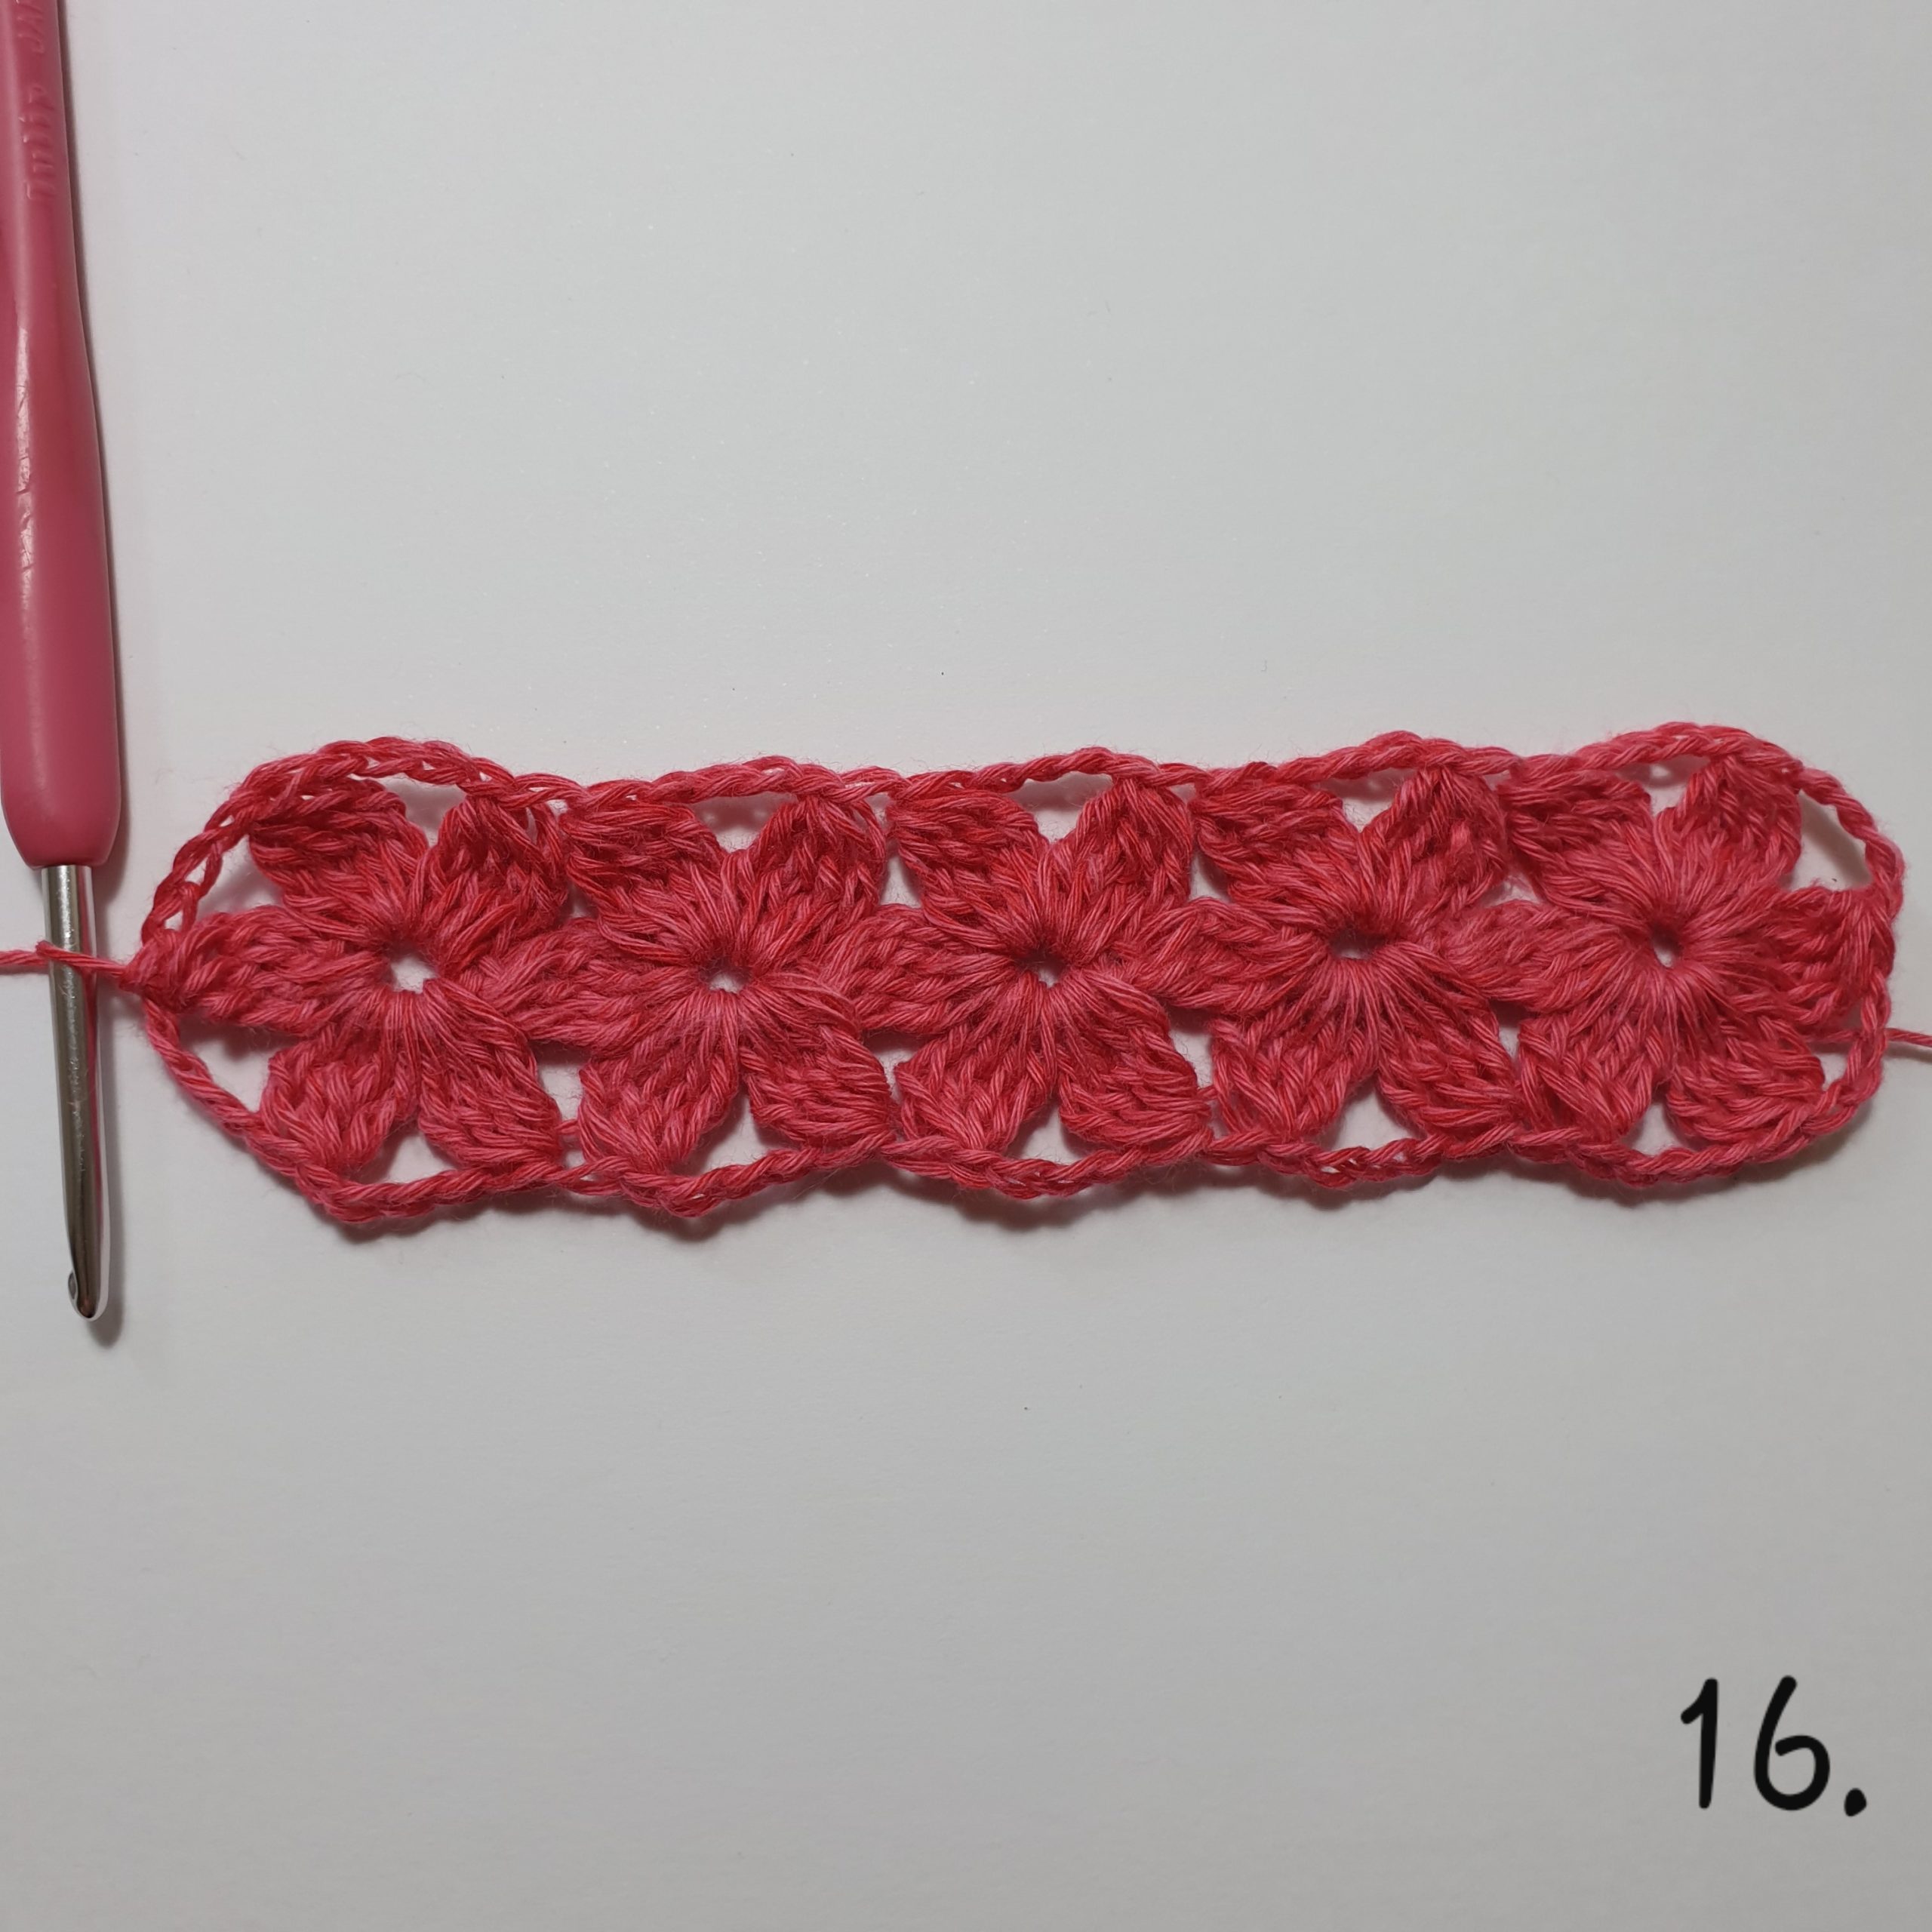
Piture 16: *(dtr4tog, ch 4, dtr4tog) in ne ring*, repeat *-* until you’ve done the last ring, ch 4, slst in the dtr3tog. Cut the yarn.
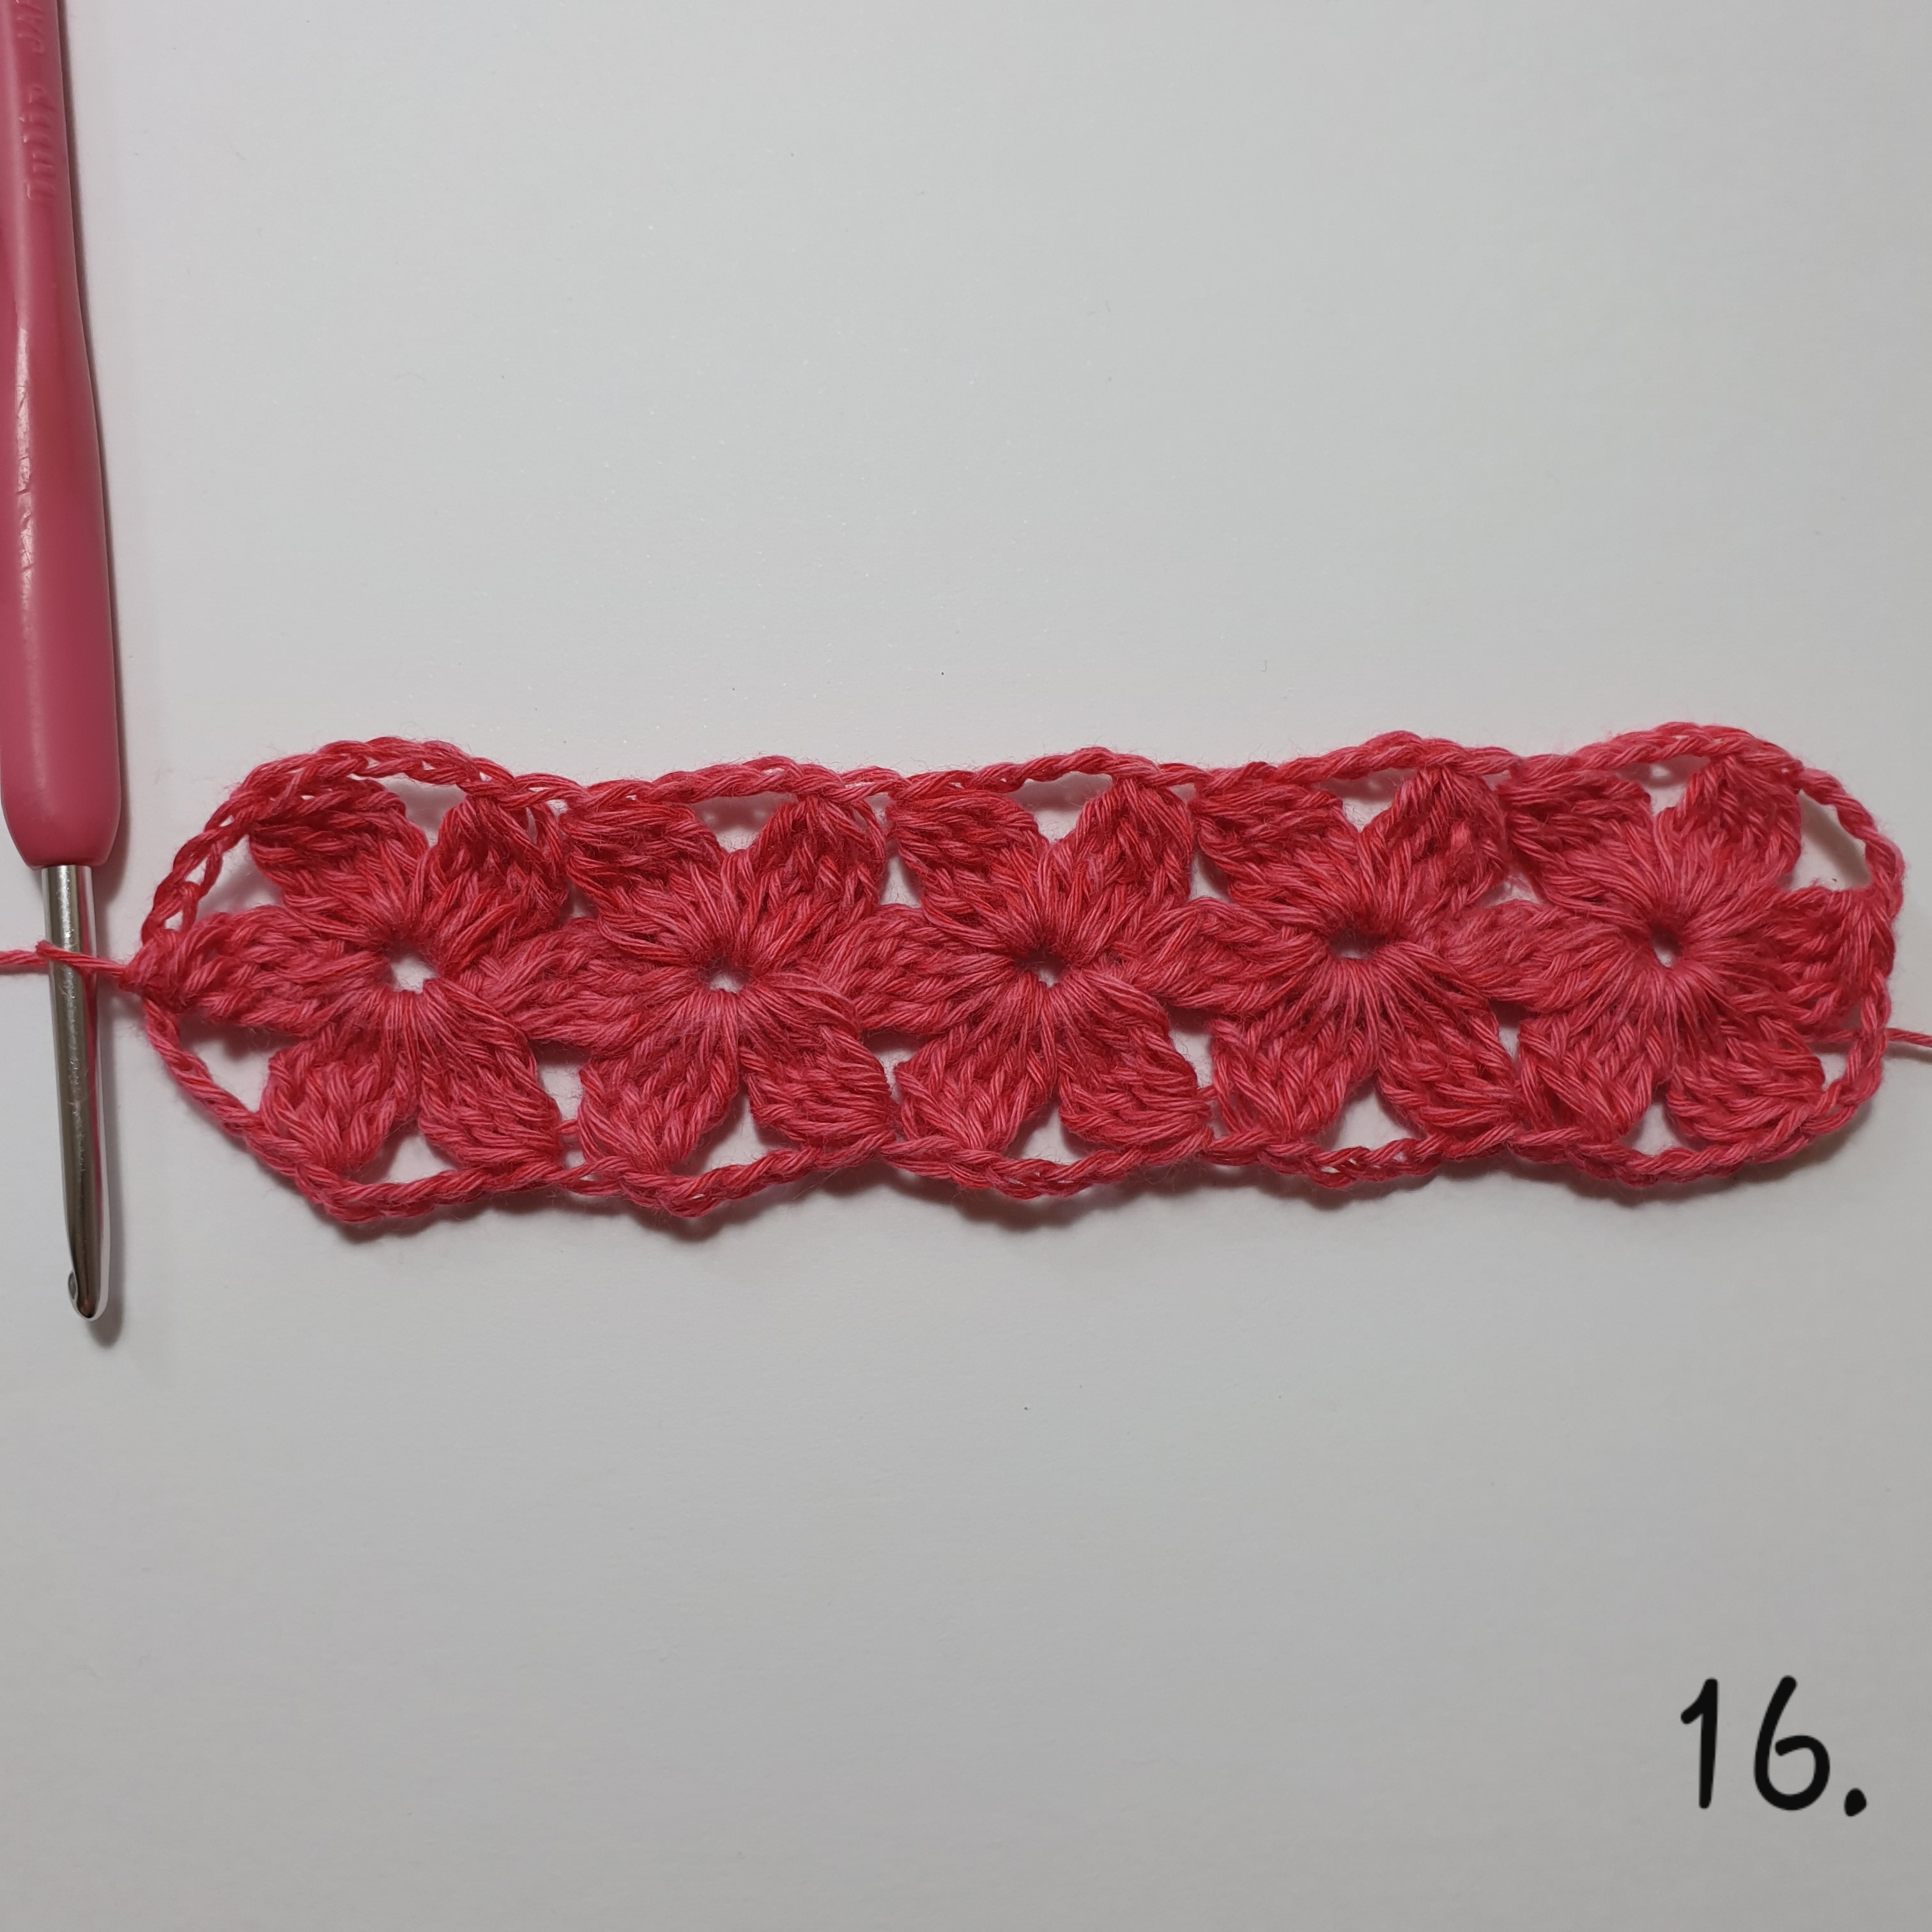
You have done your first garland of flowers
The following garlands are joined together in row 2 with the previous garlands row 3.
Every following garland should be decreased with one petal.
Row 1:
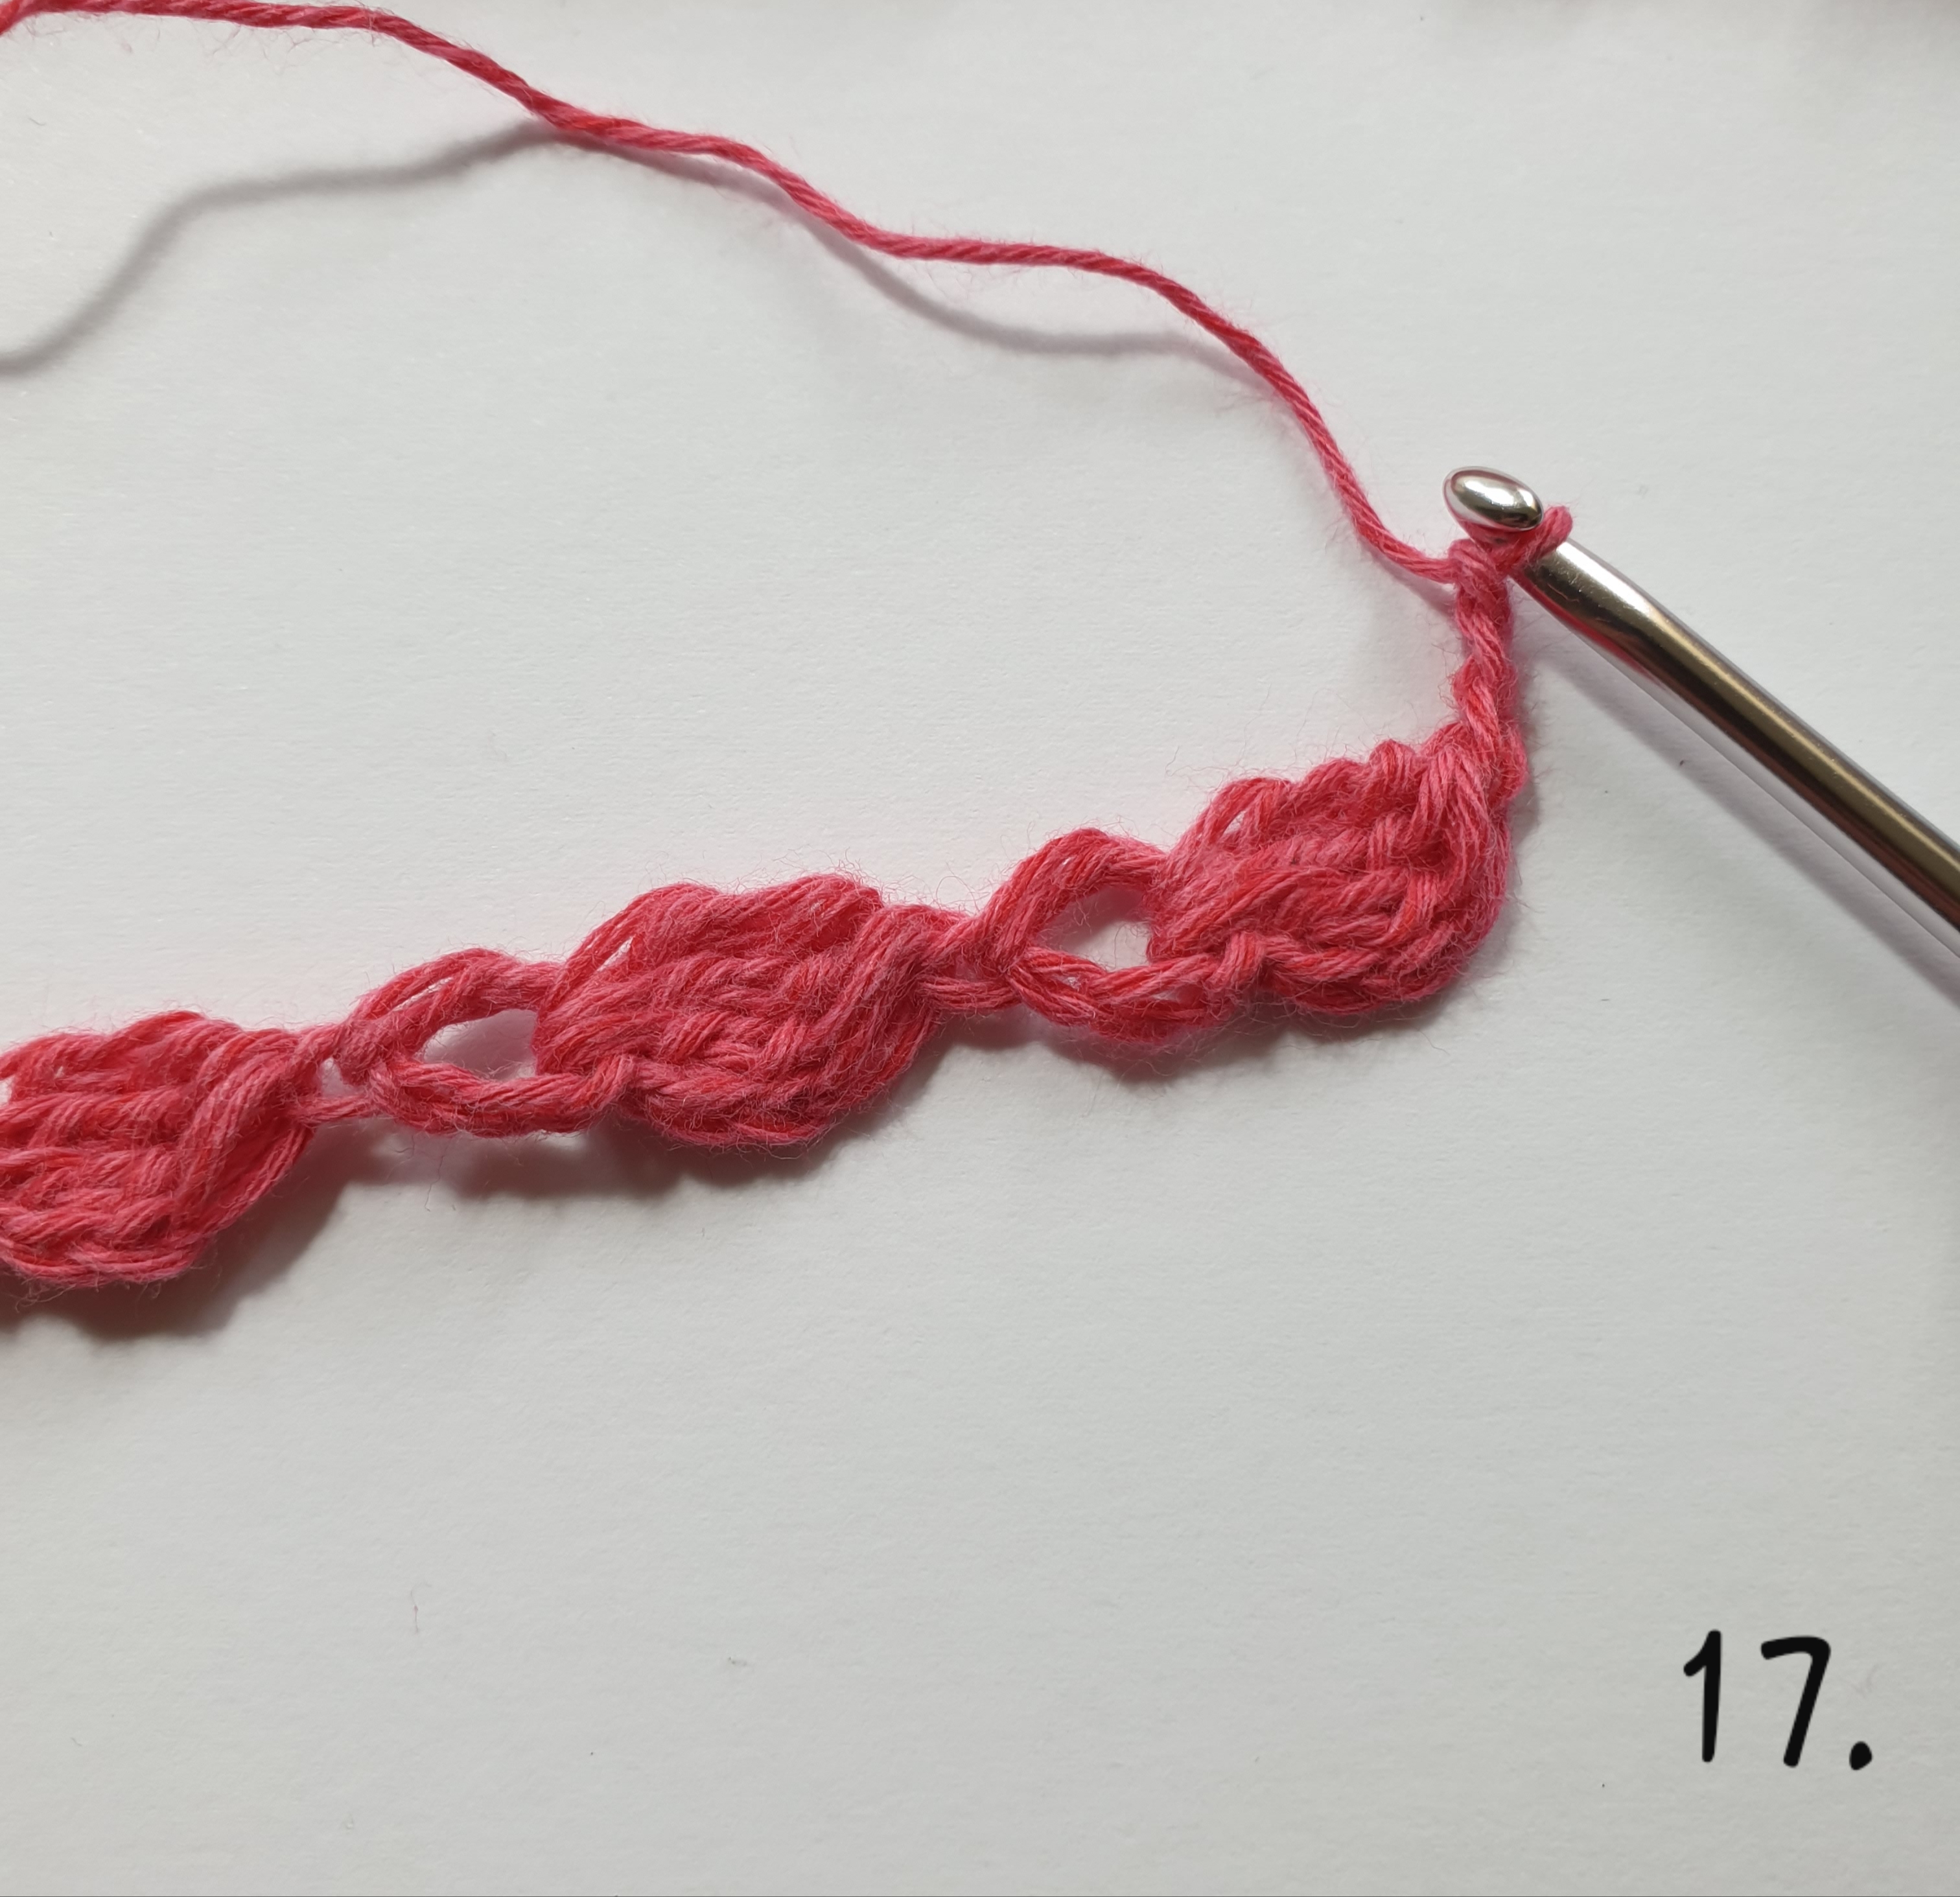
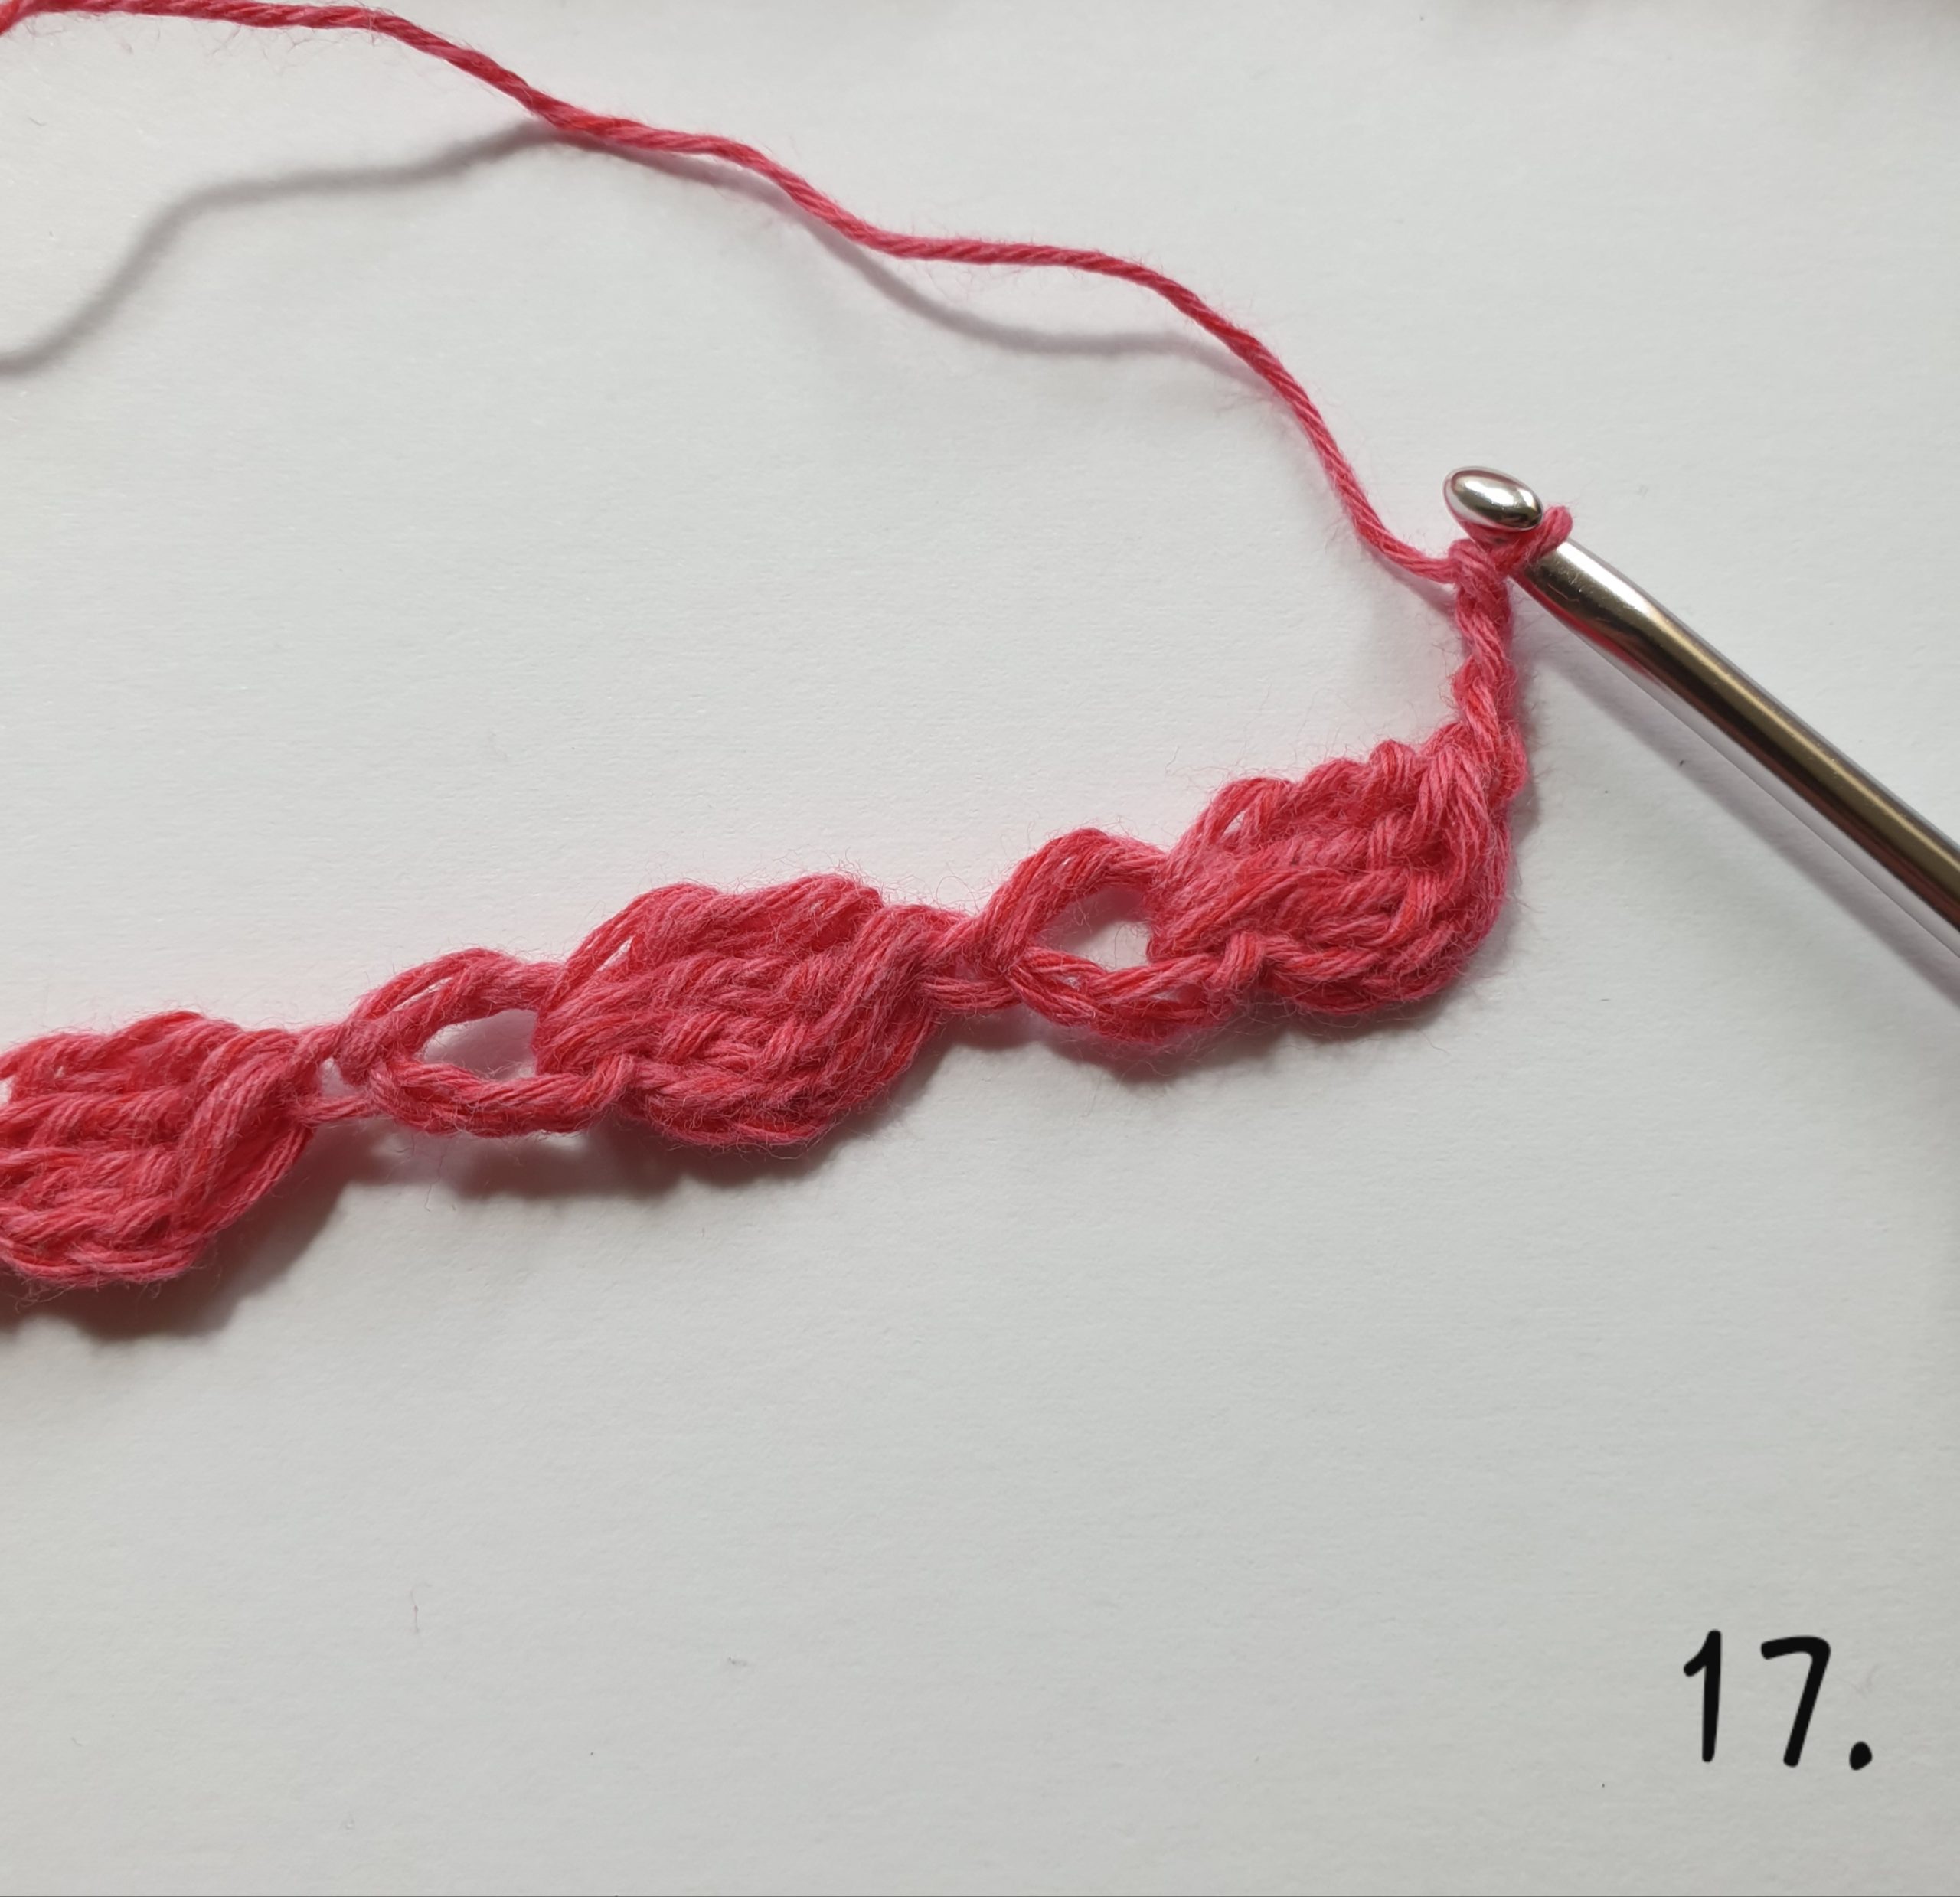
Picture 17: Ch 3, 1 tr in the 3rd ch from your hook (creates the center of the flower), ch 3, dtr3tog (petal) in the ring between the 2 tr’s, *ch 3, 1 tr in the 3rd ch from your hook, ch 3, dtr3tog in the ring*, repeat *-* until you’ve got 44 petals, ch 3.
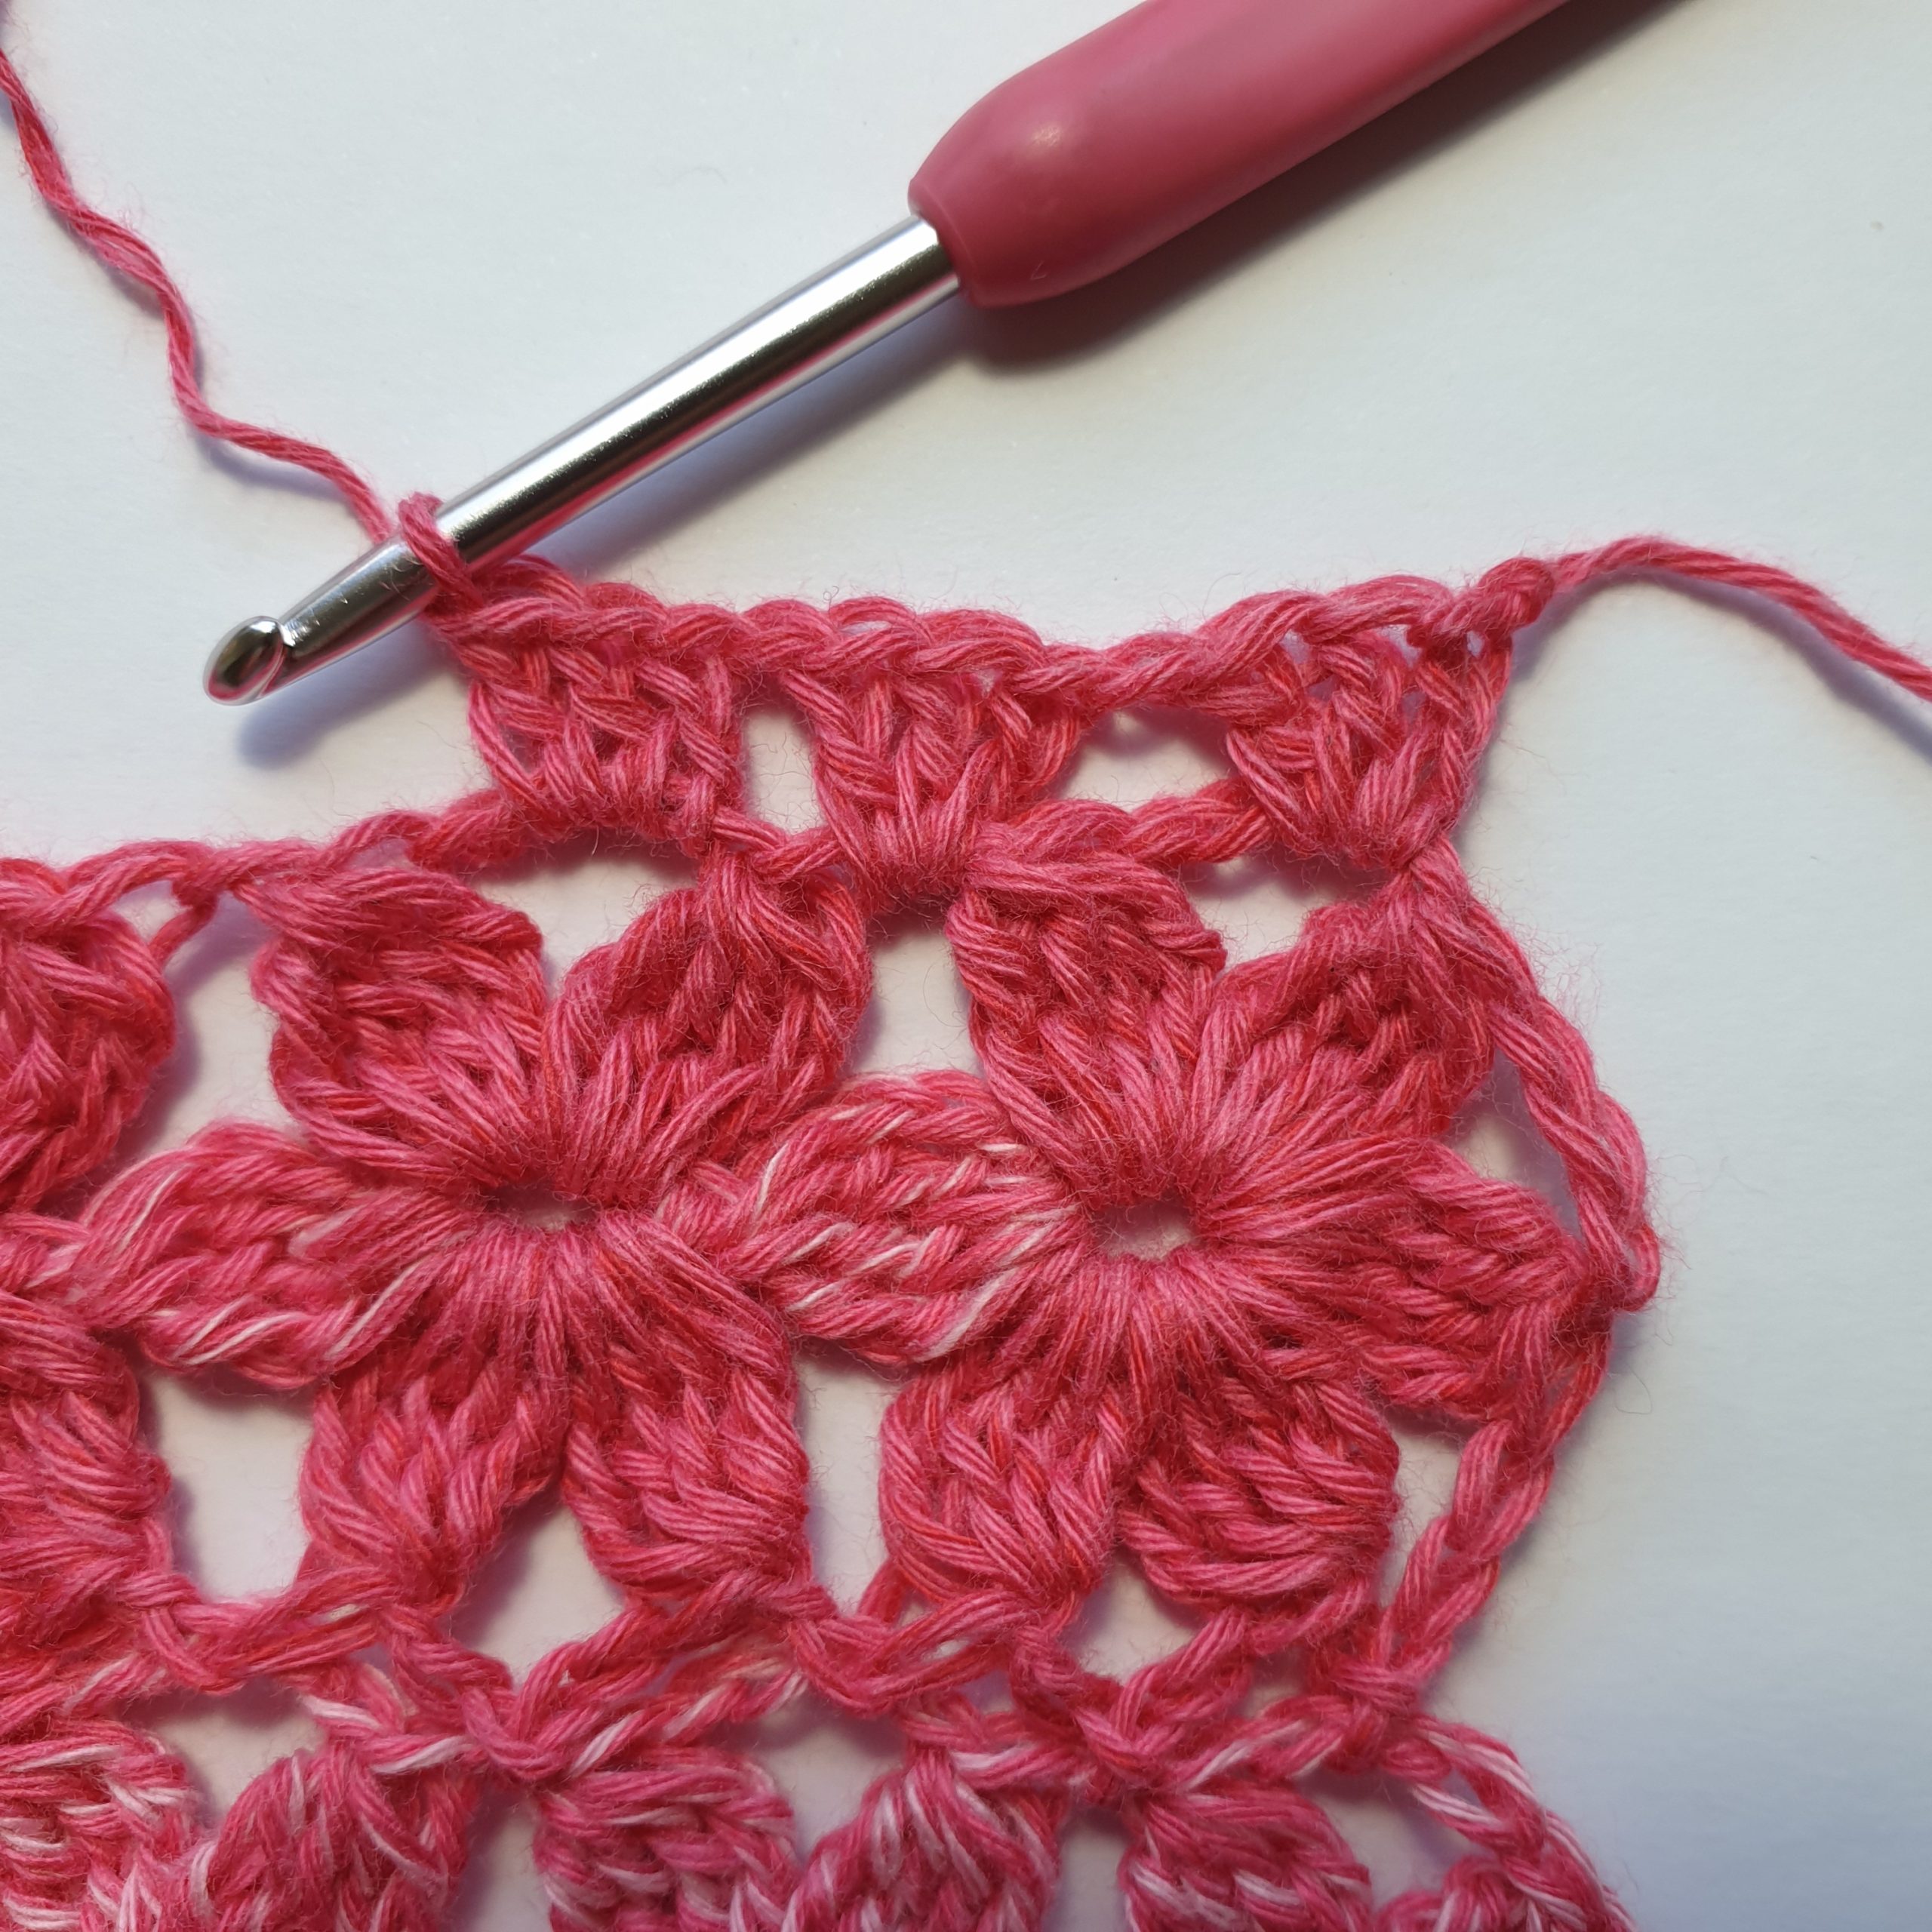
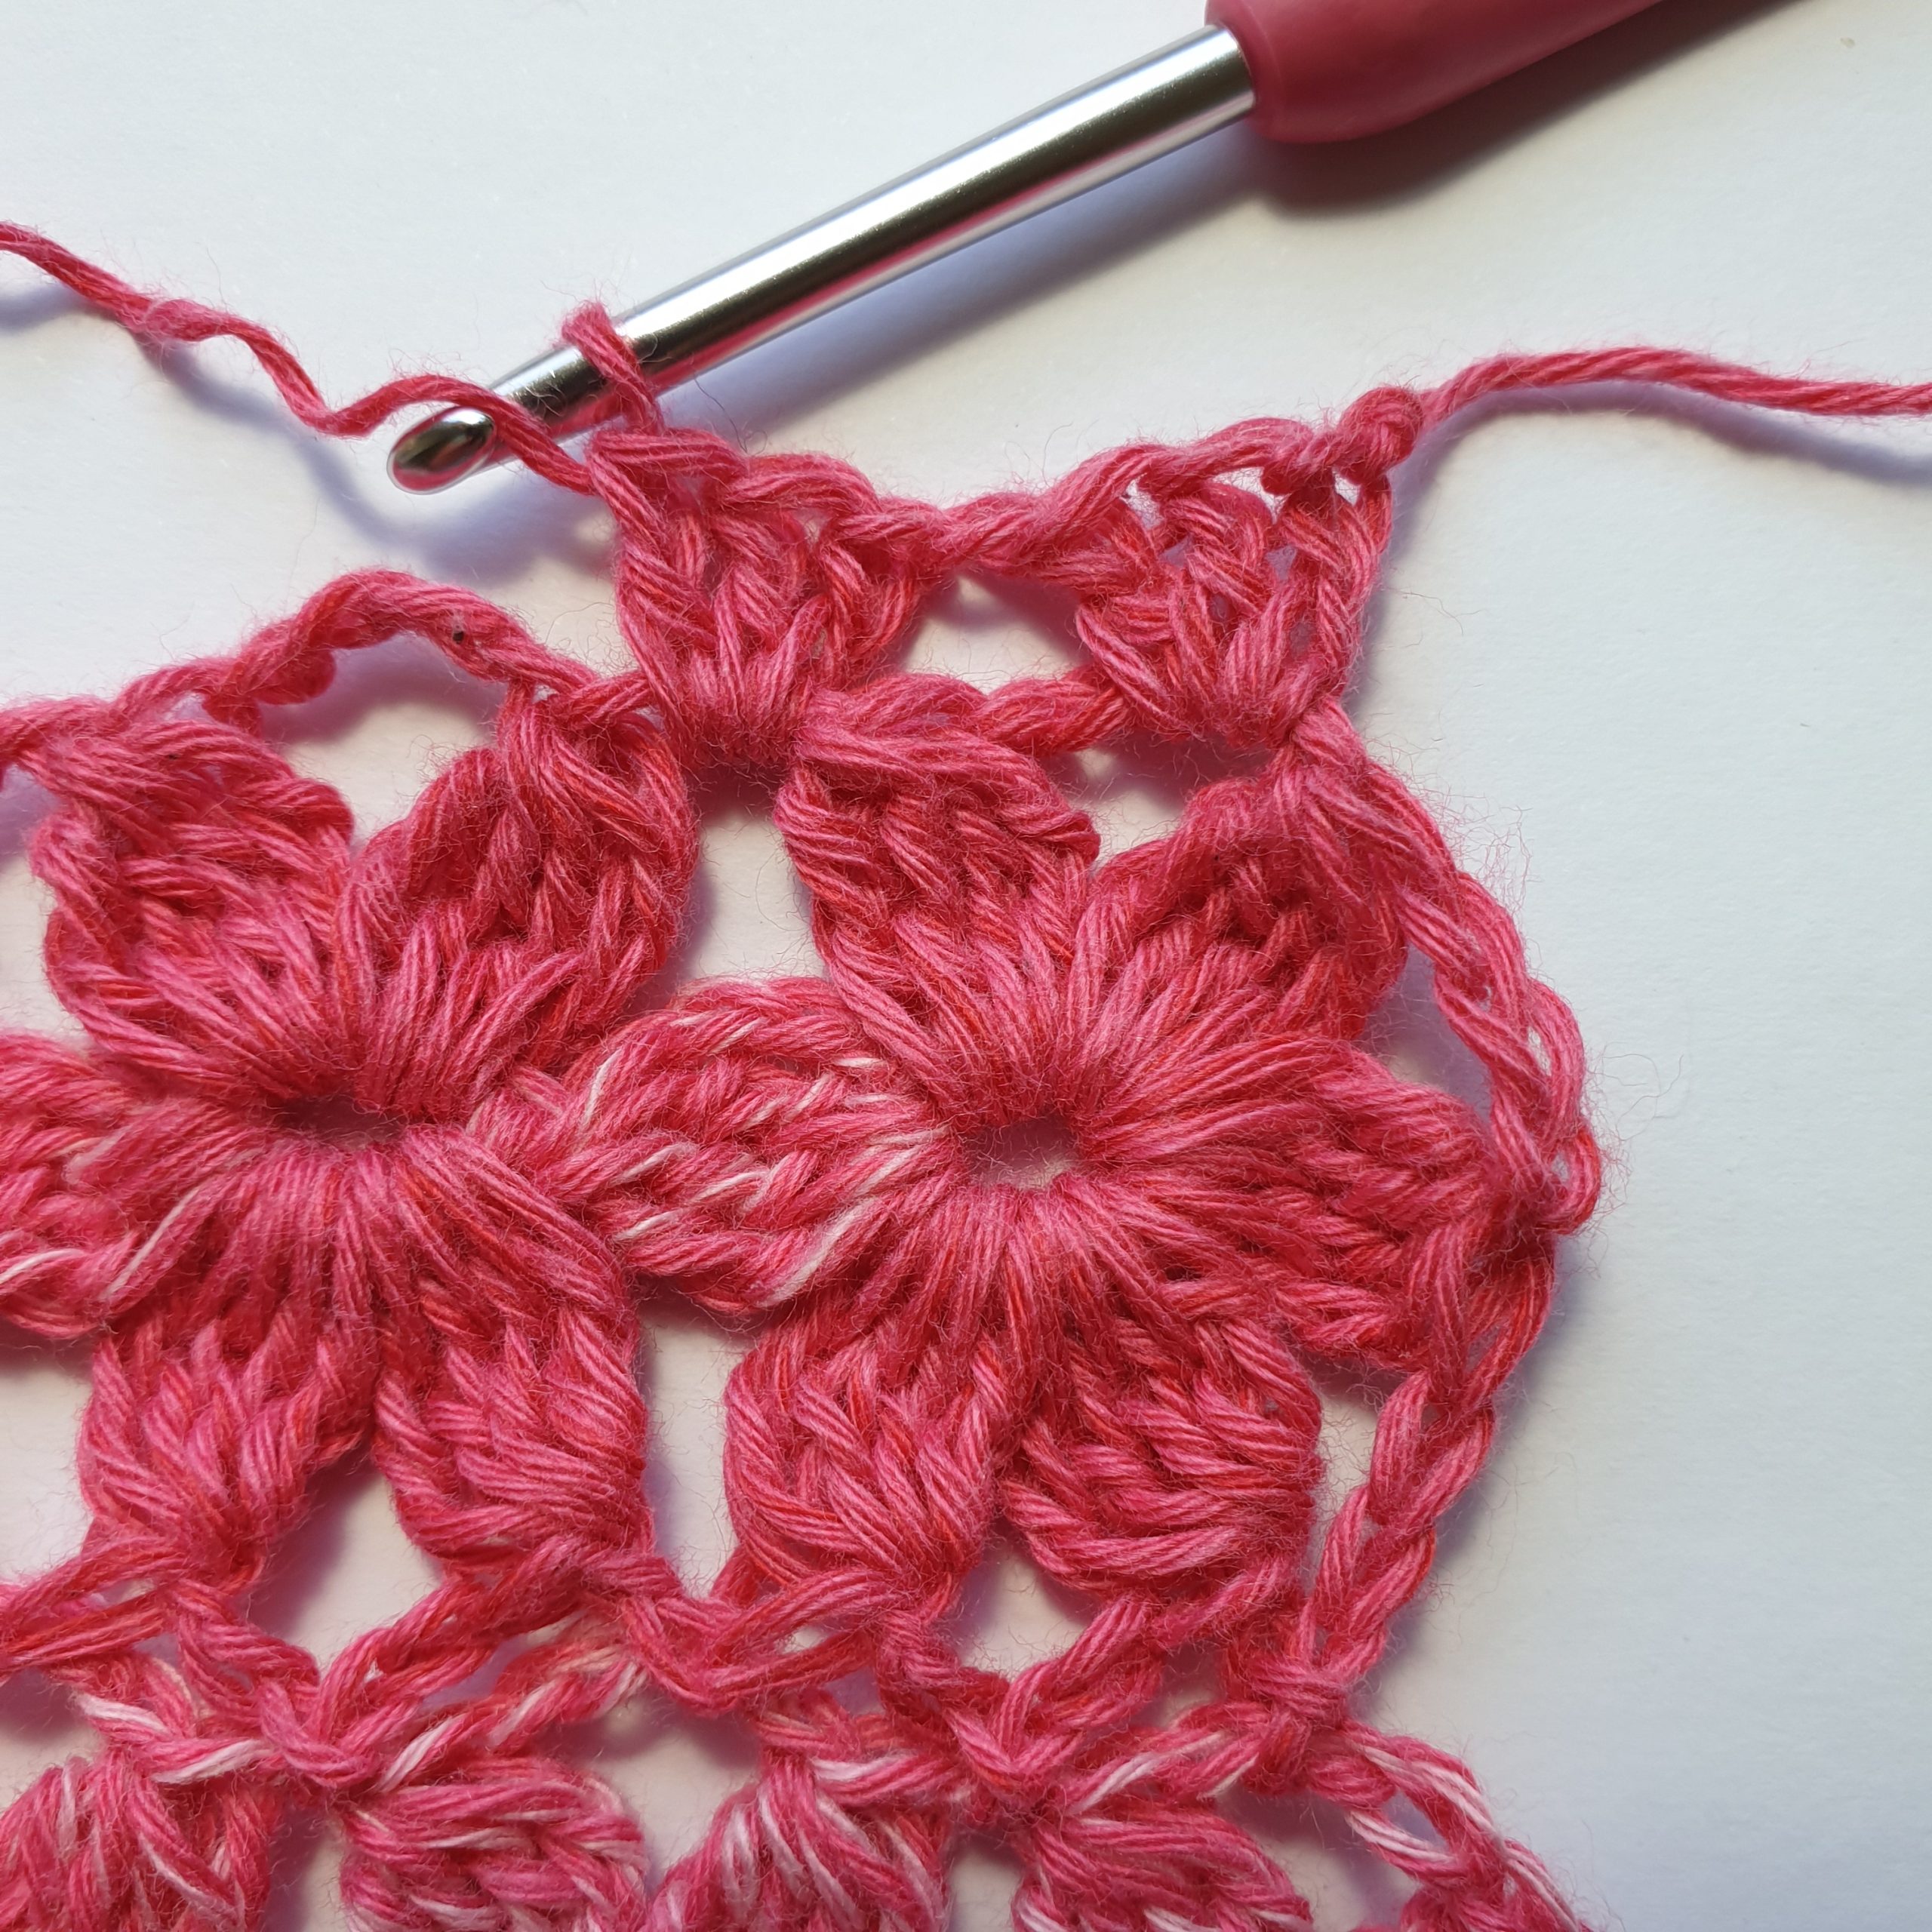
Row 2: Now we are working backwards along the upper side of the petals and join with the previous garland. You should have the first garland with the right side faceing up. Start to the right when it’s time to join. Keep an eye on the second garnland so they dont twist around when you join them.
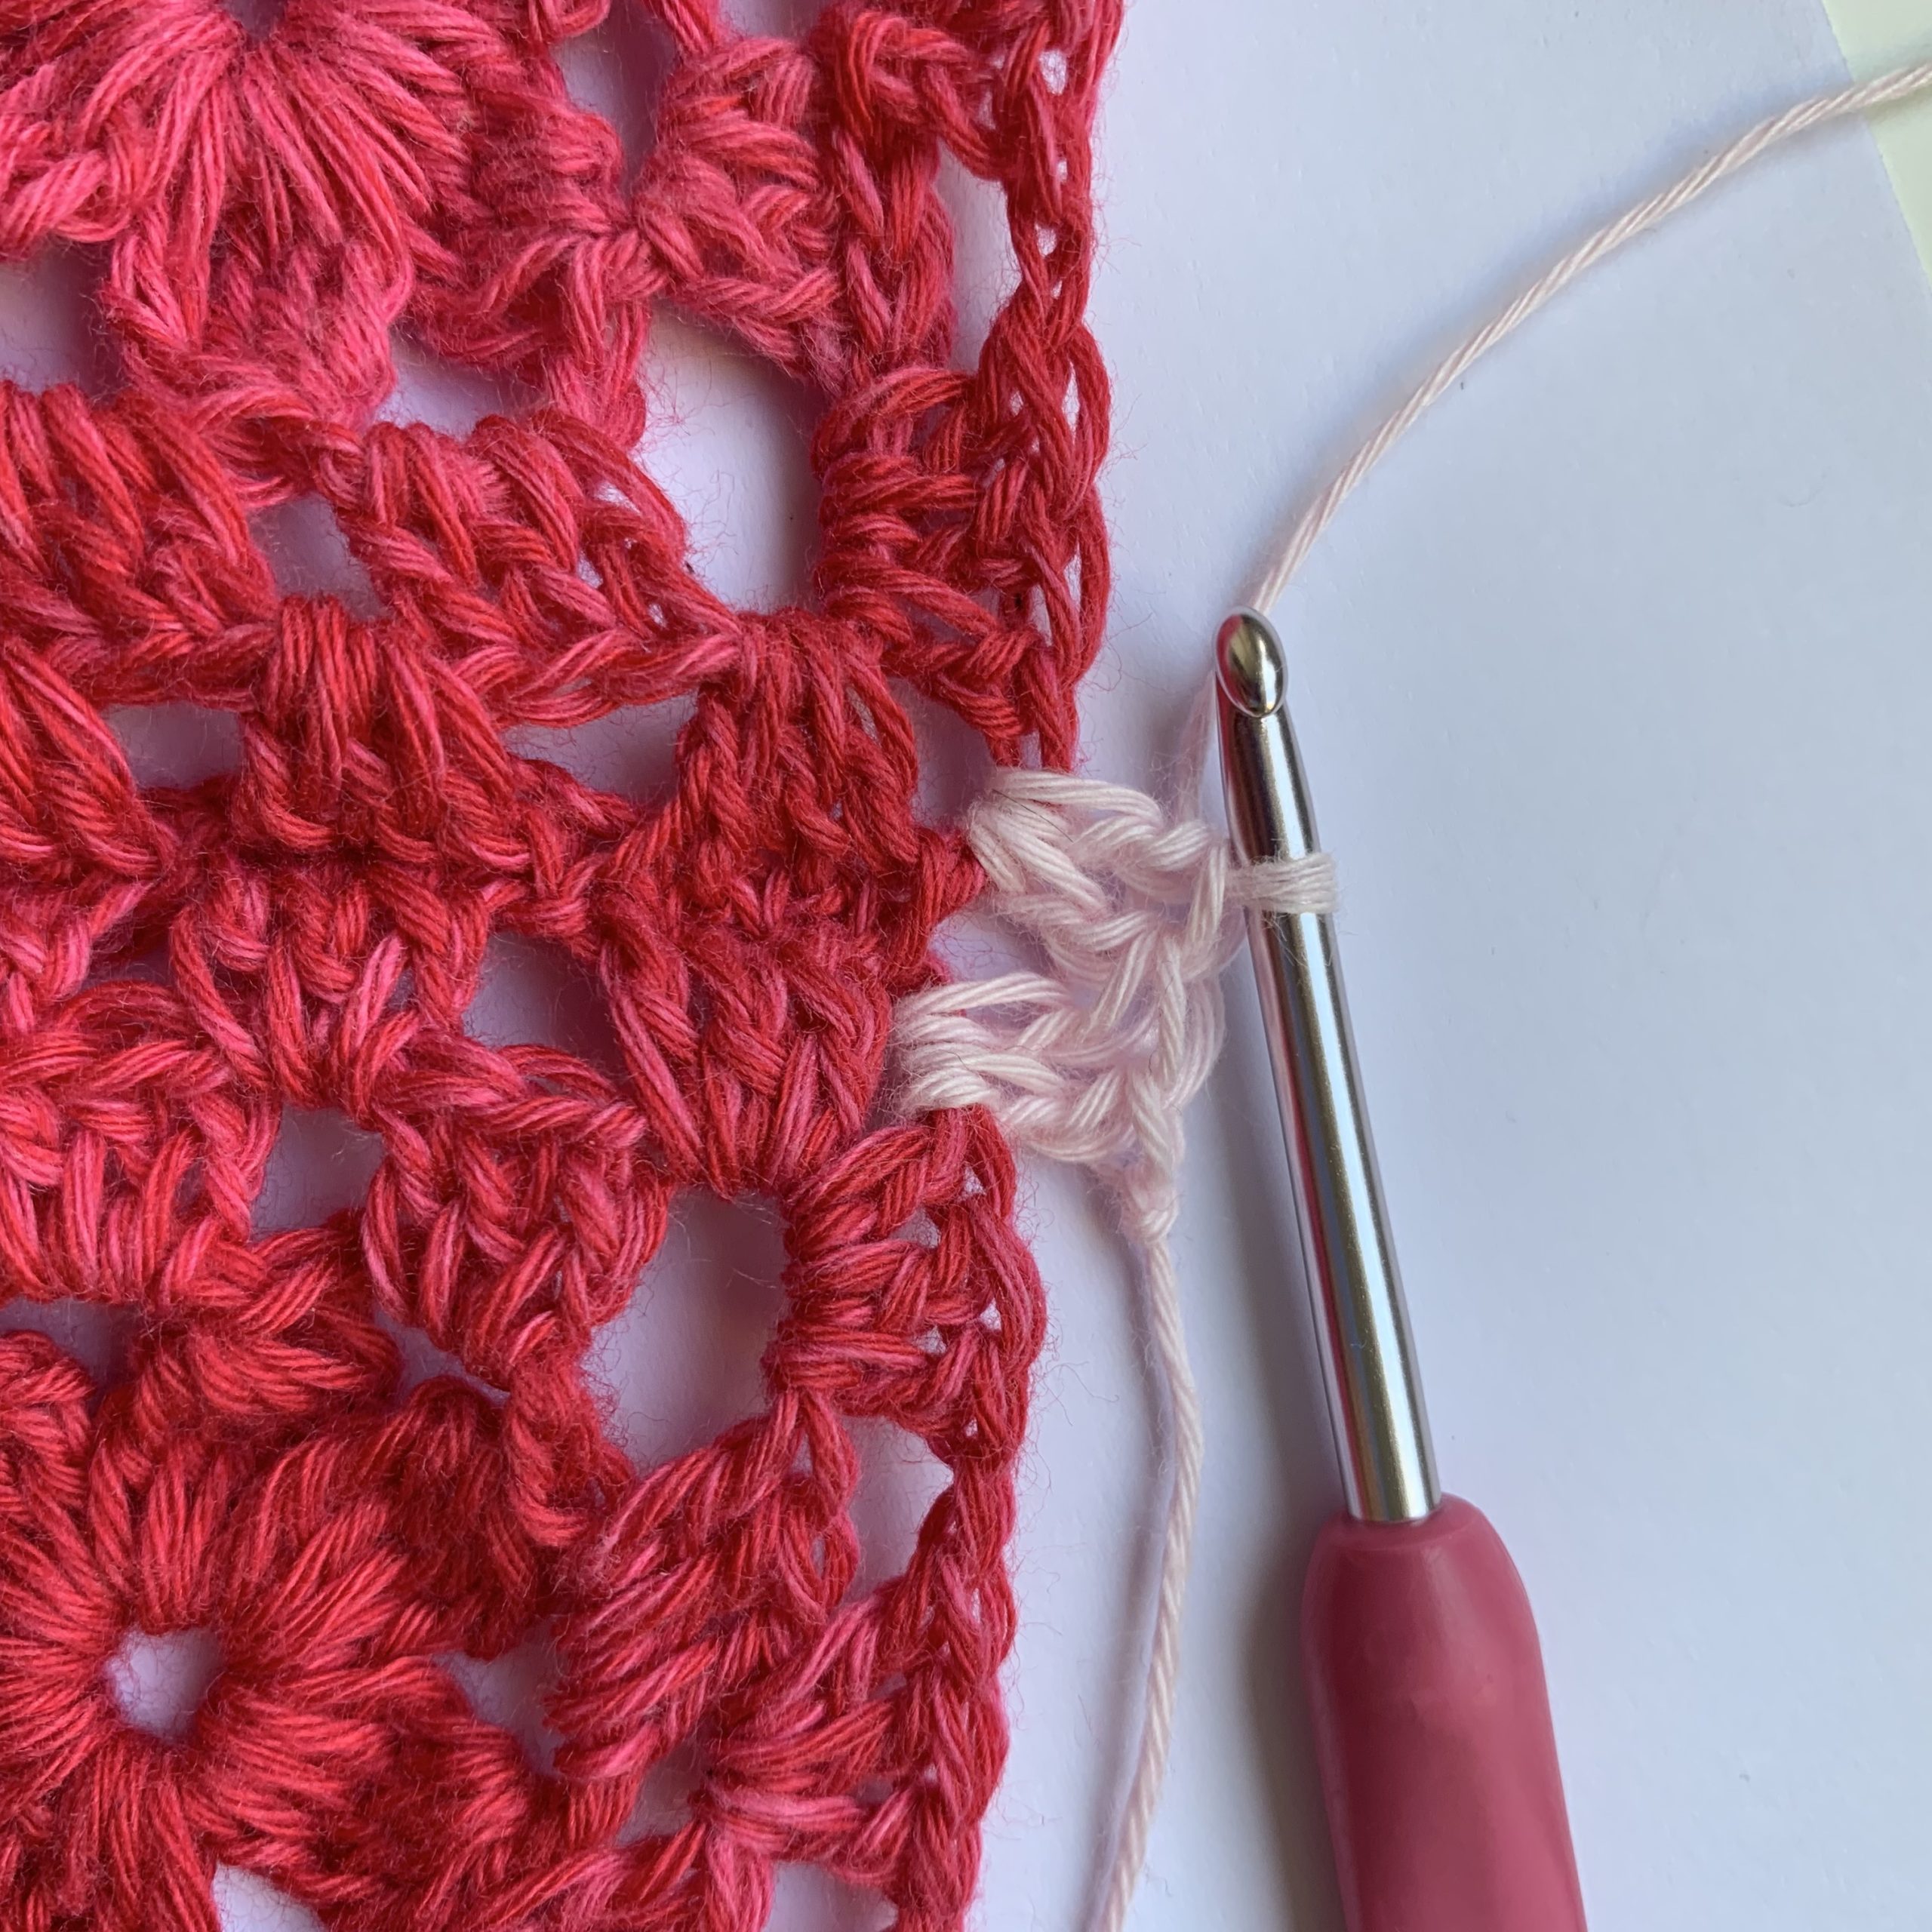
Picture 18 and 19: Slst in ch4sp between the 2 petals pointing down at the last flower in previous garland,
Picture 20: ch 2, (dtr4tog in the ring,
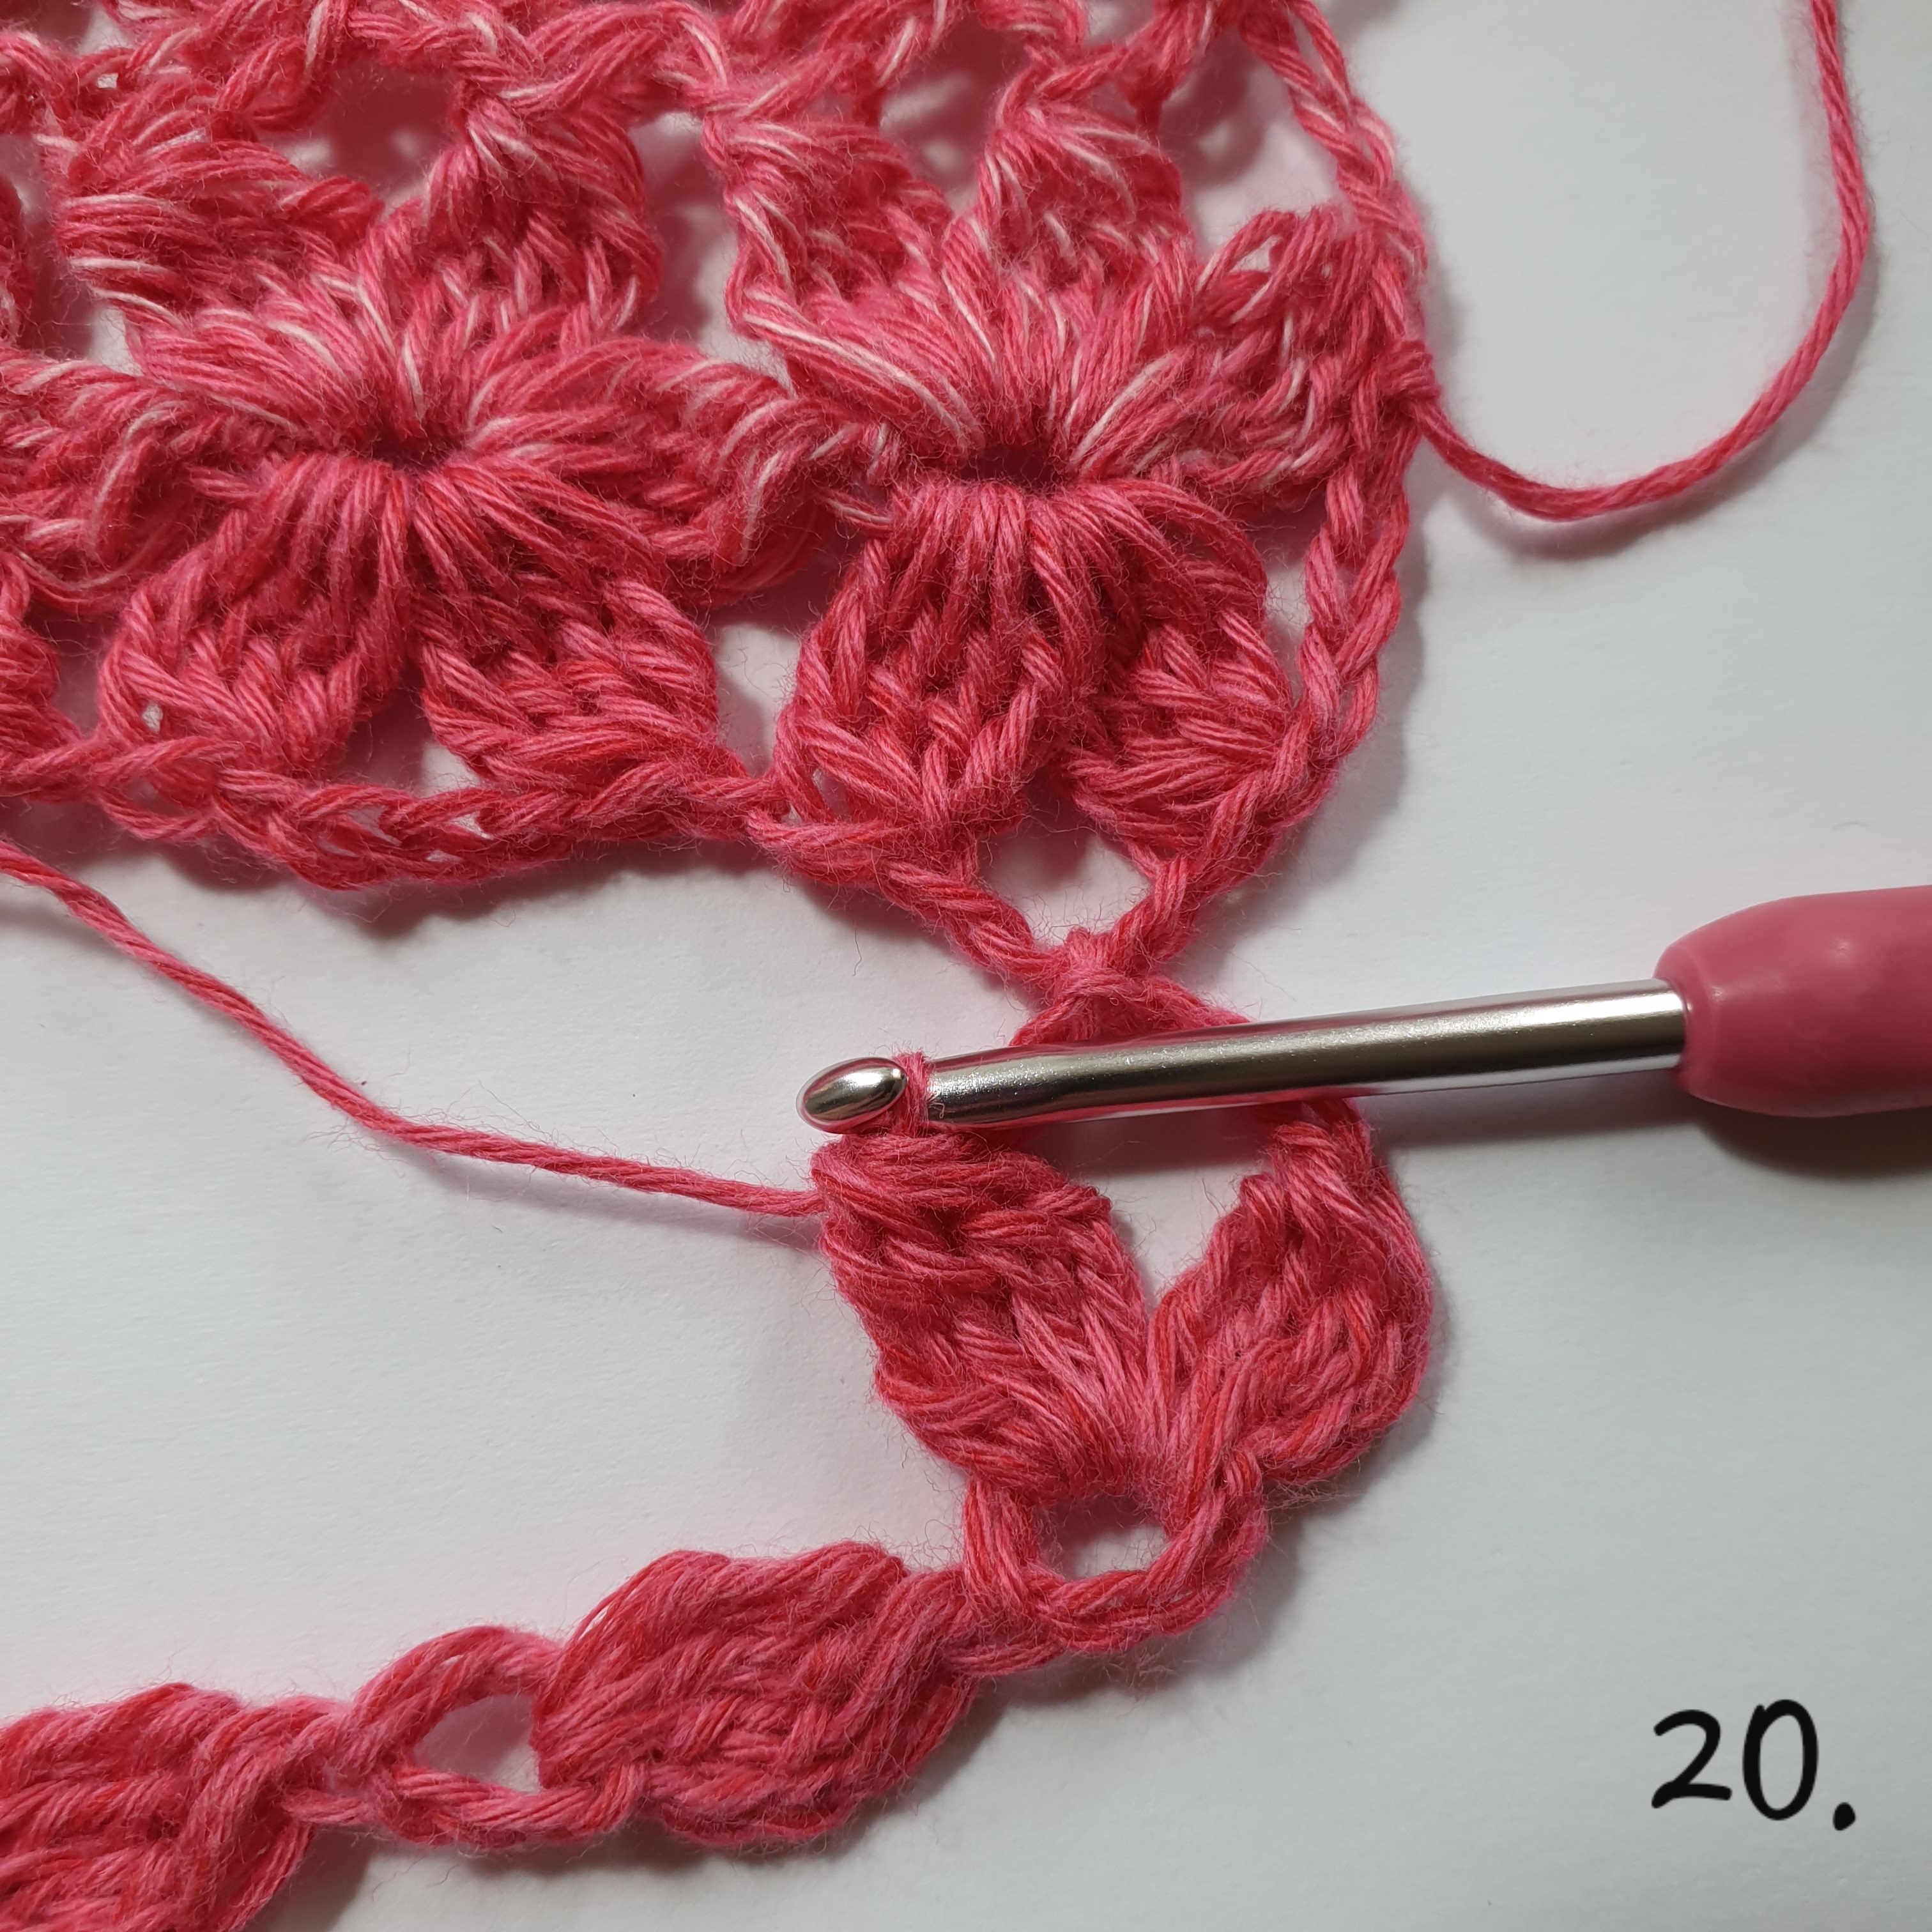
Picture 21: ch 2, slst between ne two dtr4tog in previous garland,

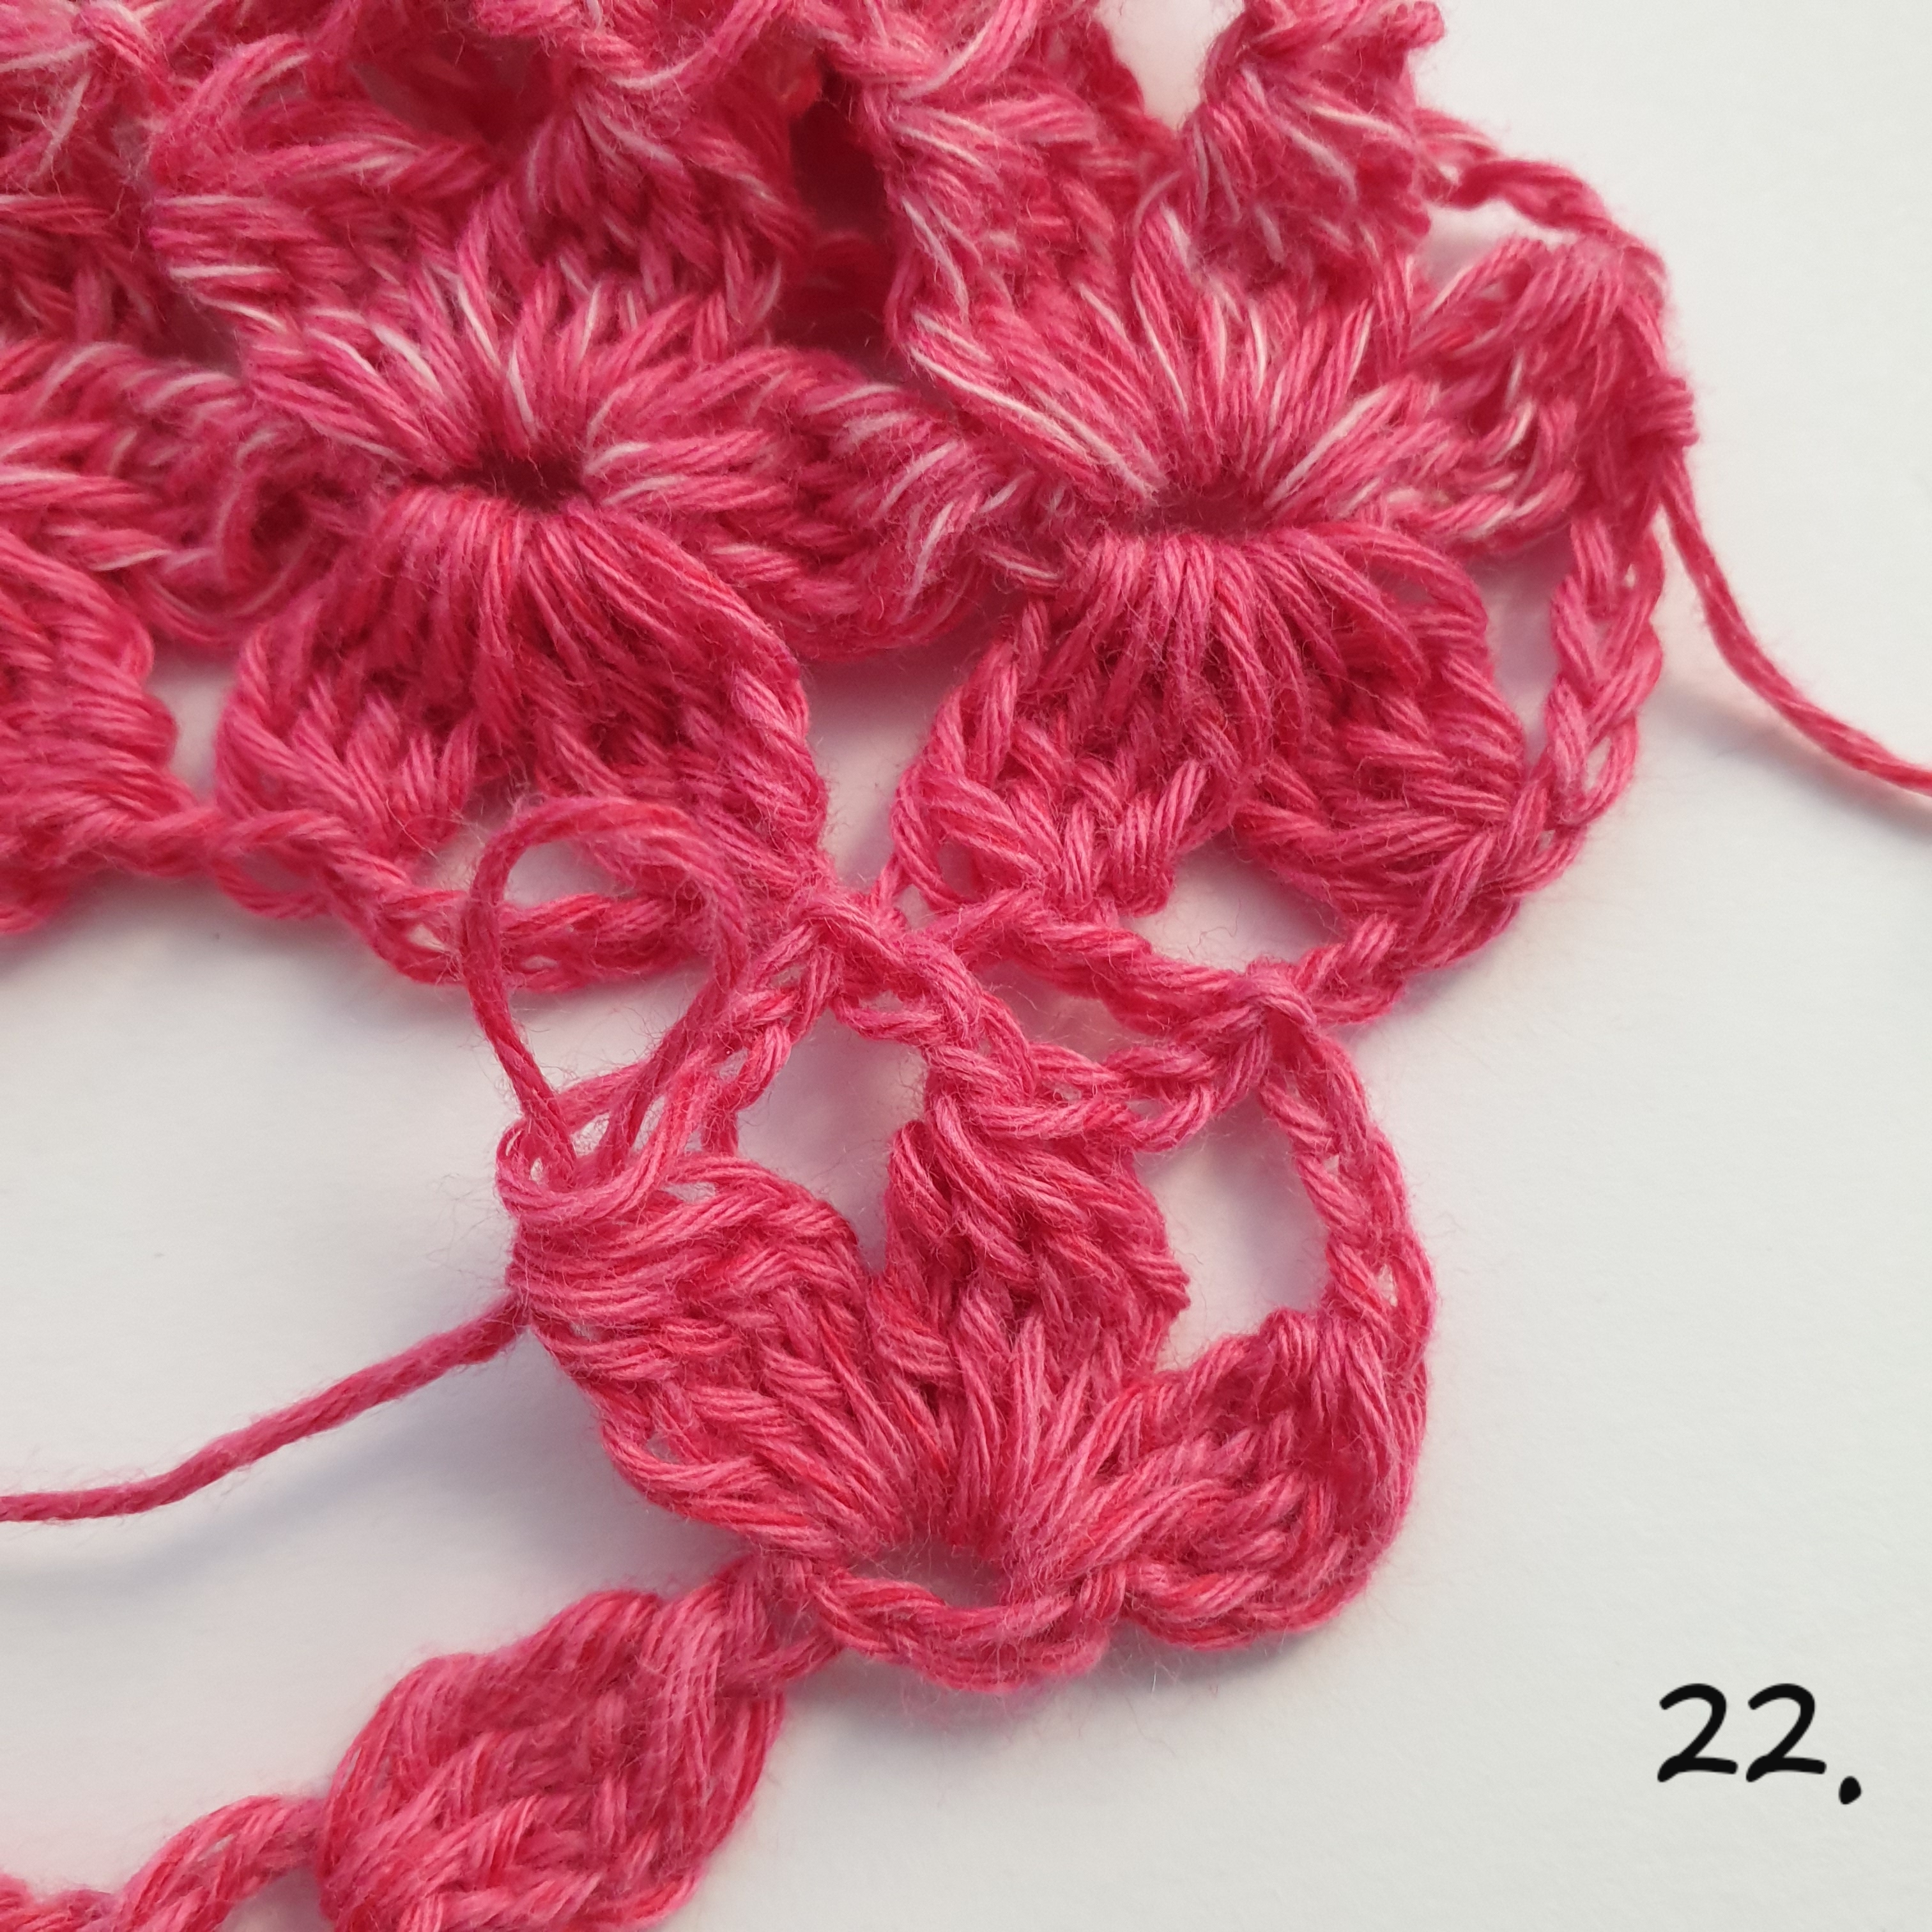
Picture 22: ch 2, dtr4tog) in same ring,
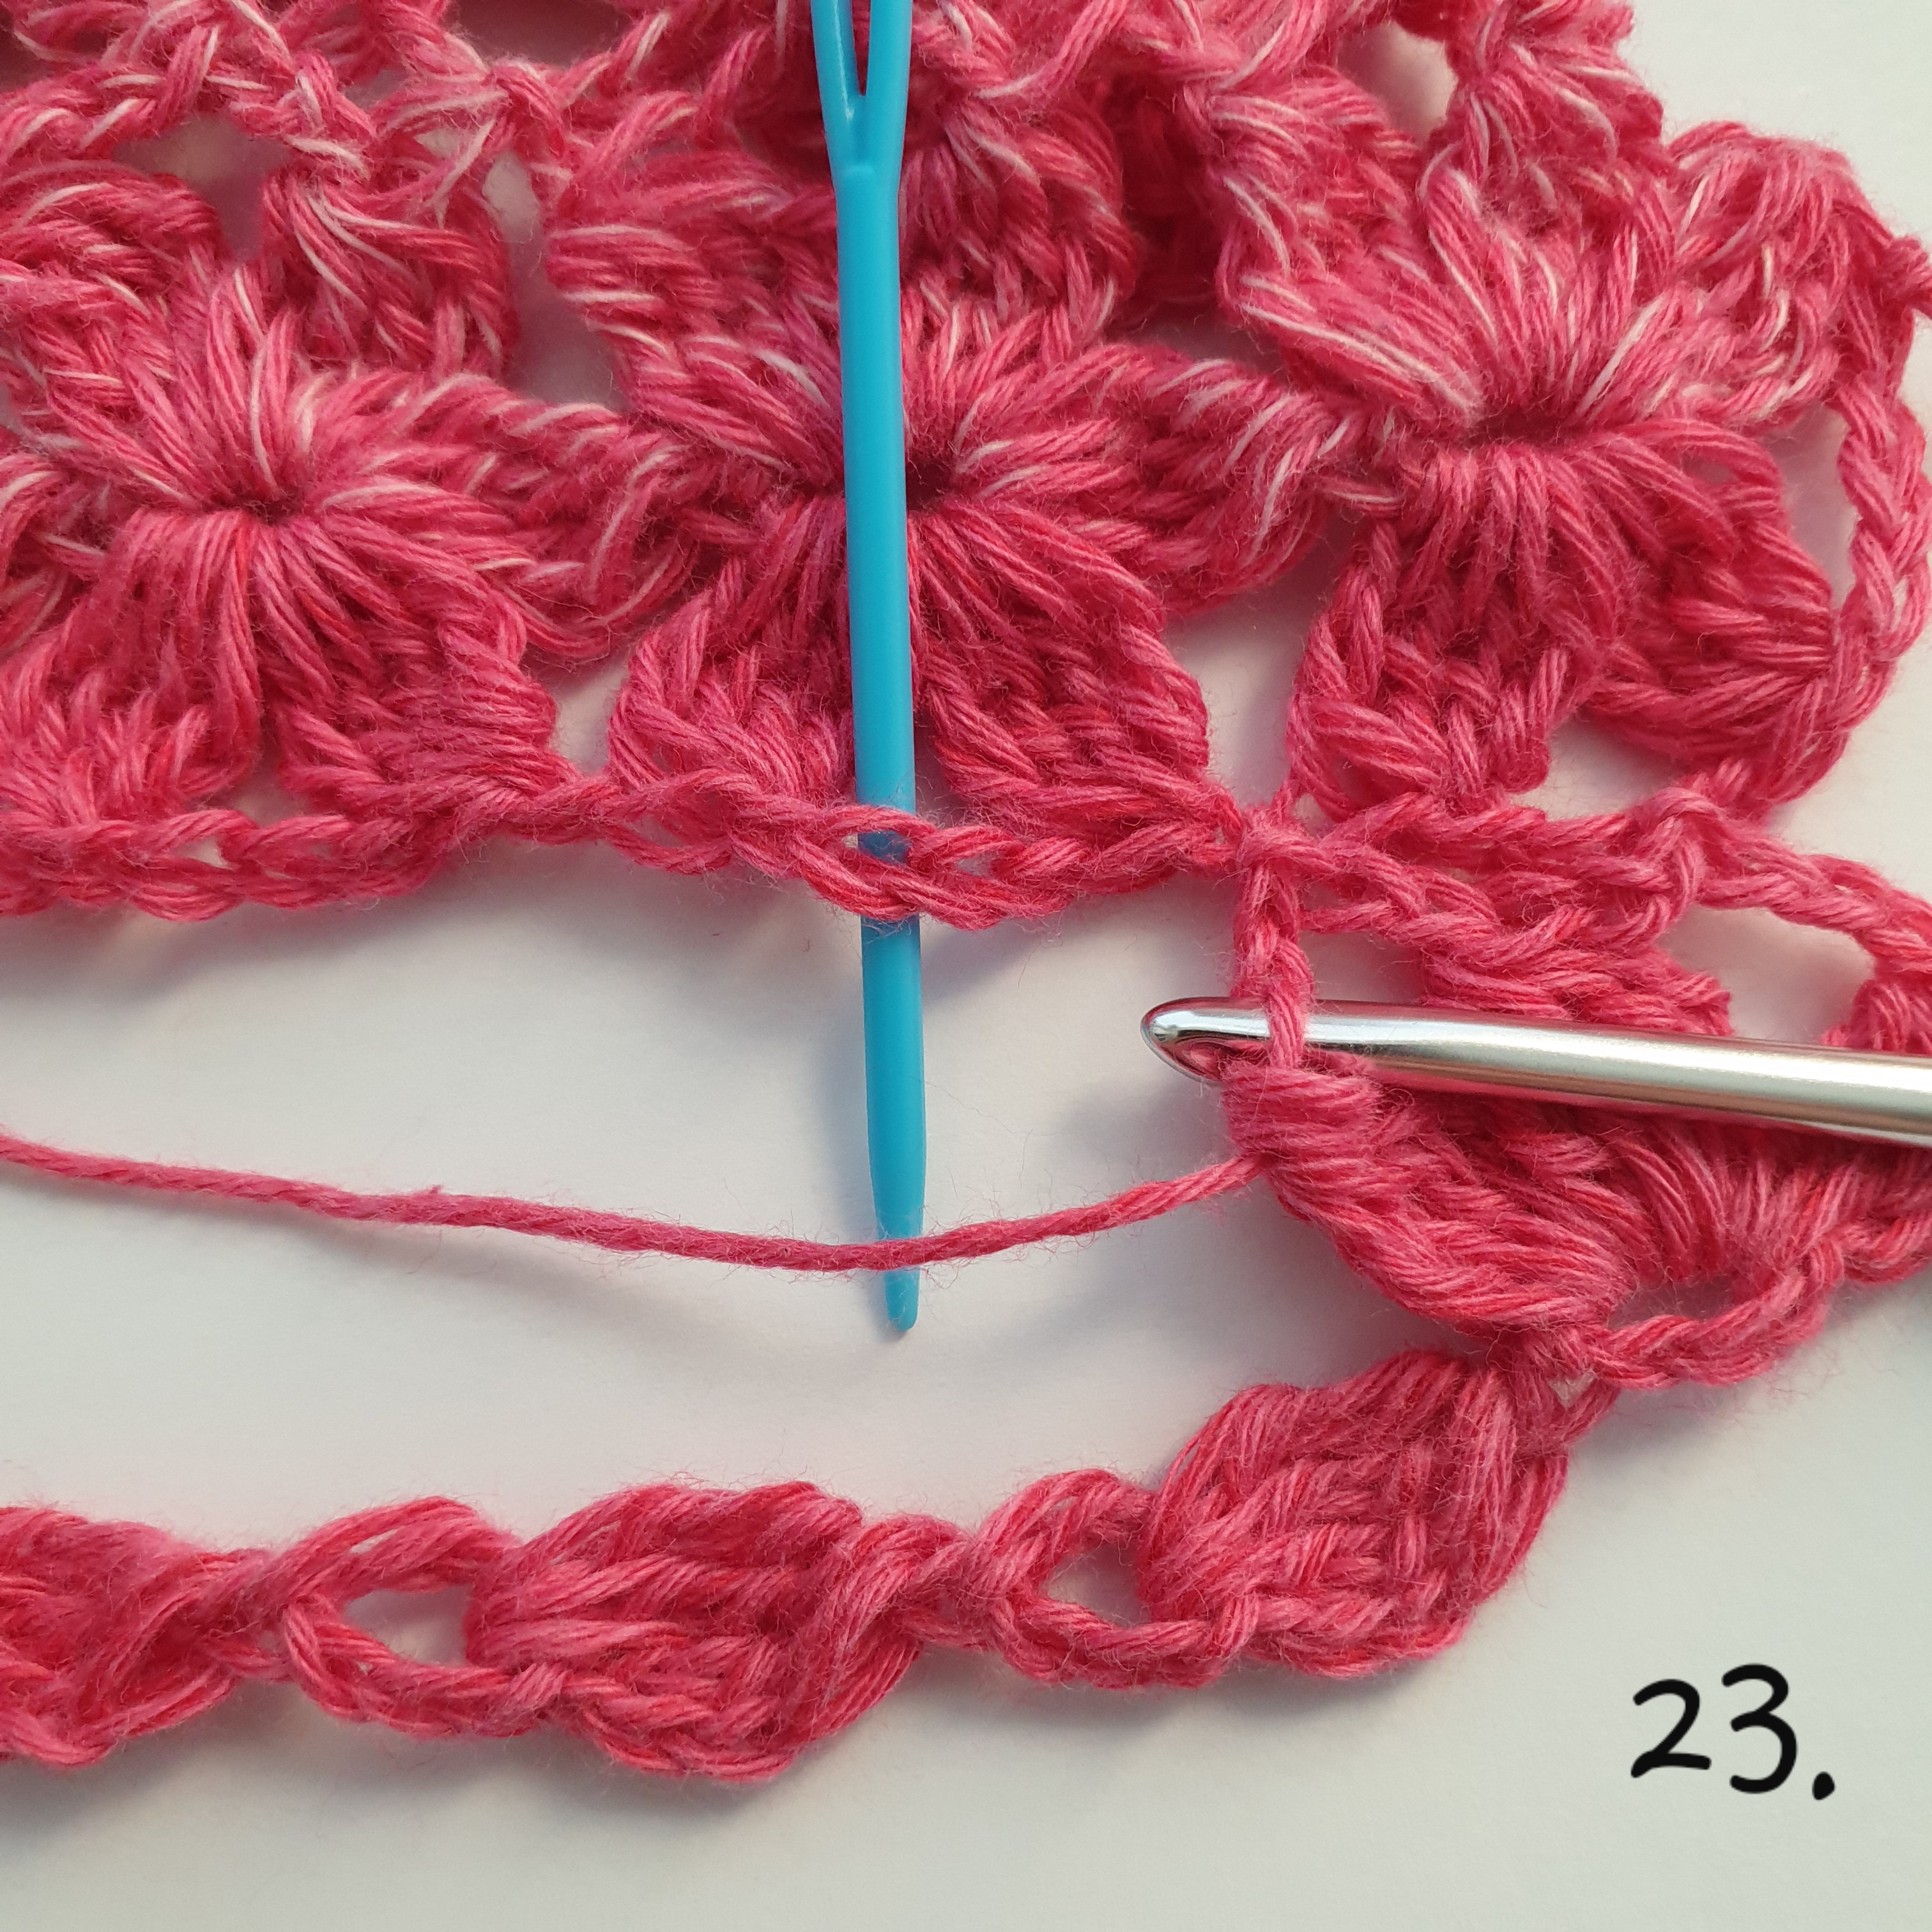
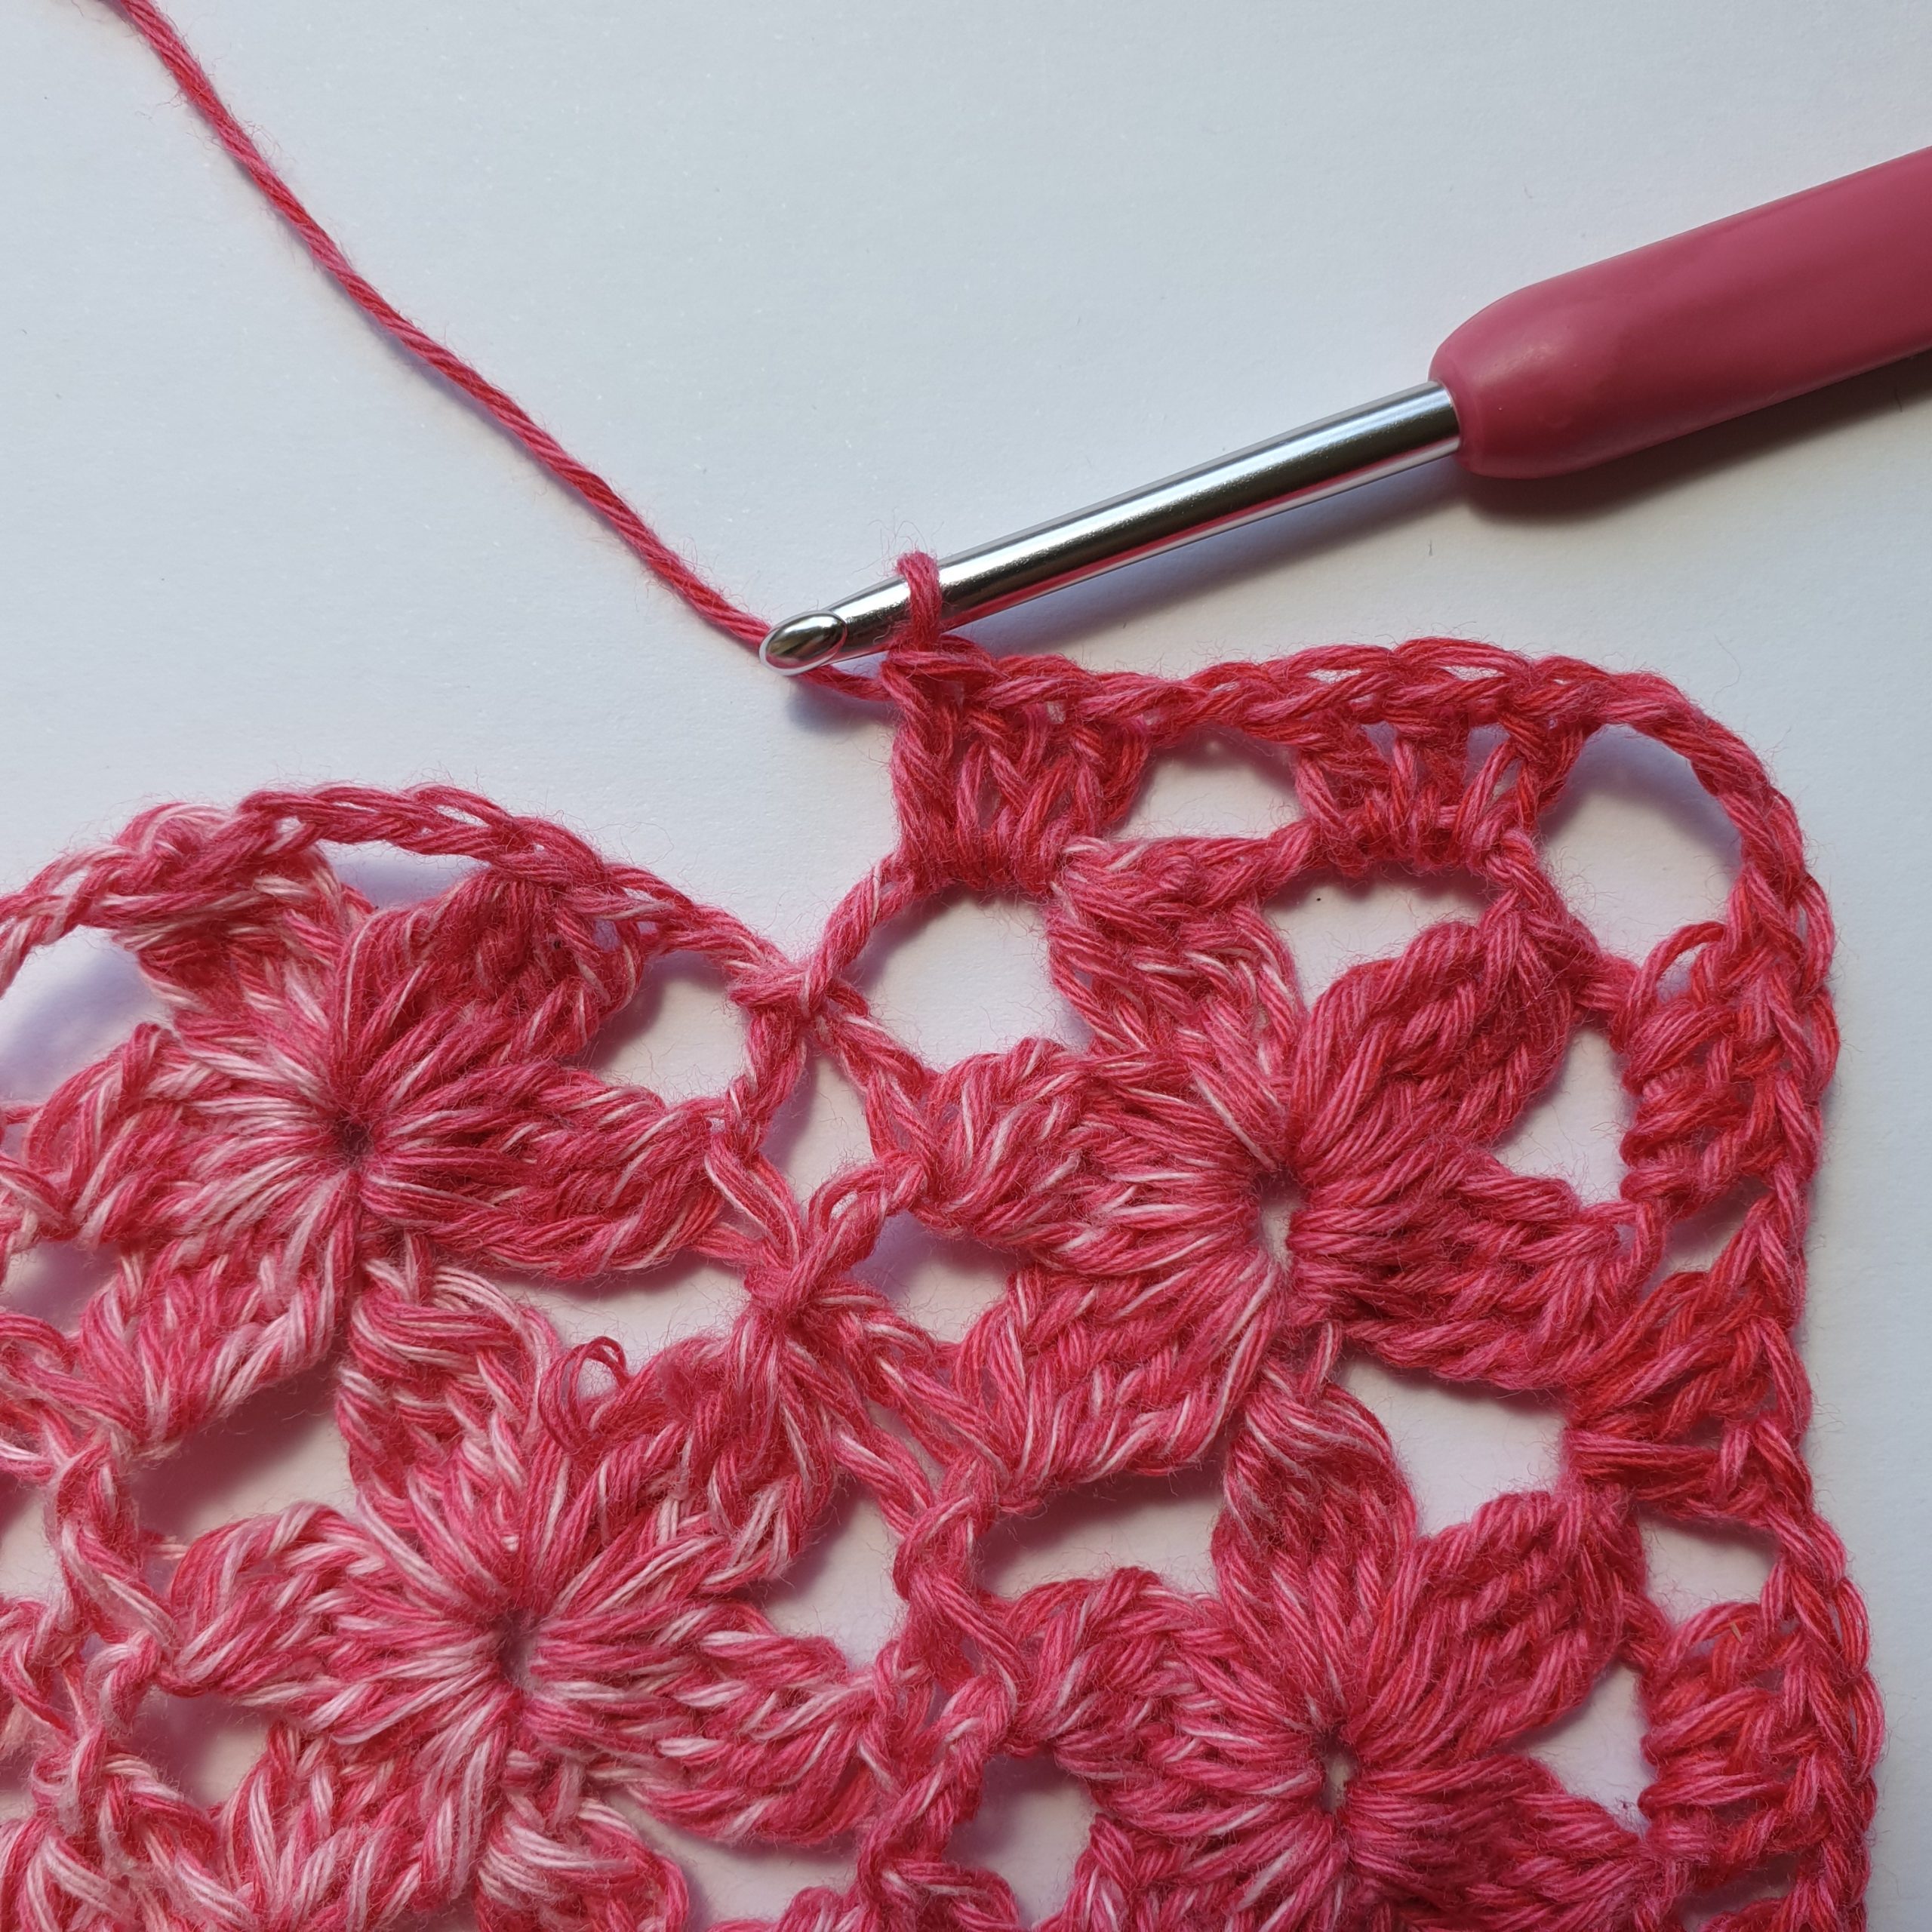
Picture 23: *slst in ne ch4sp,
Picture 24 and 25: (dtr4tog in ne ring, ch 2, slst between the two dtr4tog in previous garland, ch 2, dtr4tog in same ring) *, repeat *-* until you’ve done the first ring on this garland,
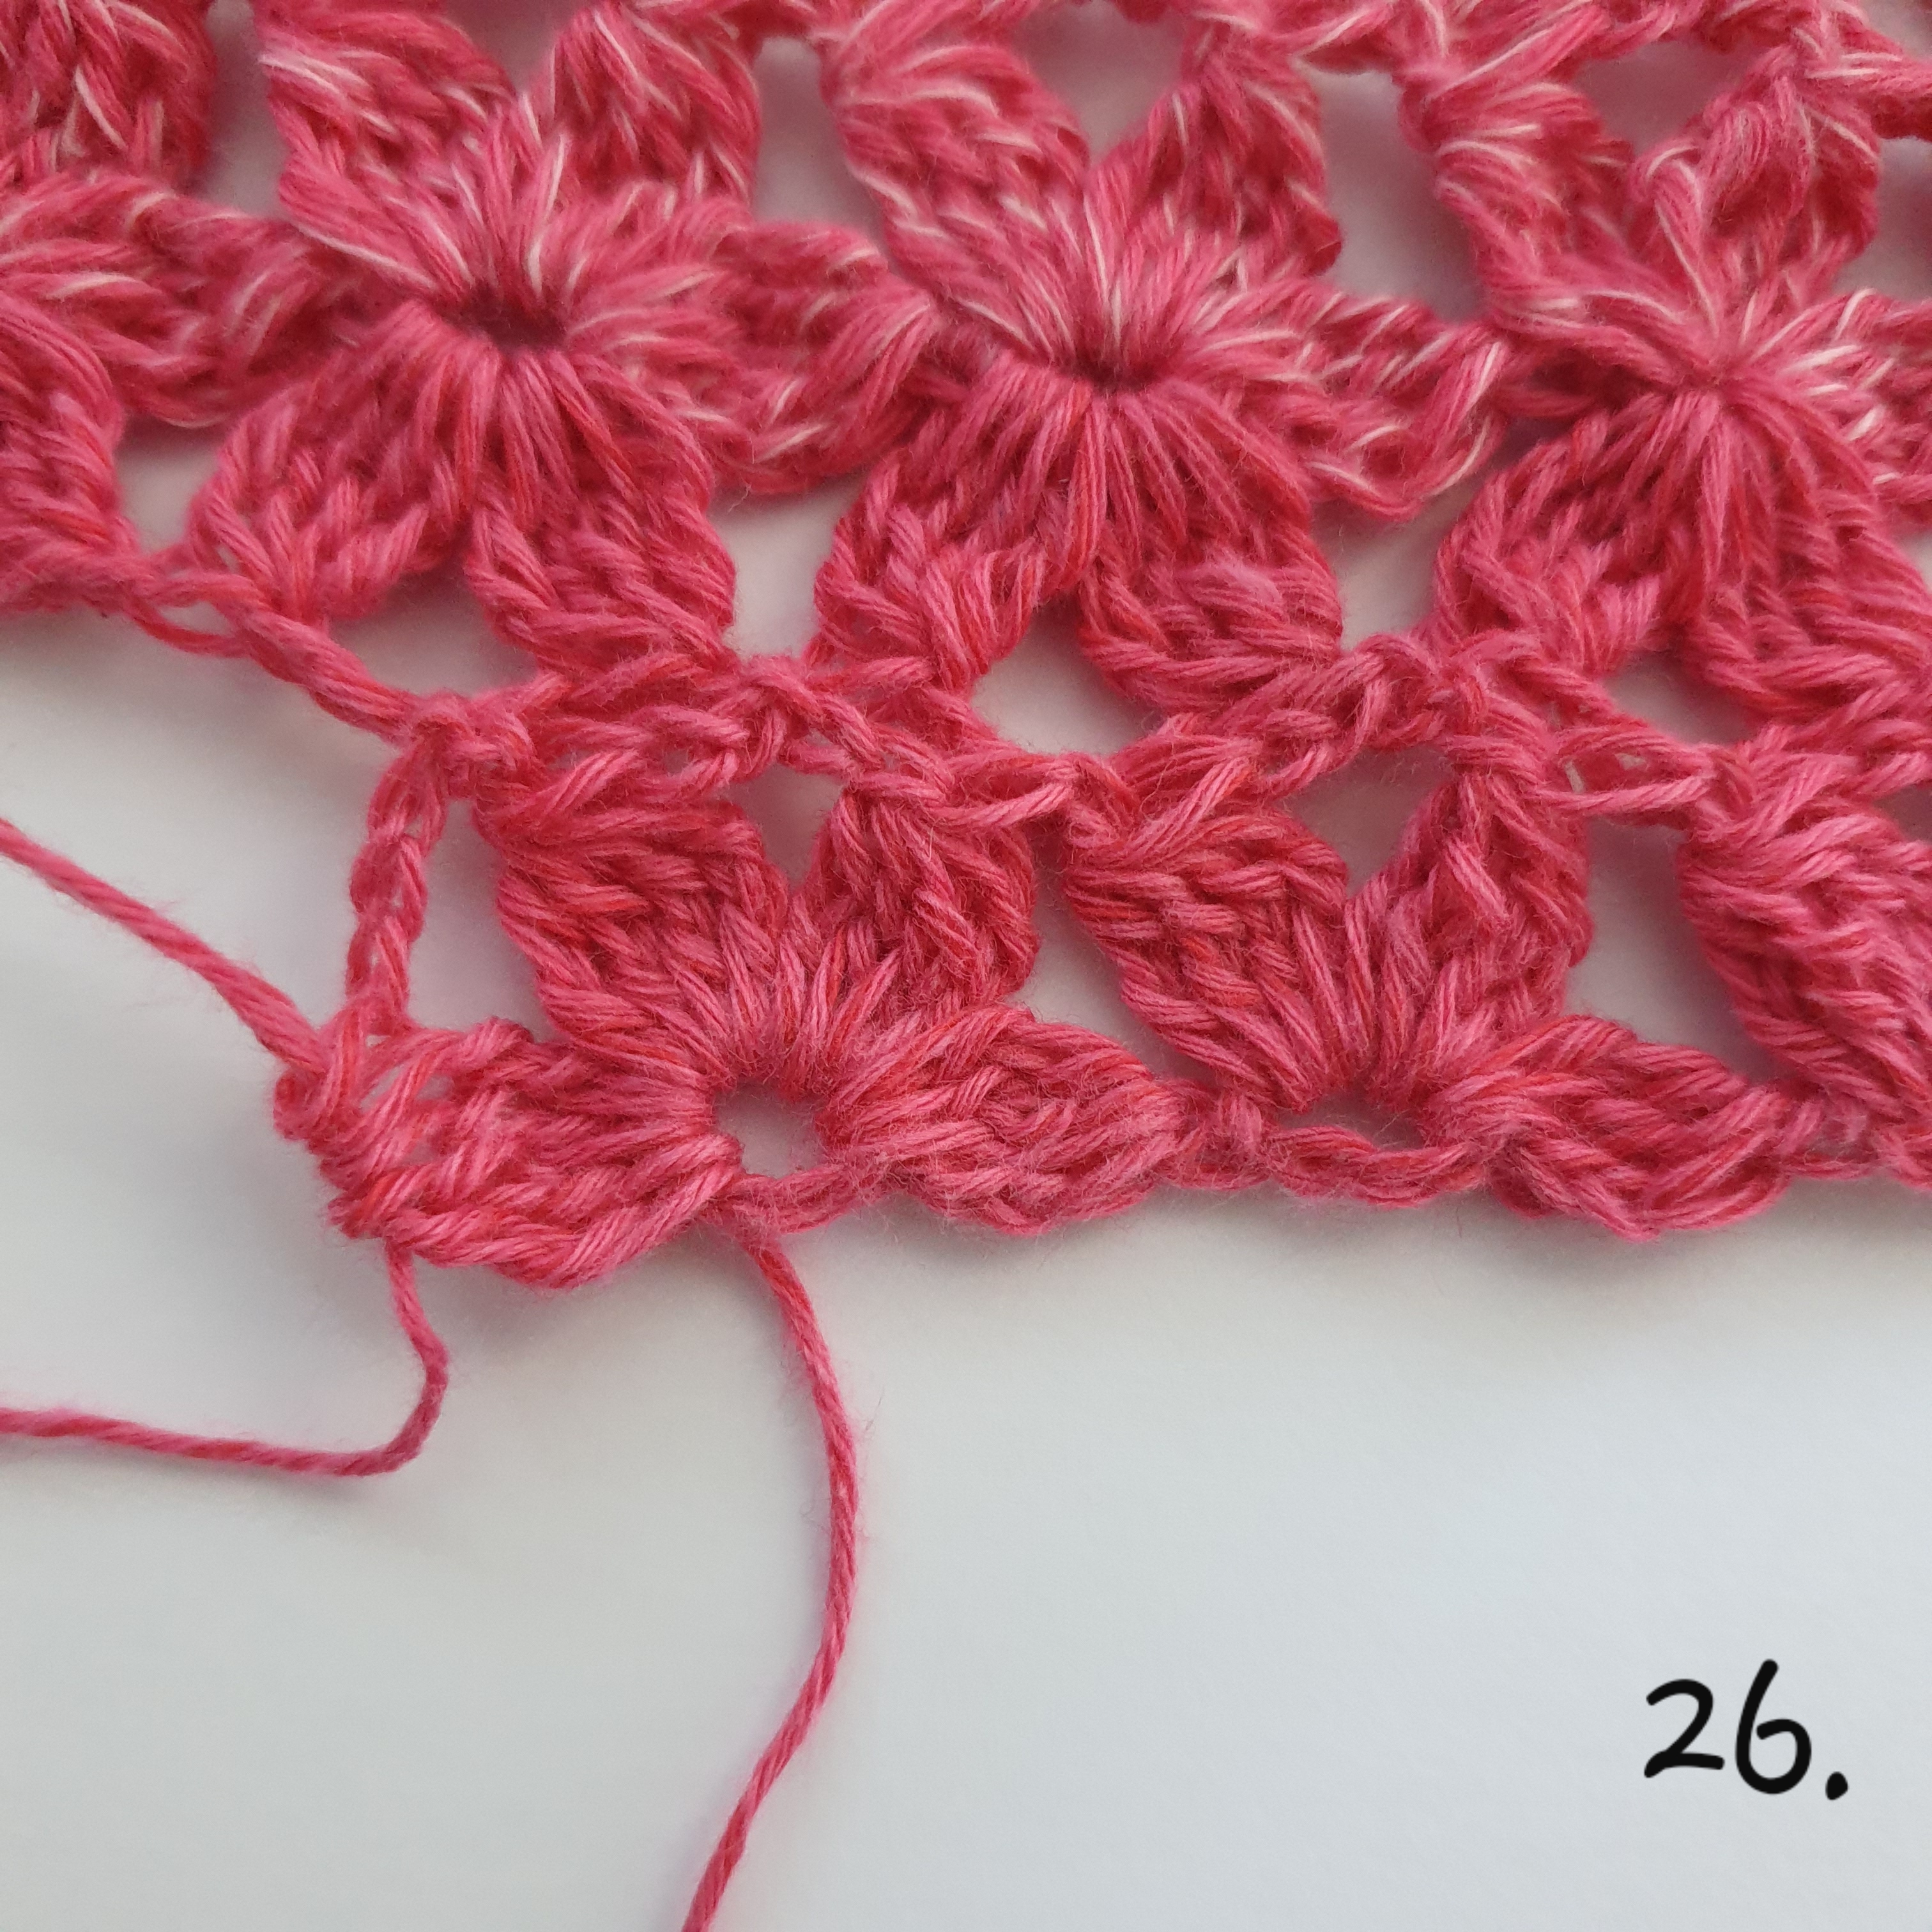
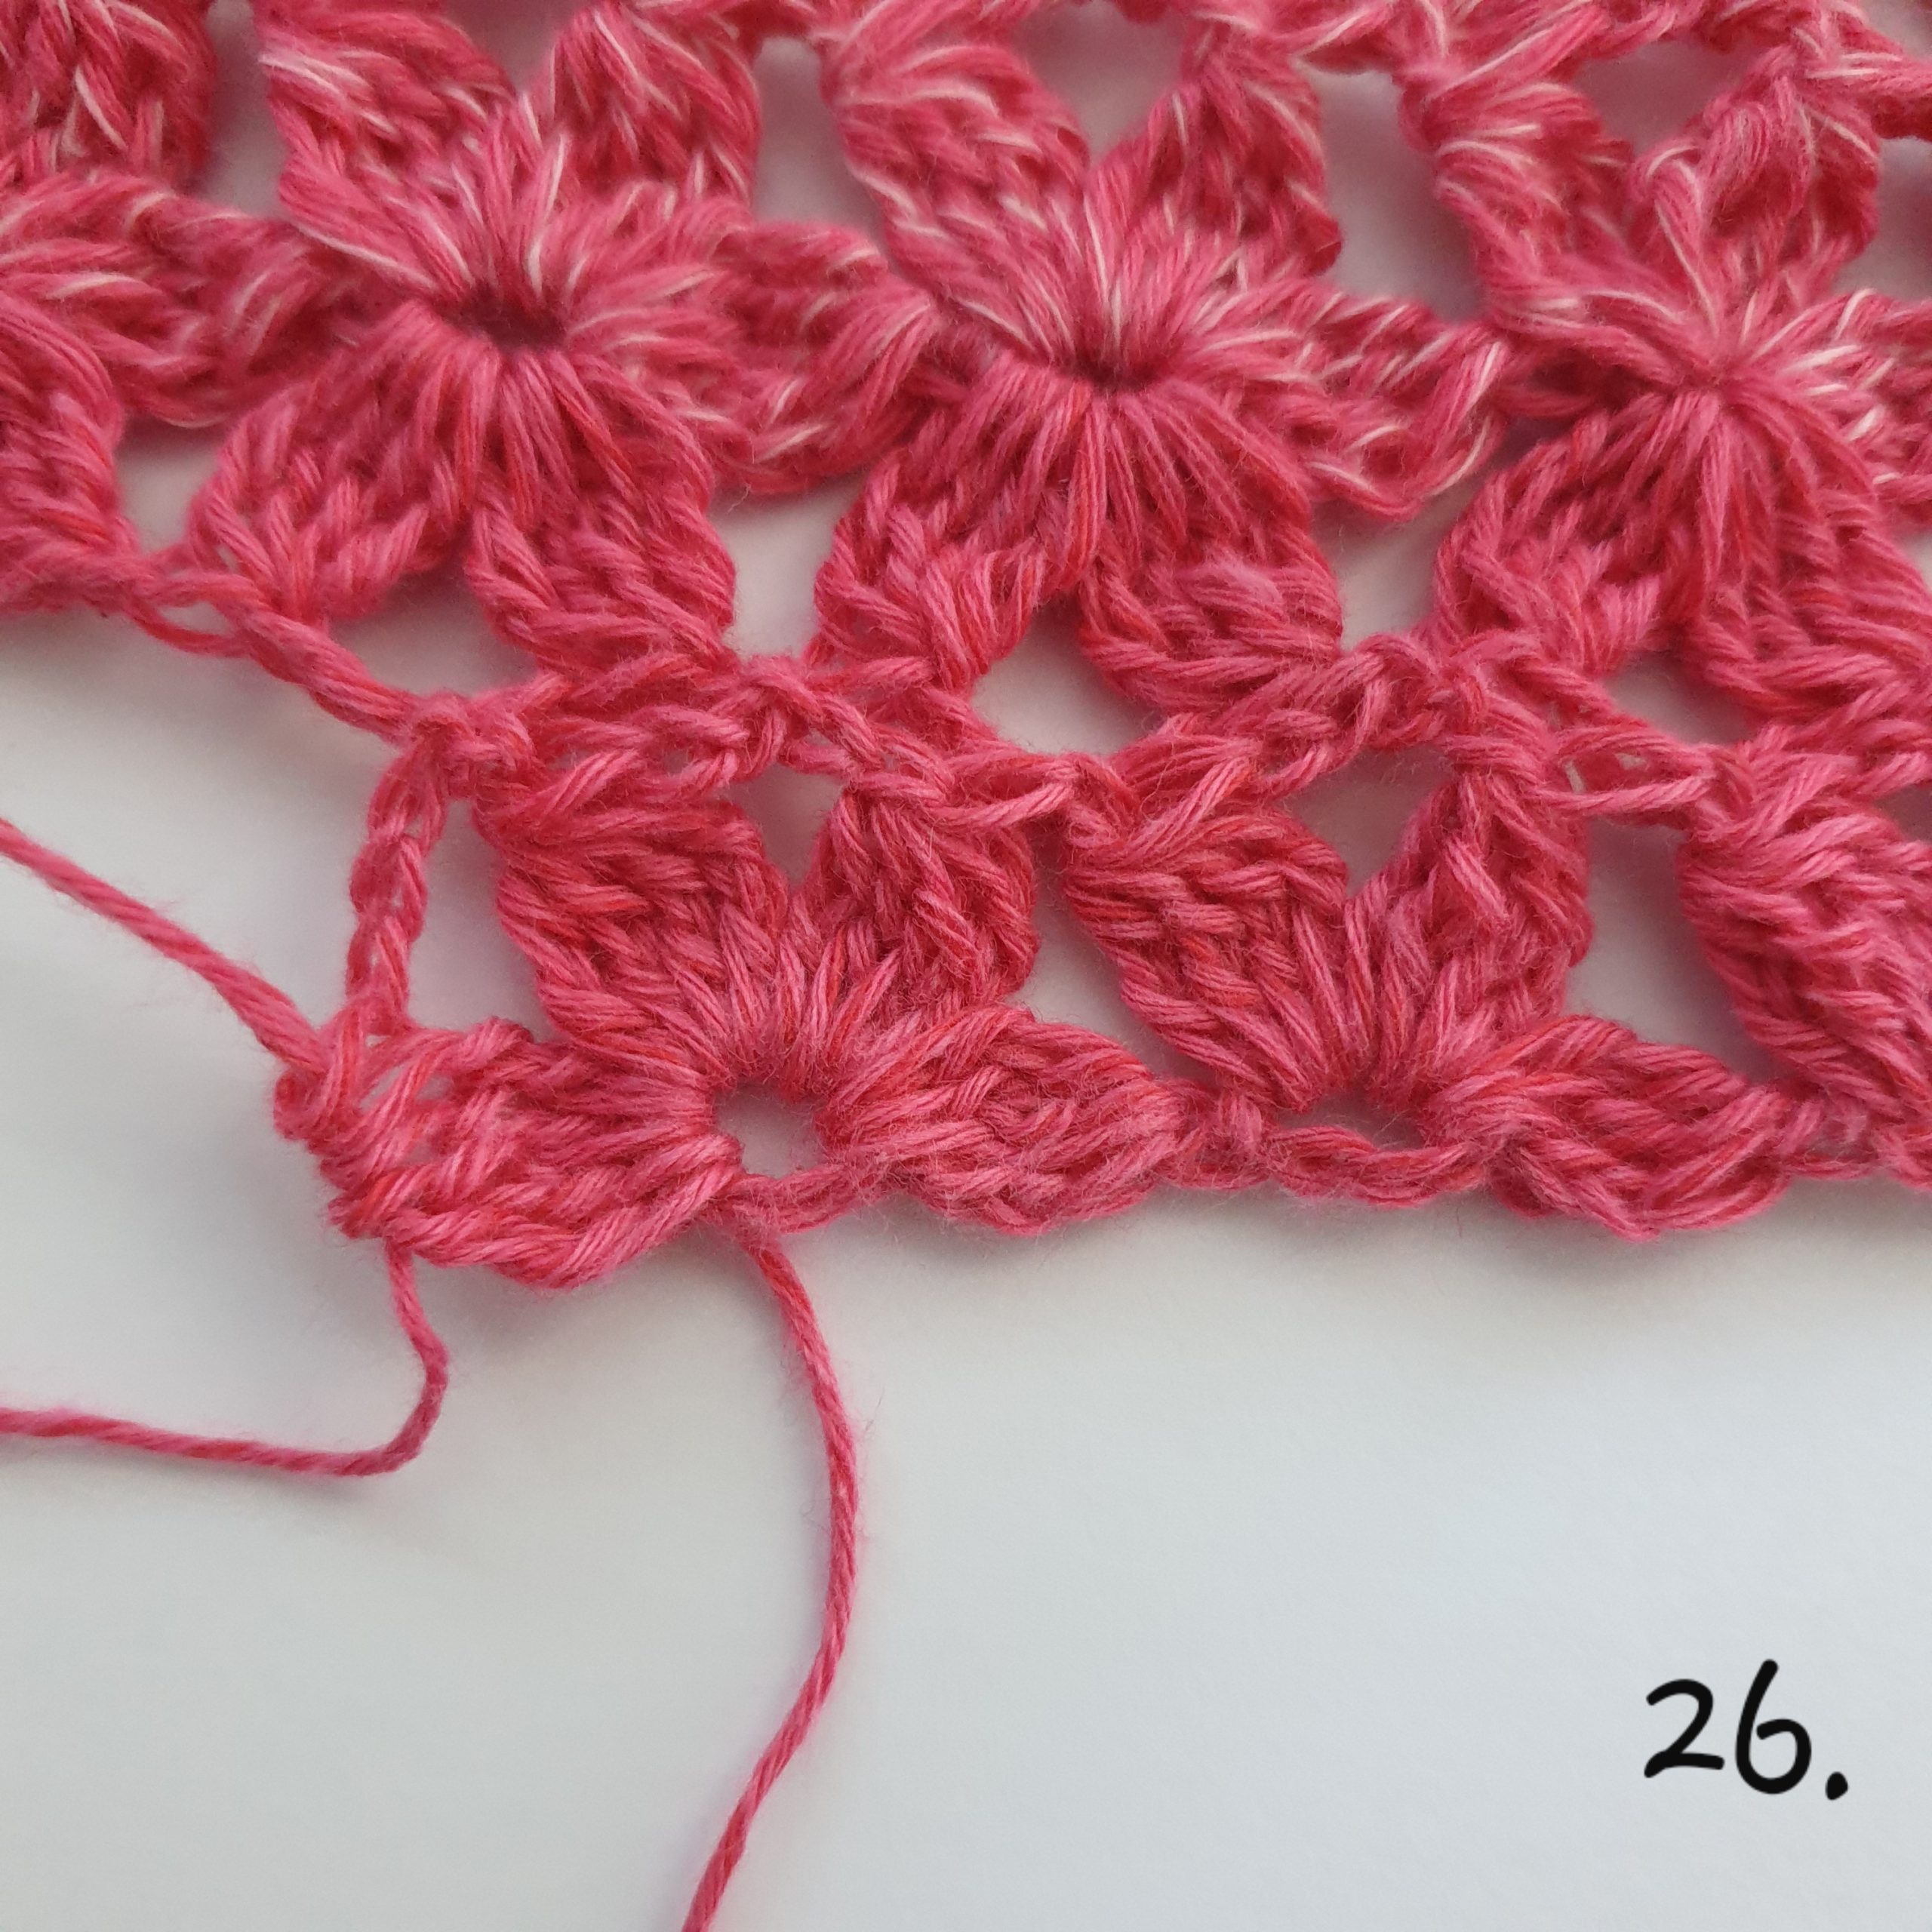
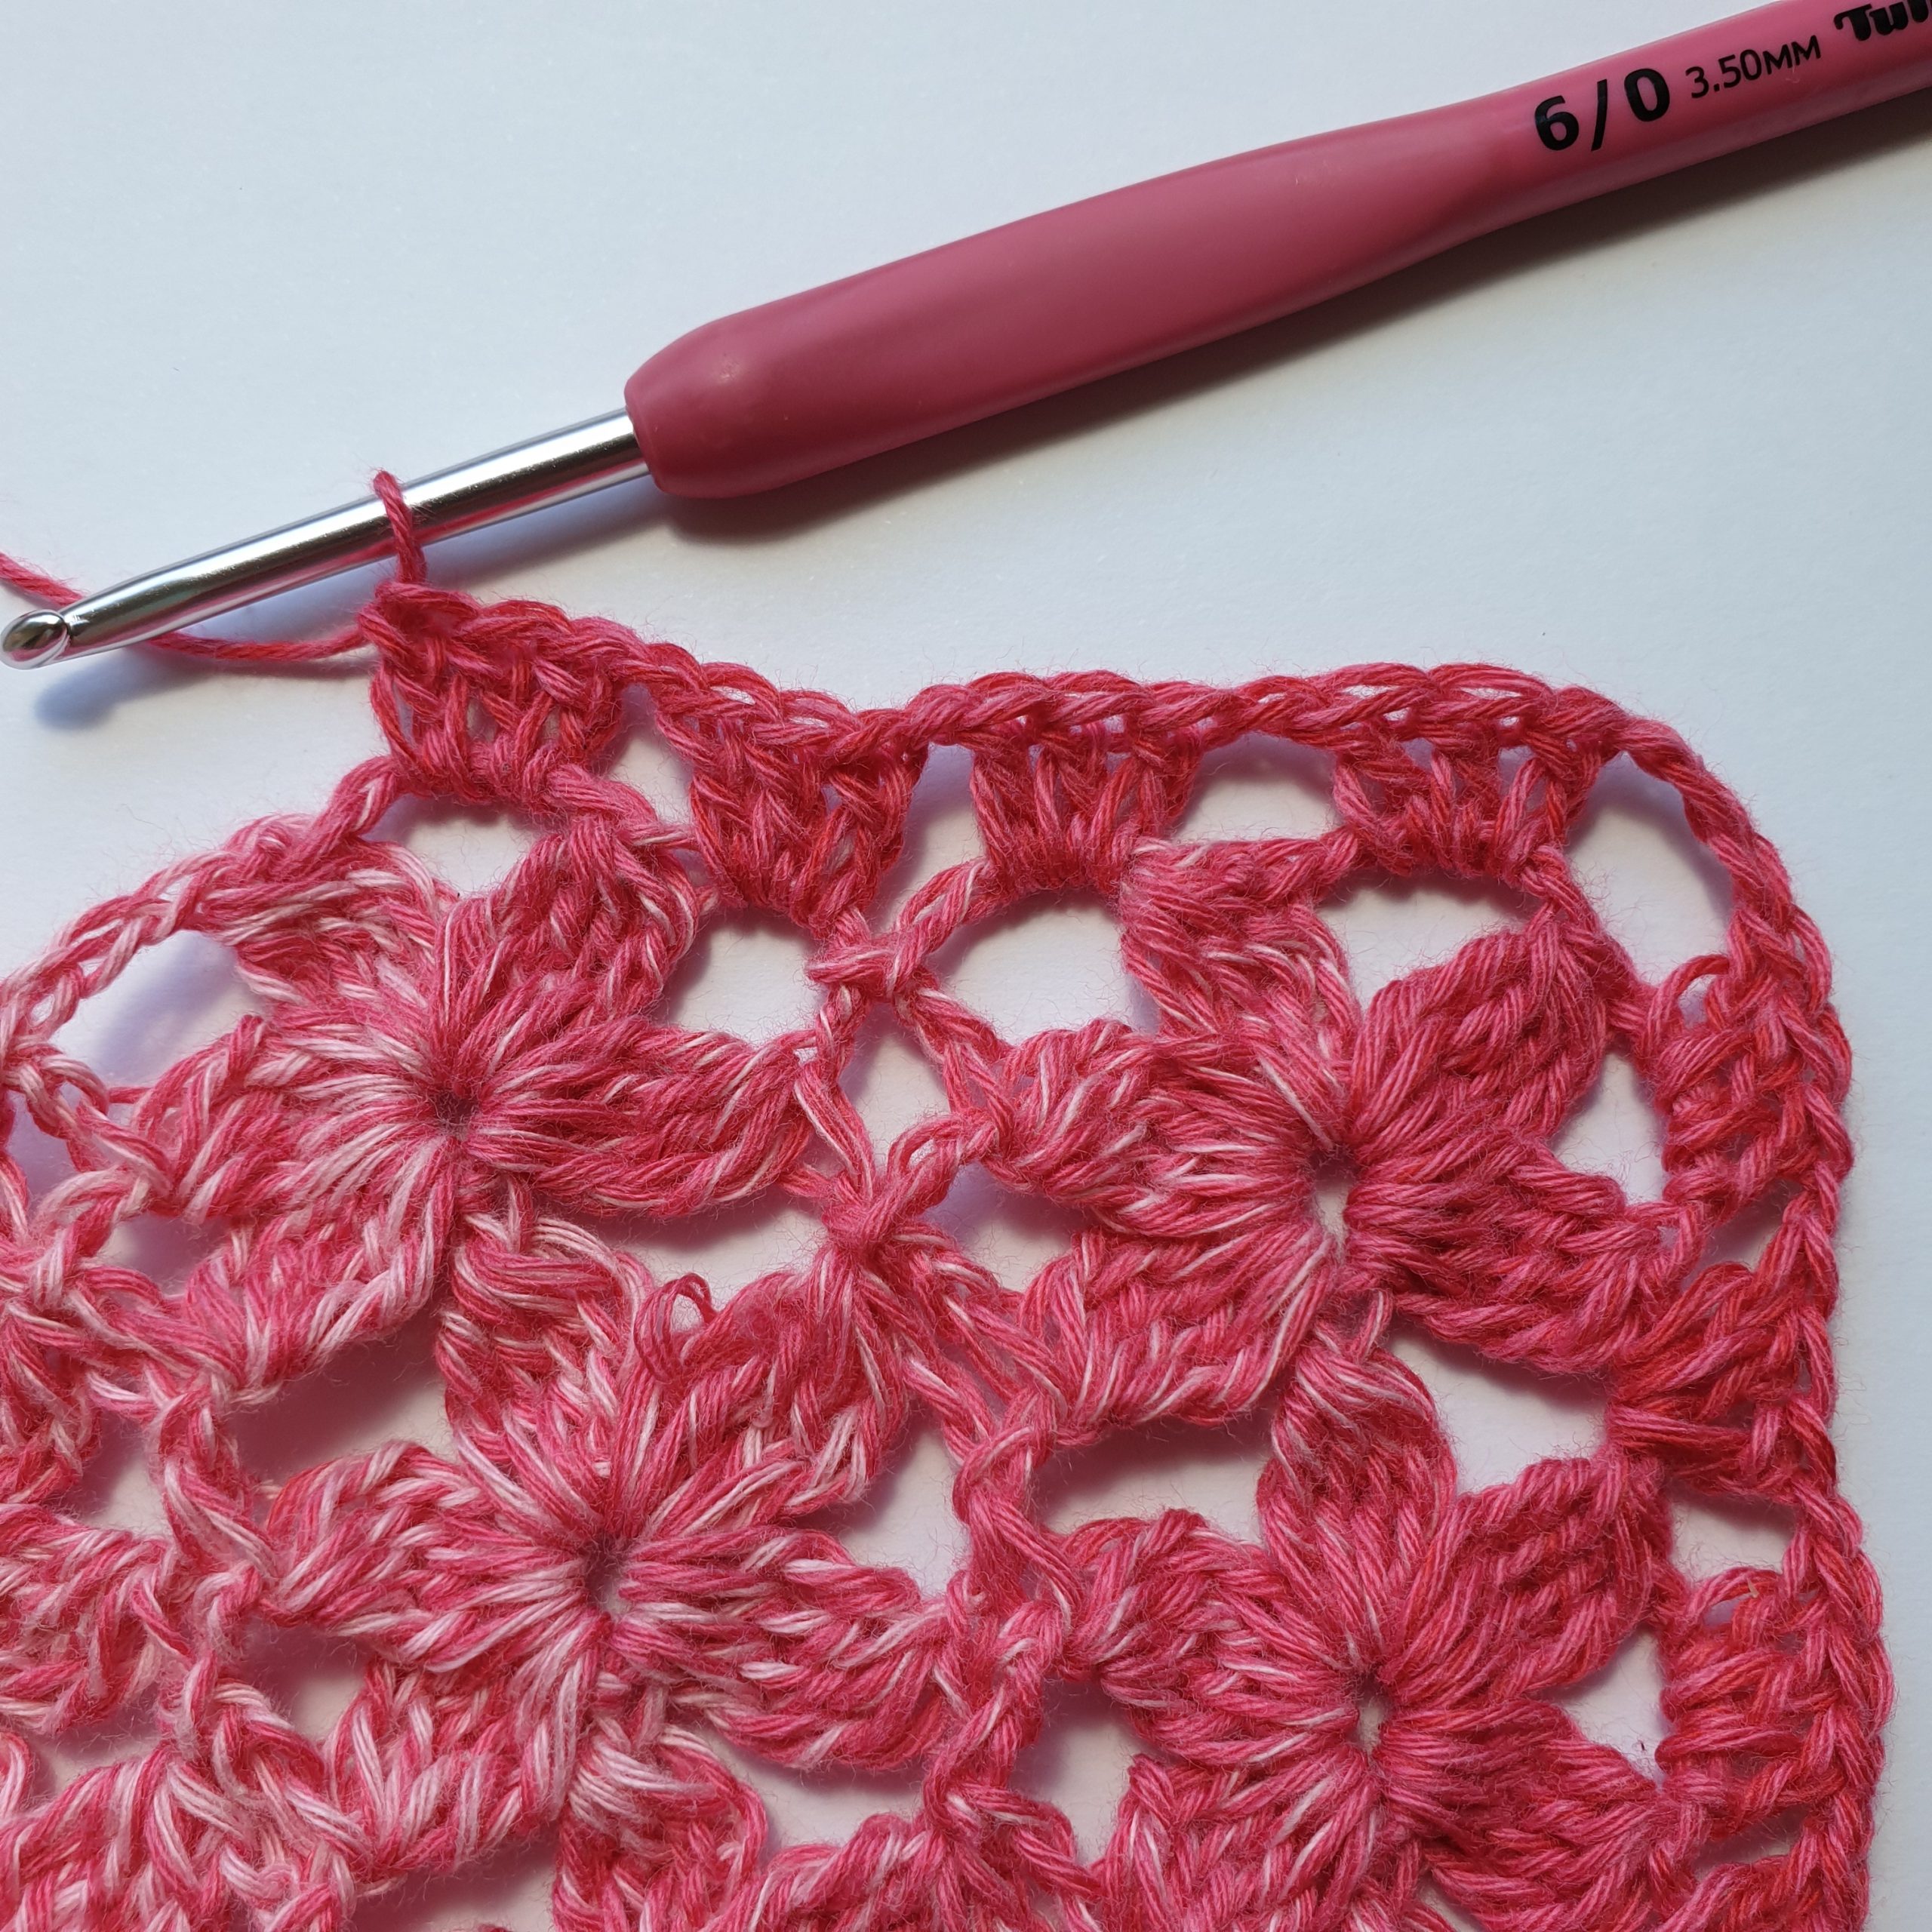
Picture 26: slst in ne ch4sp, (dtr4tog, ch 2, slst between the two dtr4tog in previous row, dtr4tog, ch 2, slst in ne ch4, ch 3, (turn your work and work in the opposite side of the petals), dtr4tog,
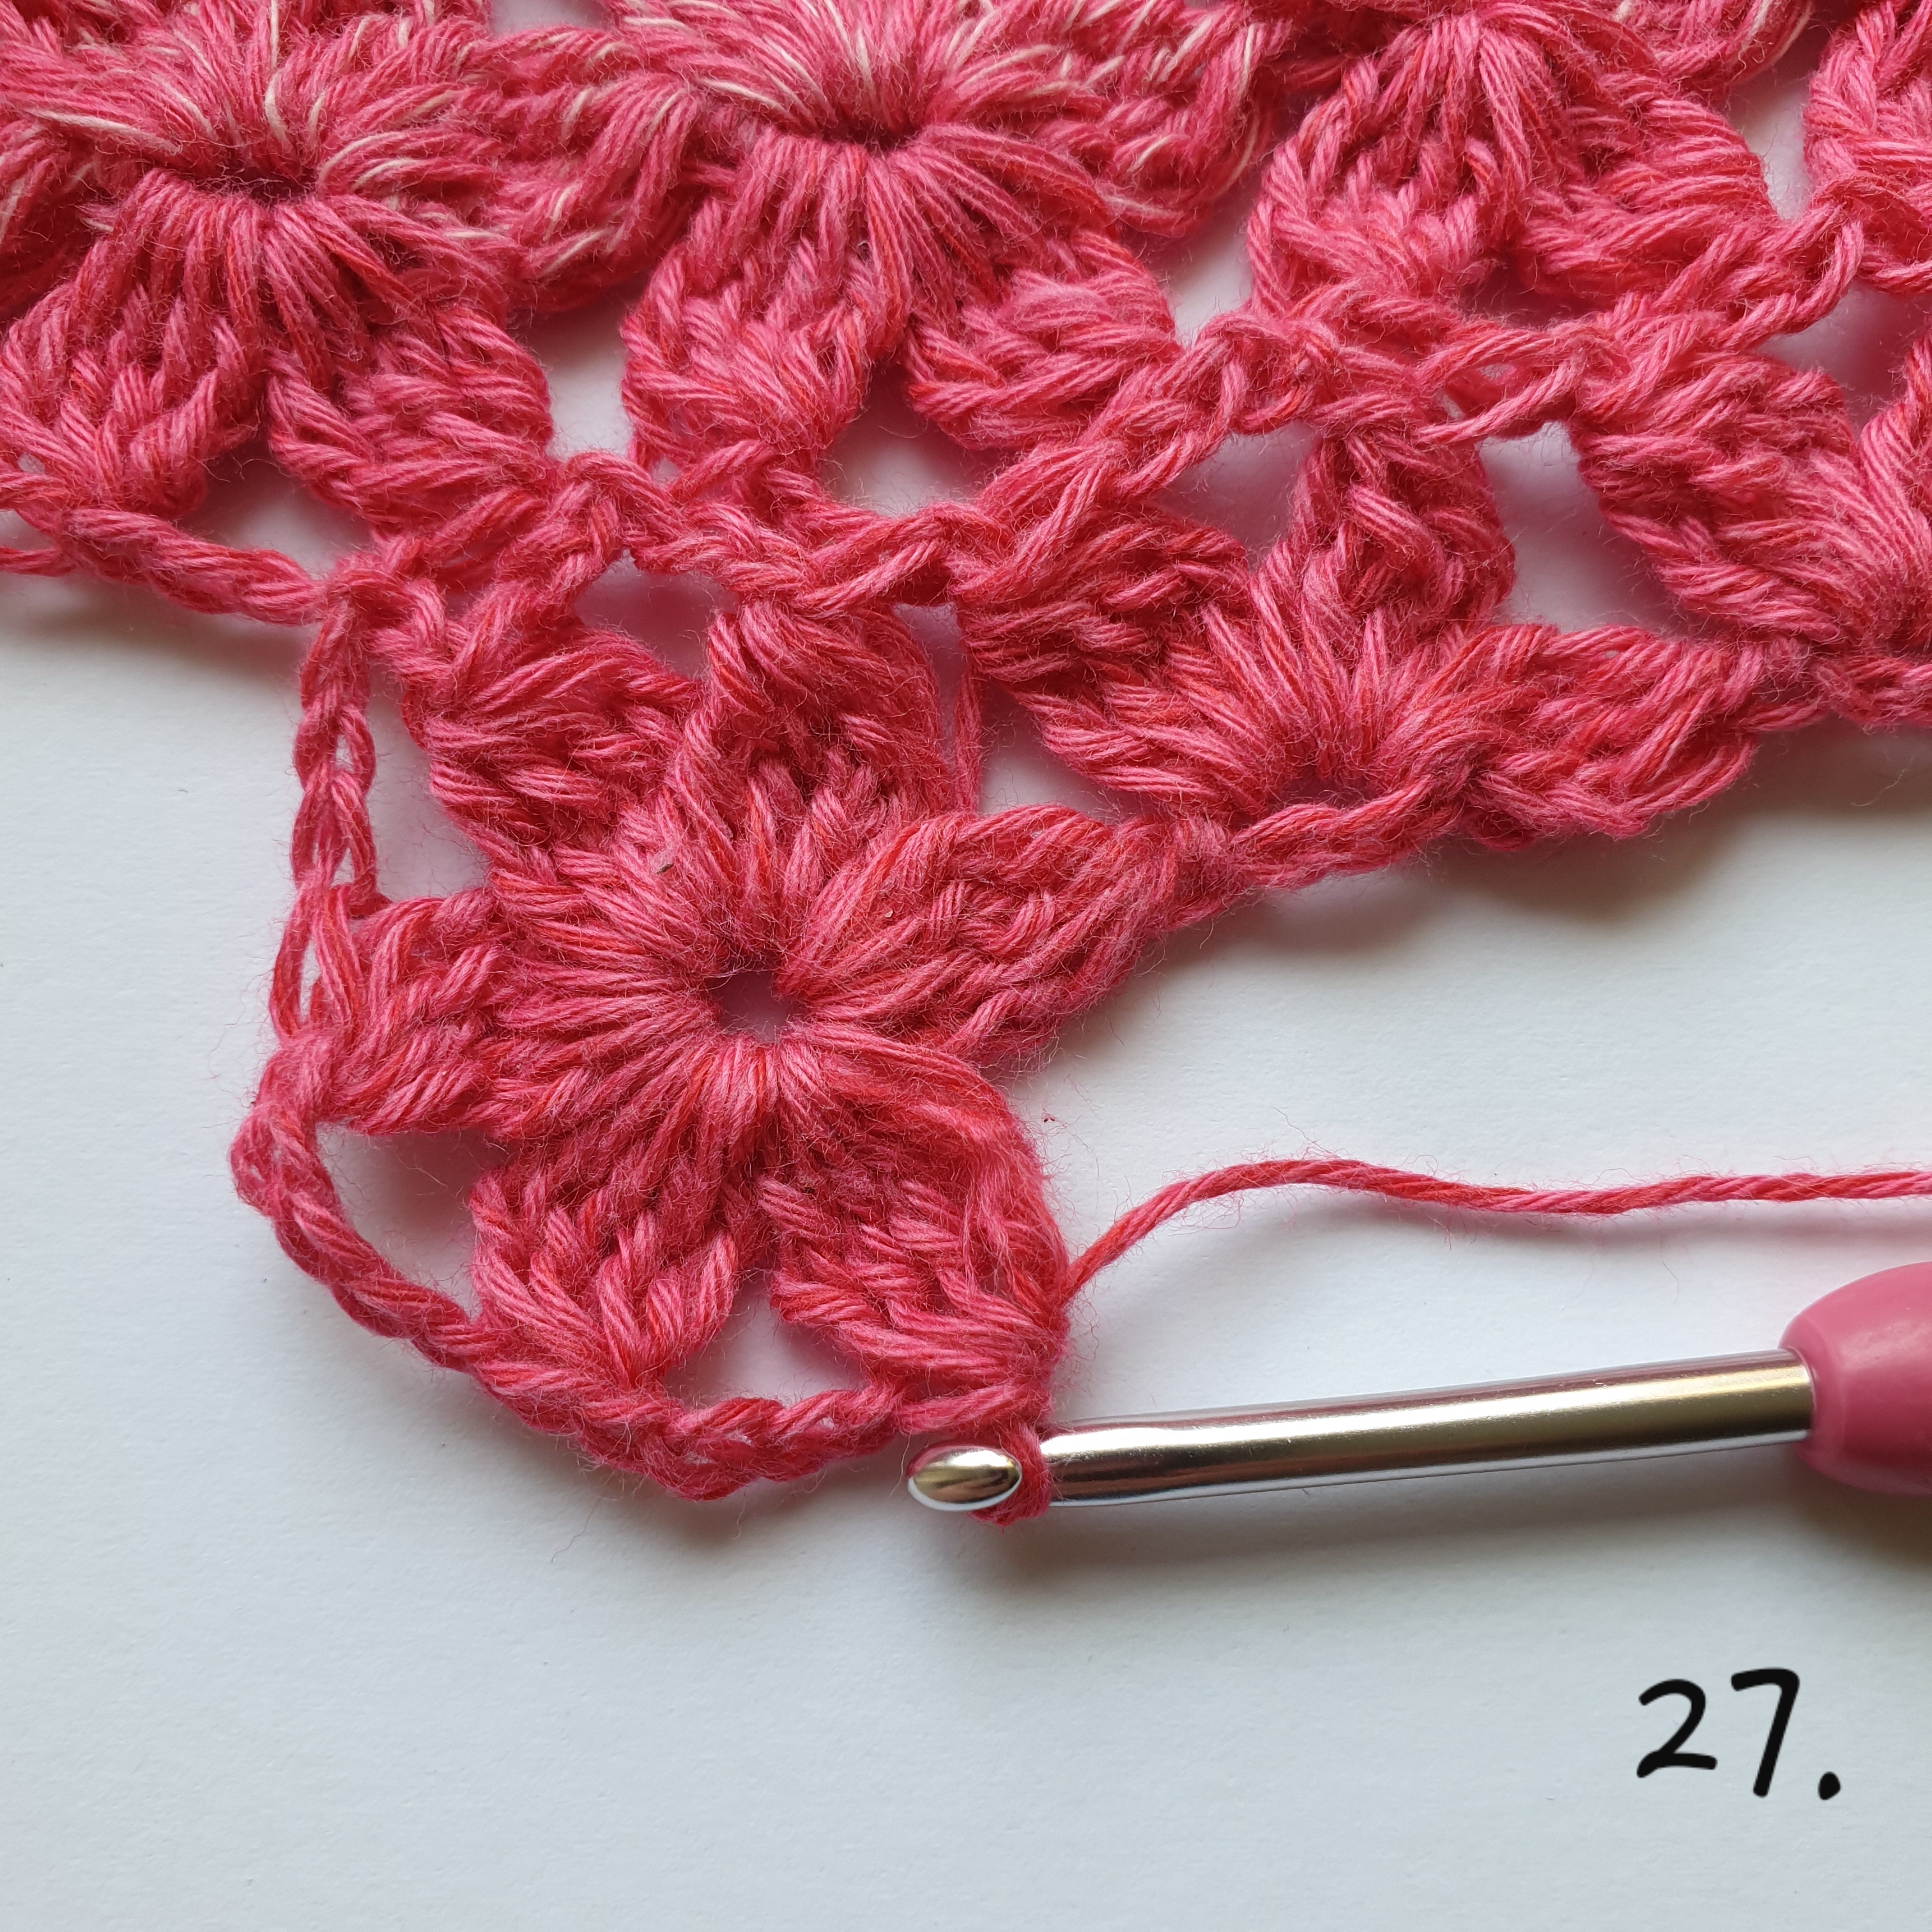
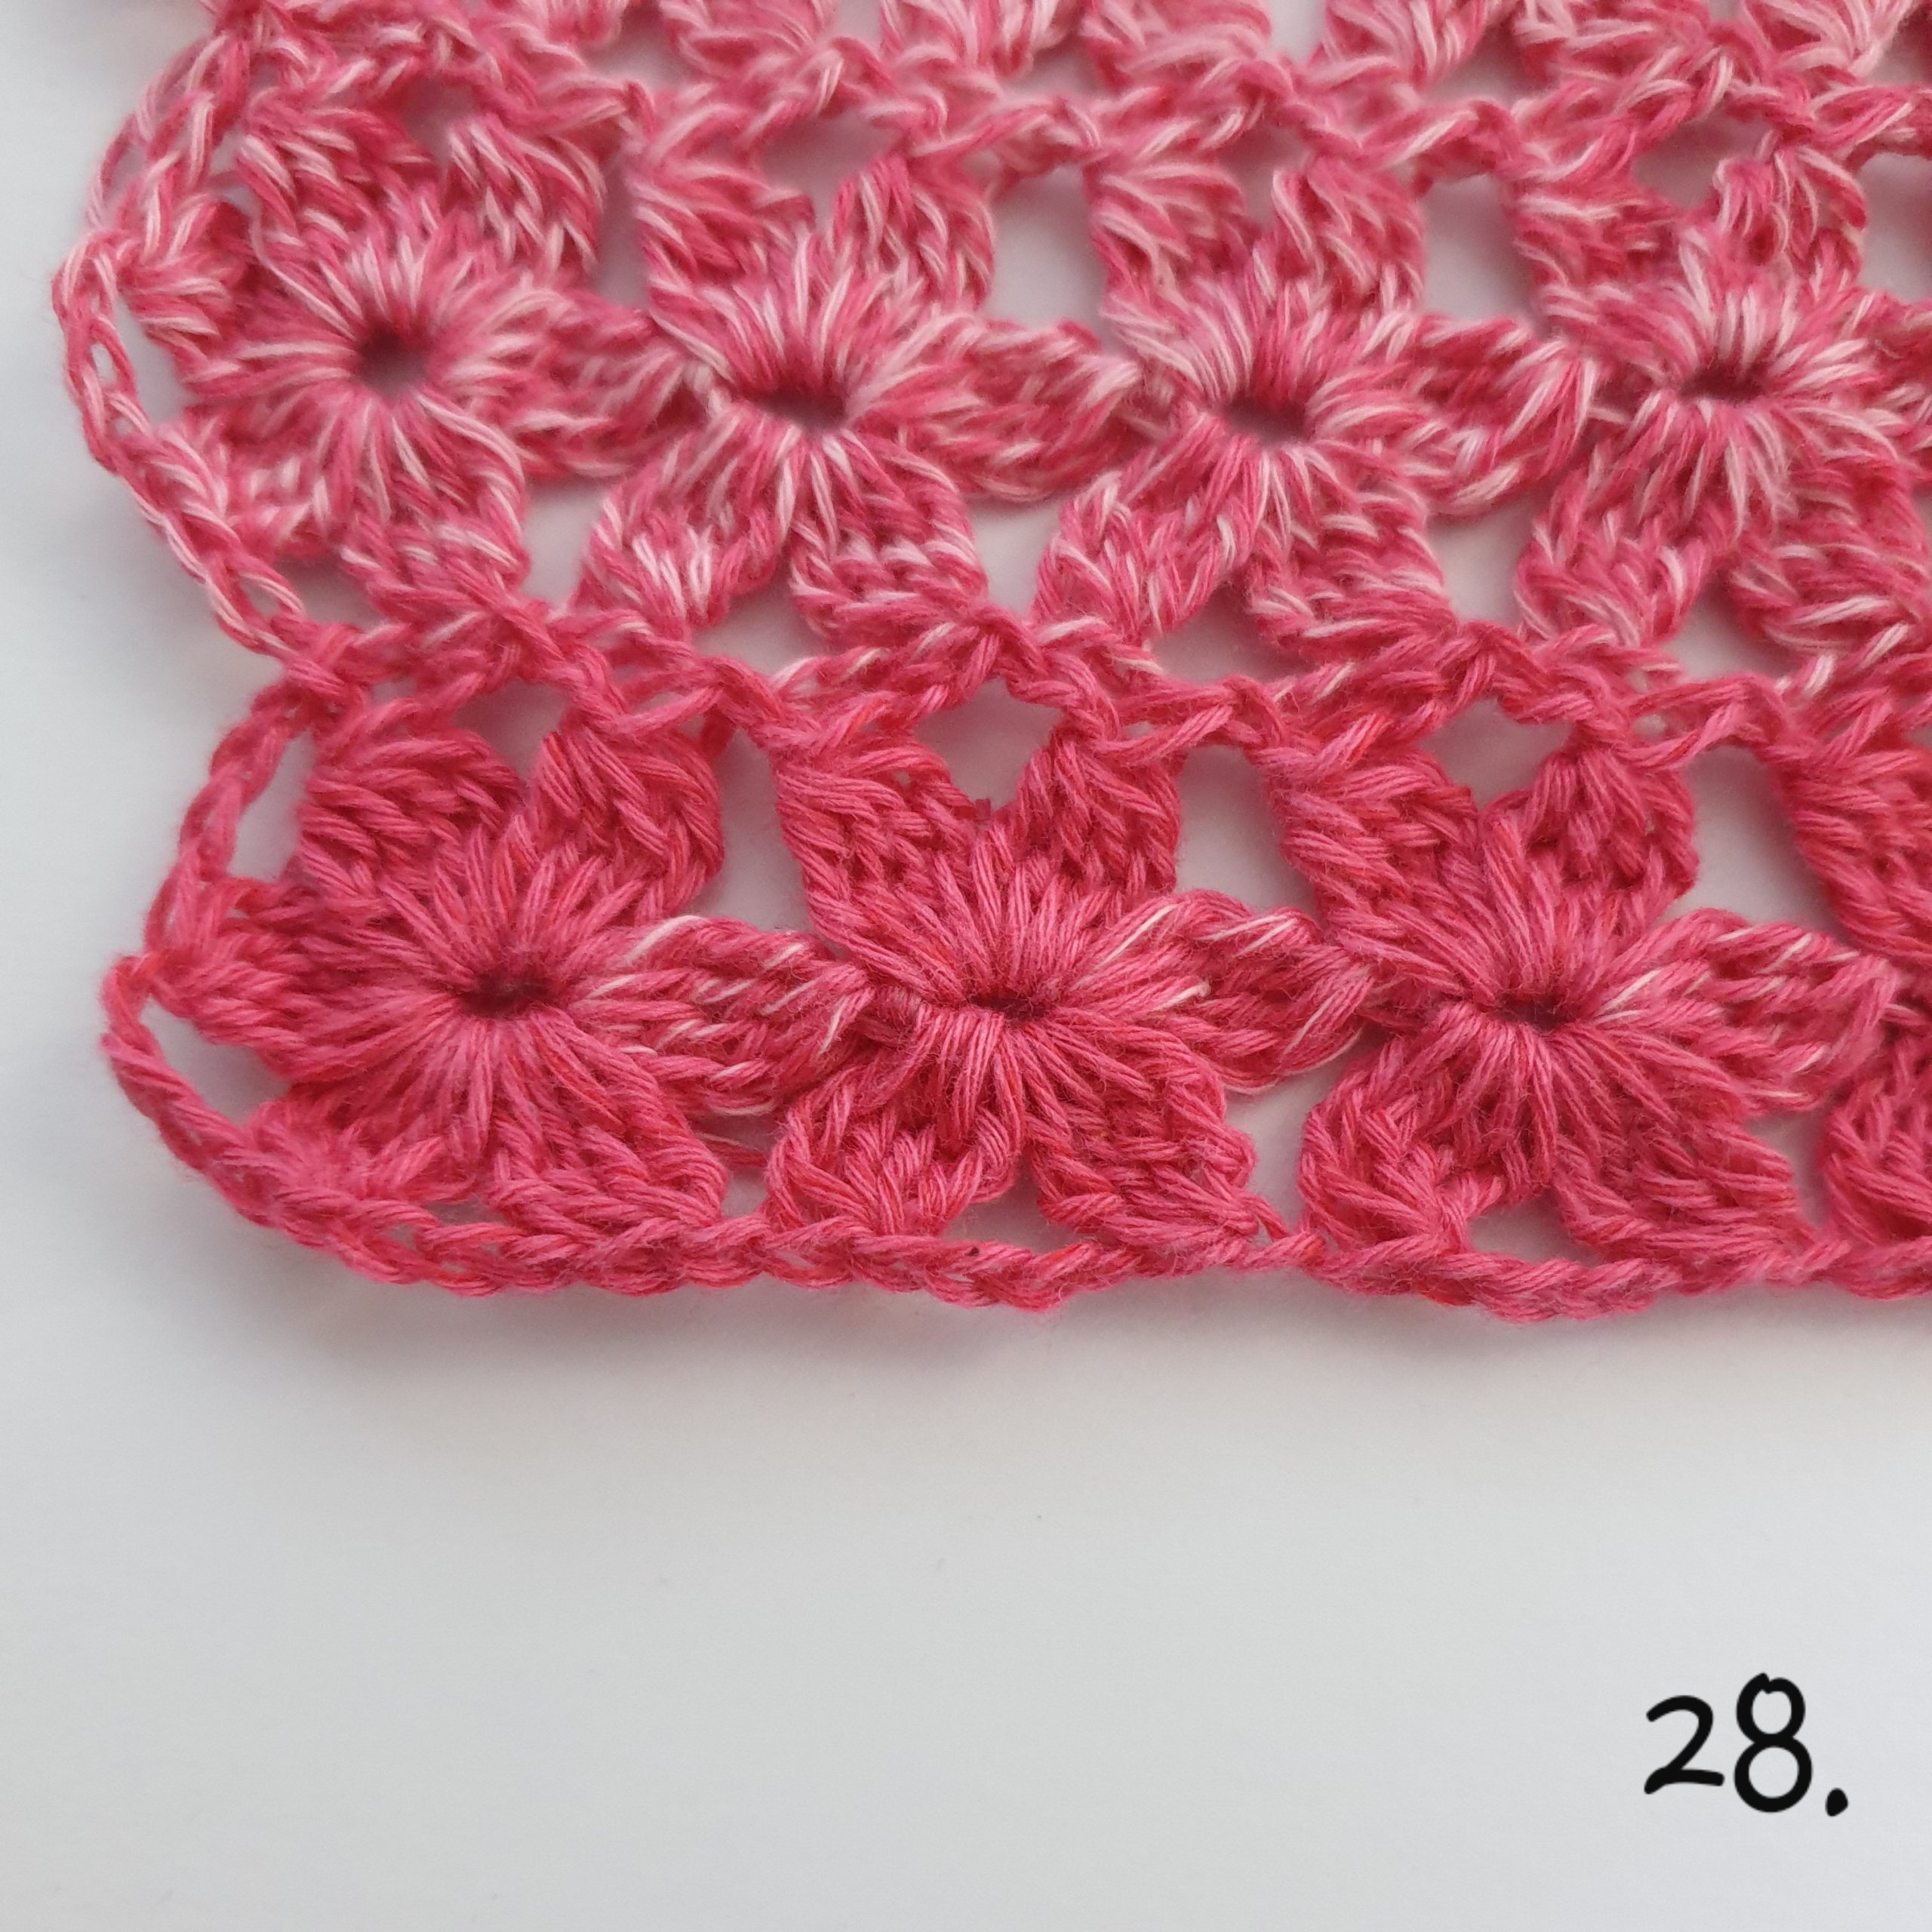
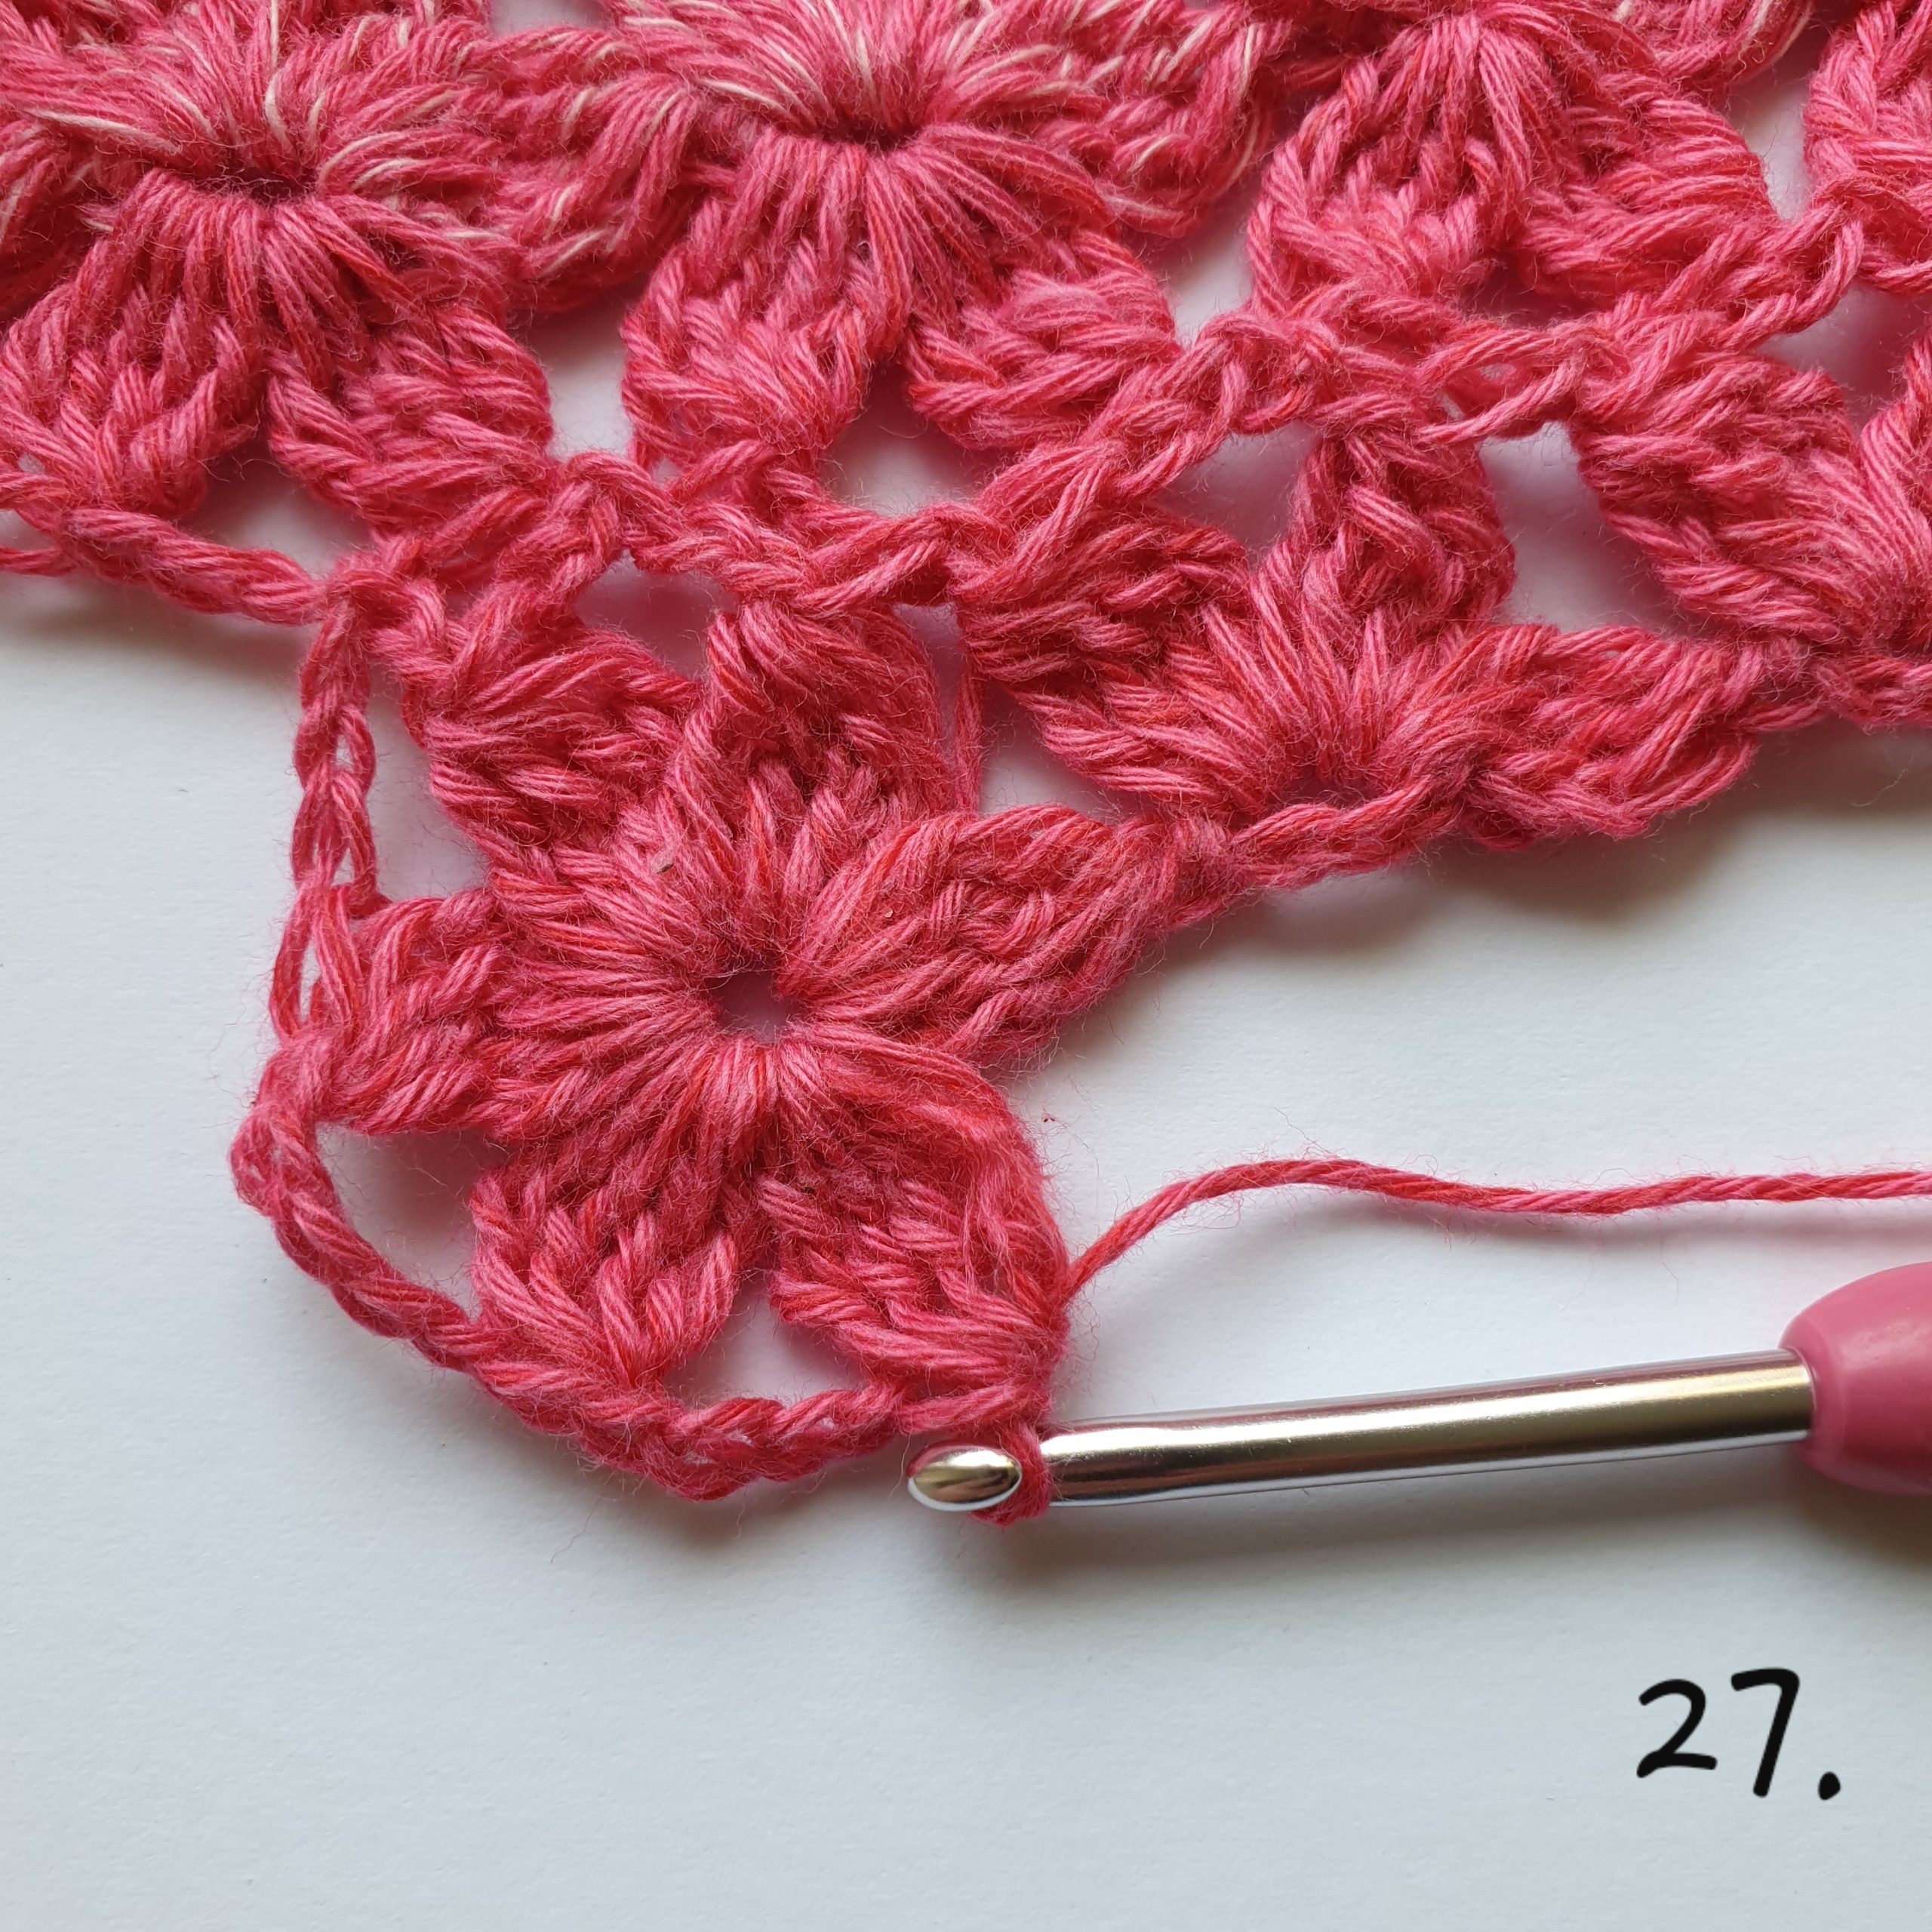
Picture 27: ch 4, dtr4tog, ch 4, dtr4tog) in the ring.
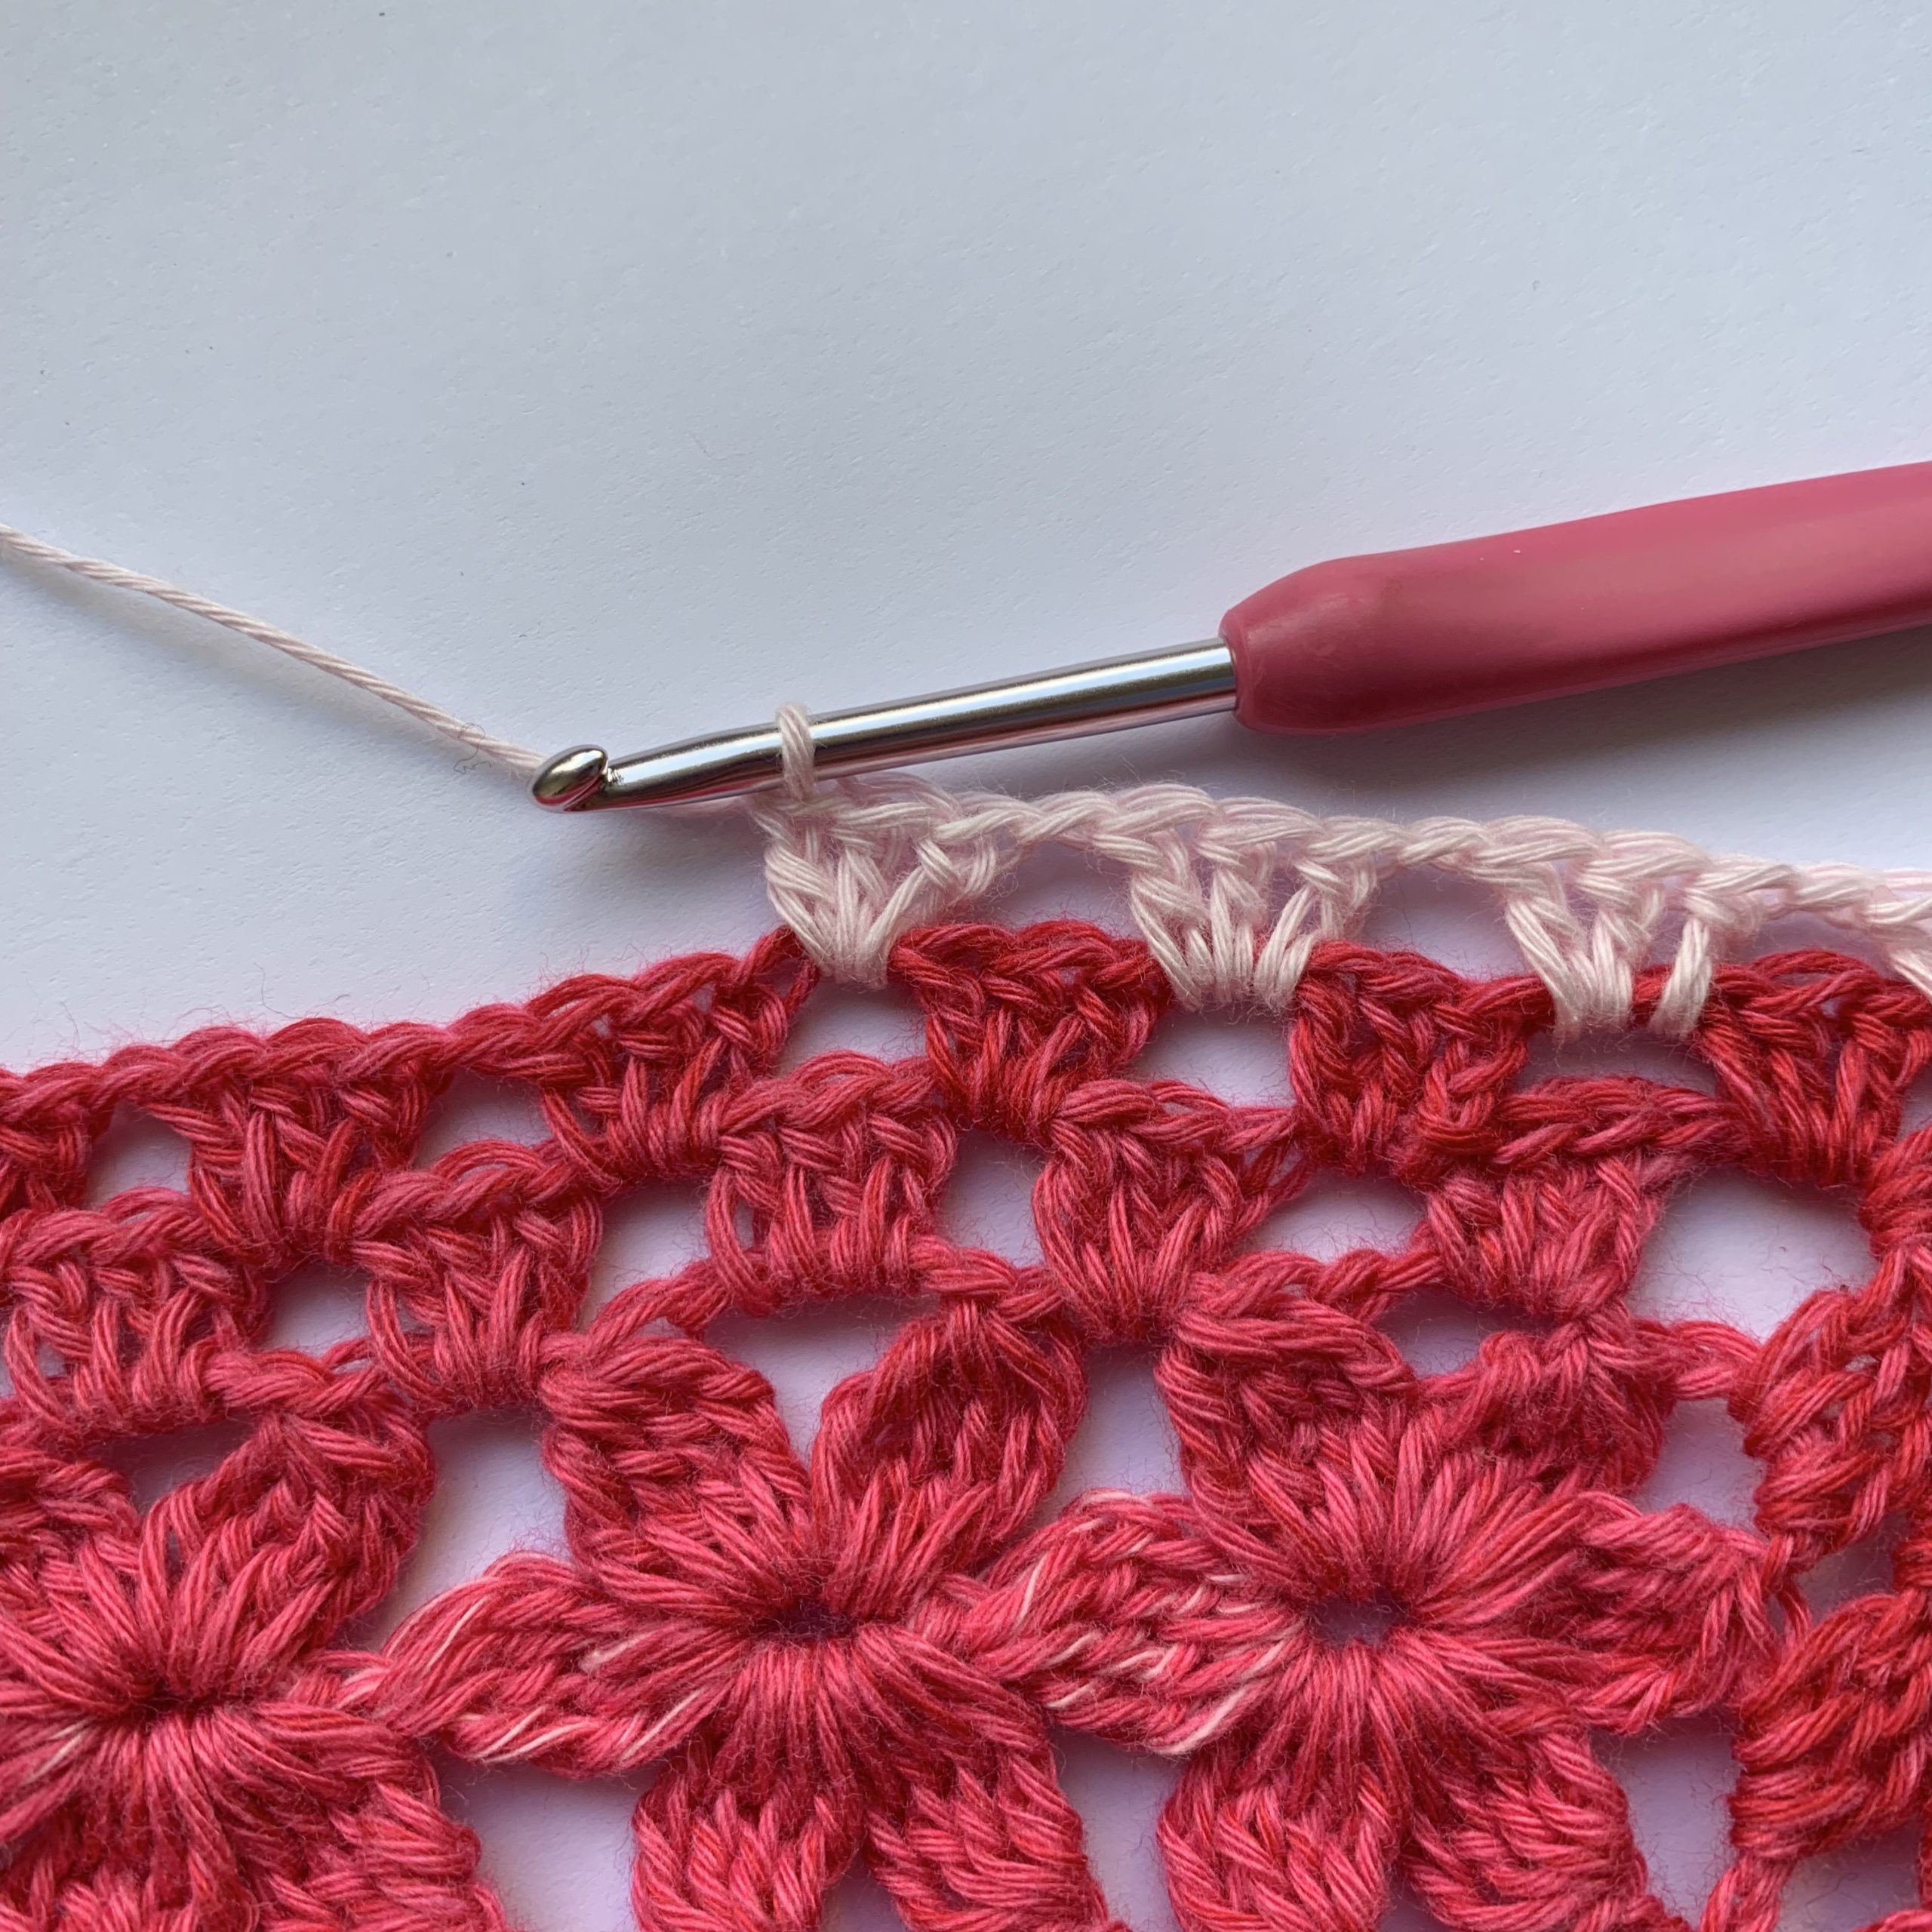
Row 3: *(dtr4tog in ne ring, ch 4, dtr4tog in same ring) *, repeat until you’ve done with the last ring, ch 4, slst in the dtr3tog. Cut the yarn.

Continue to make garlands and join them together until you have 18 garlands all joined together. The last garland should have 28 petals.
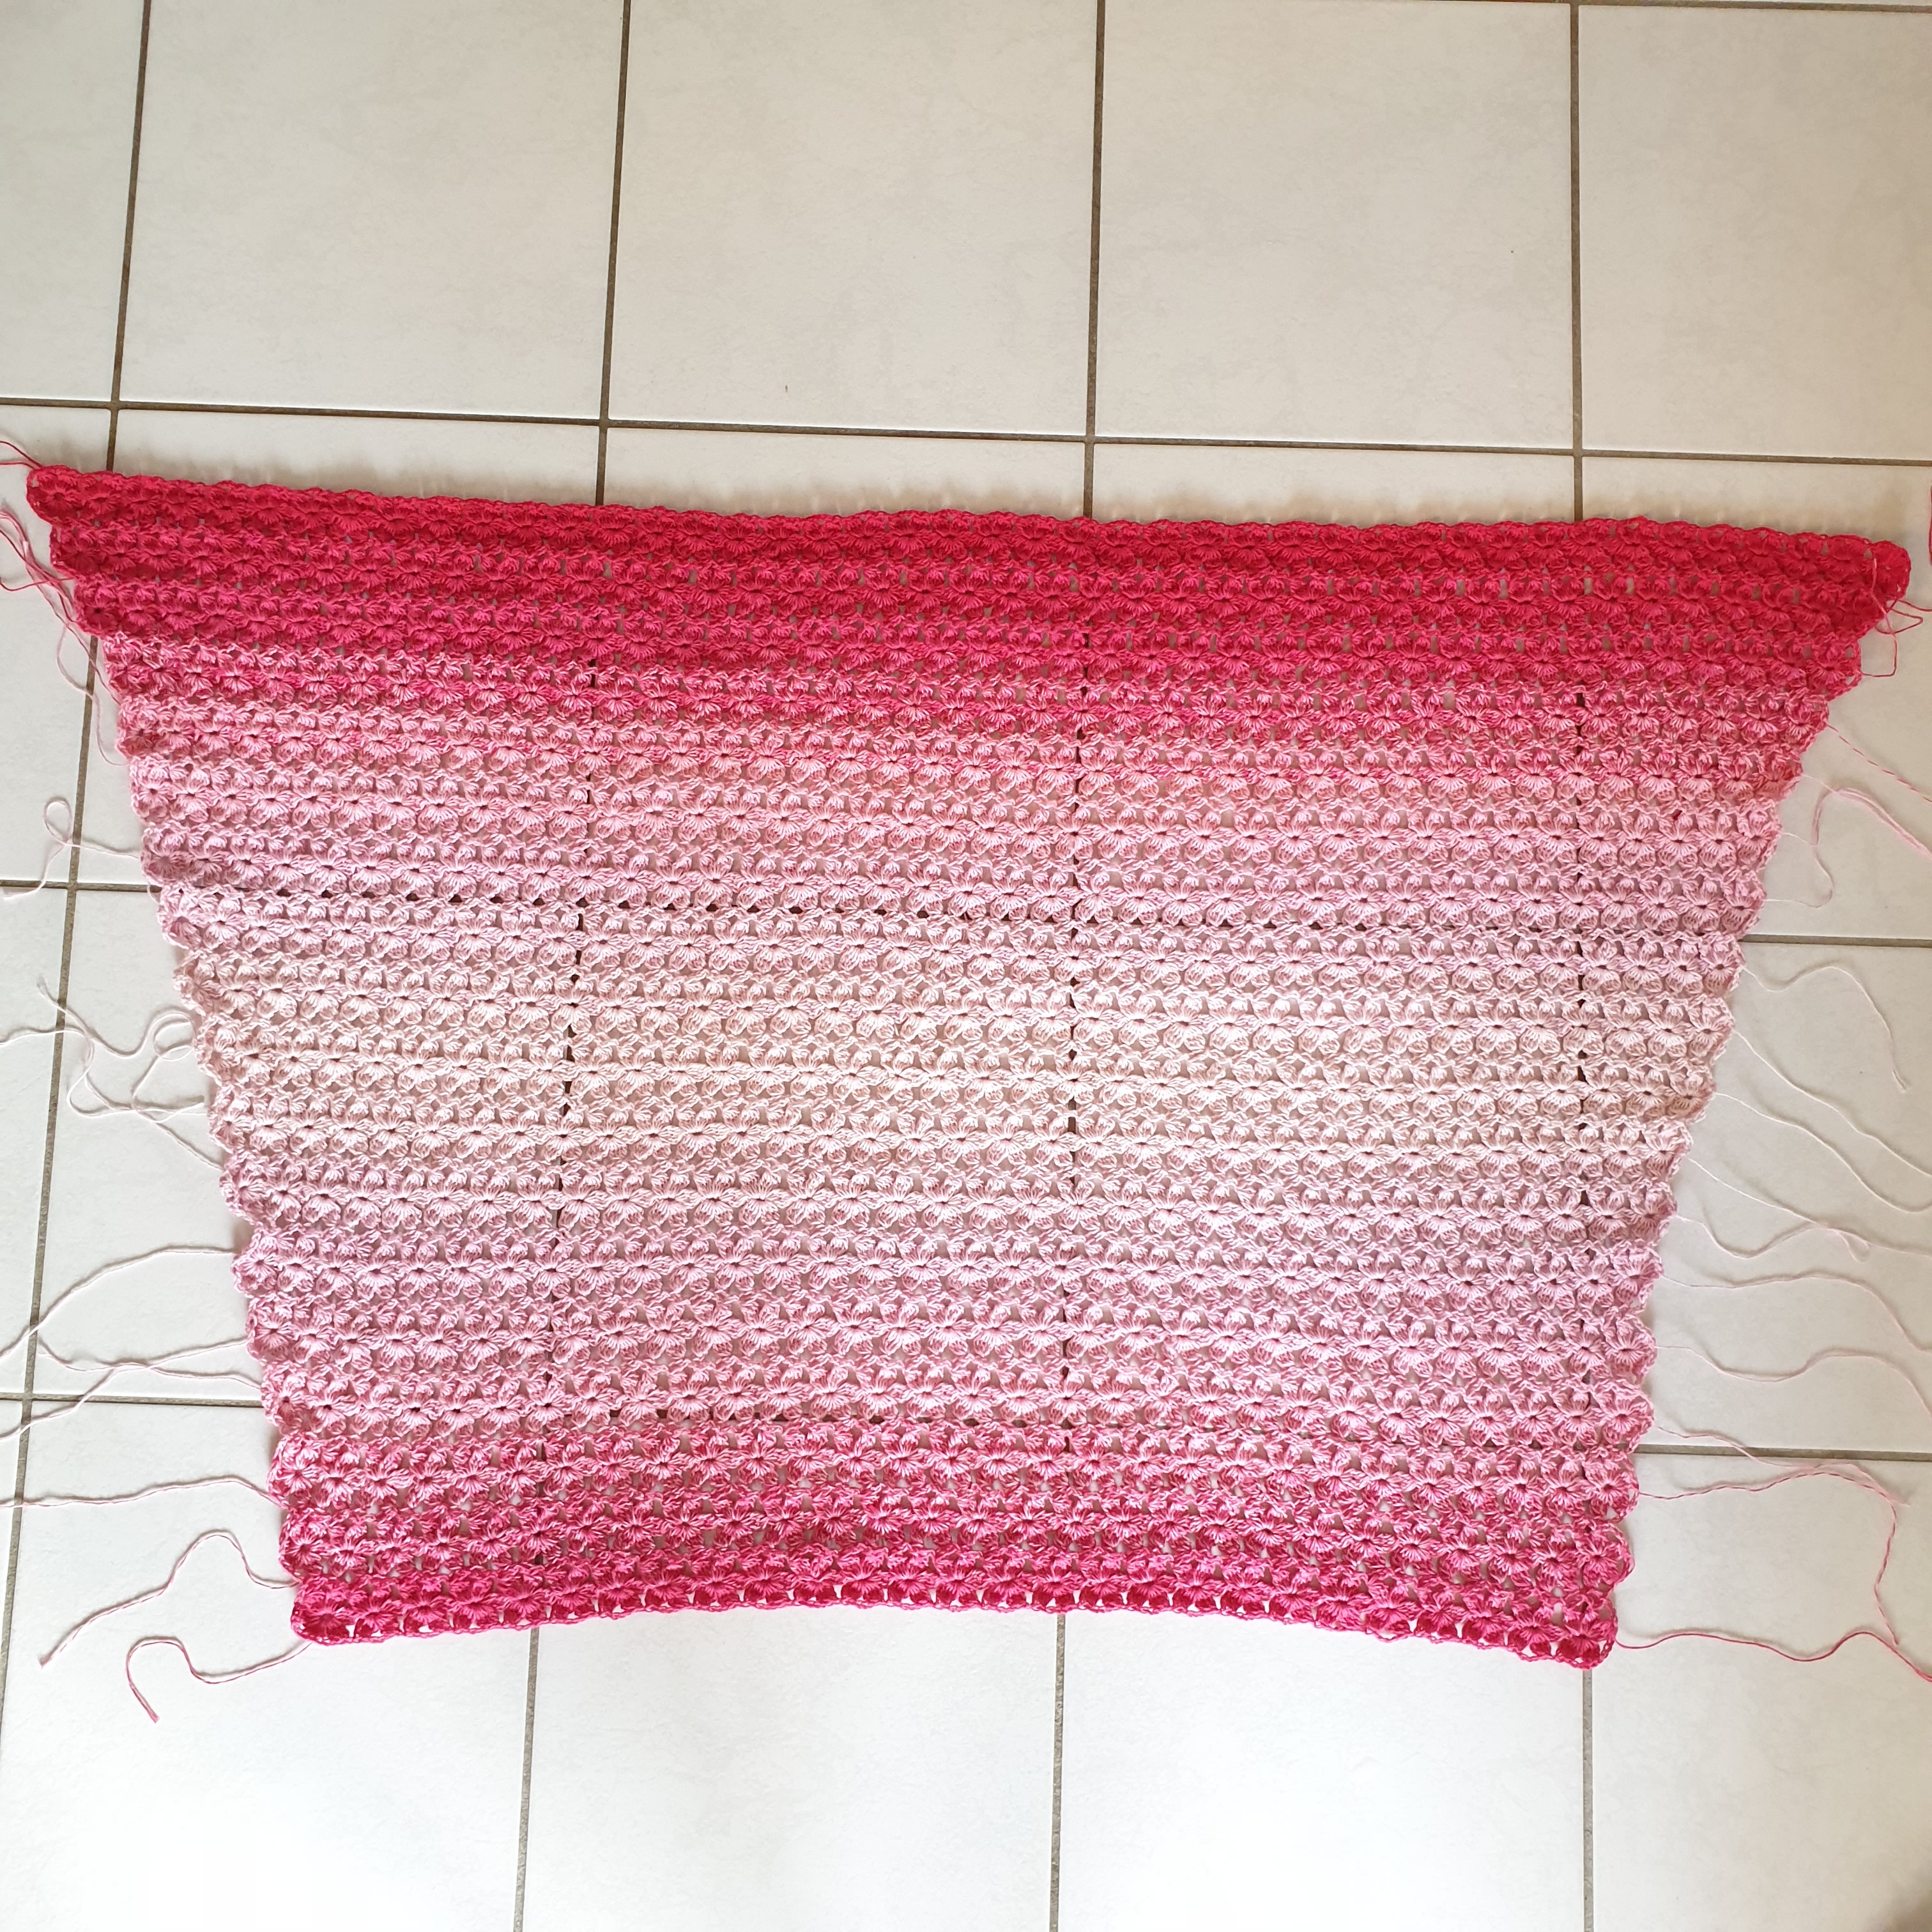
Fasten all your loose ends.
Now we shall make a 2round edge around the whole piece.
With the right side faceing up, start in the lower left hand corner (in the last chsp before next petal).
Row 1: Start with a standing tr or ch 3 in the chsp of the first flower, 2 tr in same chsp, ch 1, *3 tr between the flowers, ch 1, 3 tr in ne chsp*, repeat *-* along the whole side,
Ch 3, 3 tr in first chsp in ne side, *ch 1, 3 tr in ne chsp*, repeat *-* along the whole side,
Make the last two sides in the same way
Row 2: Slst until first chsp, {*3 tr in chsp, ch 1* repeat *-* until you reach the ch3sp in the corner, (3 tr, ch 1, 3 tr) in corner chsp}, repeat {-} around. Cut the yarn.
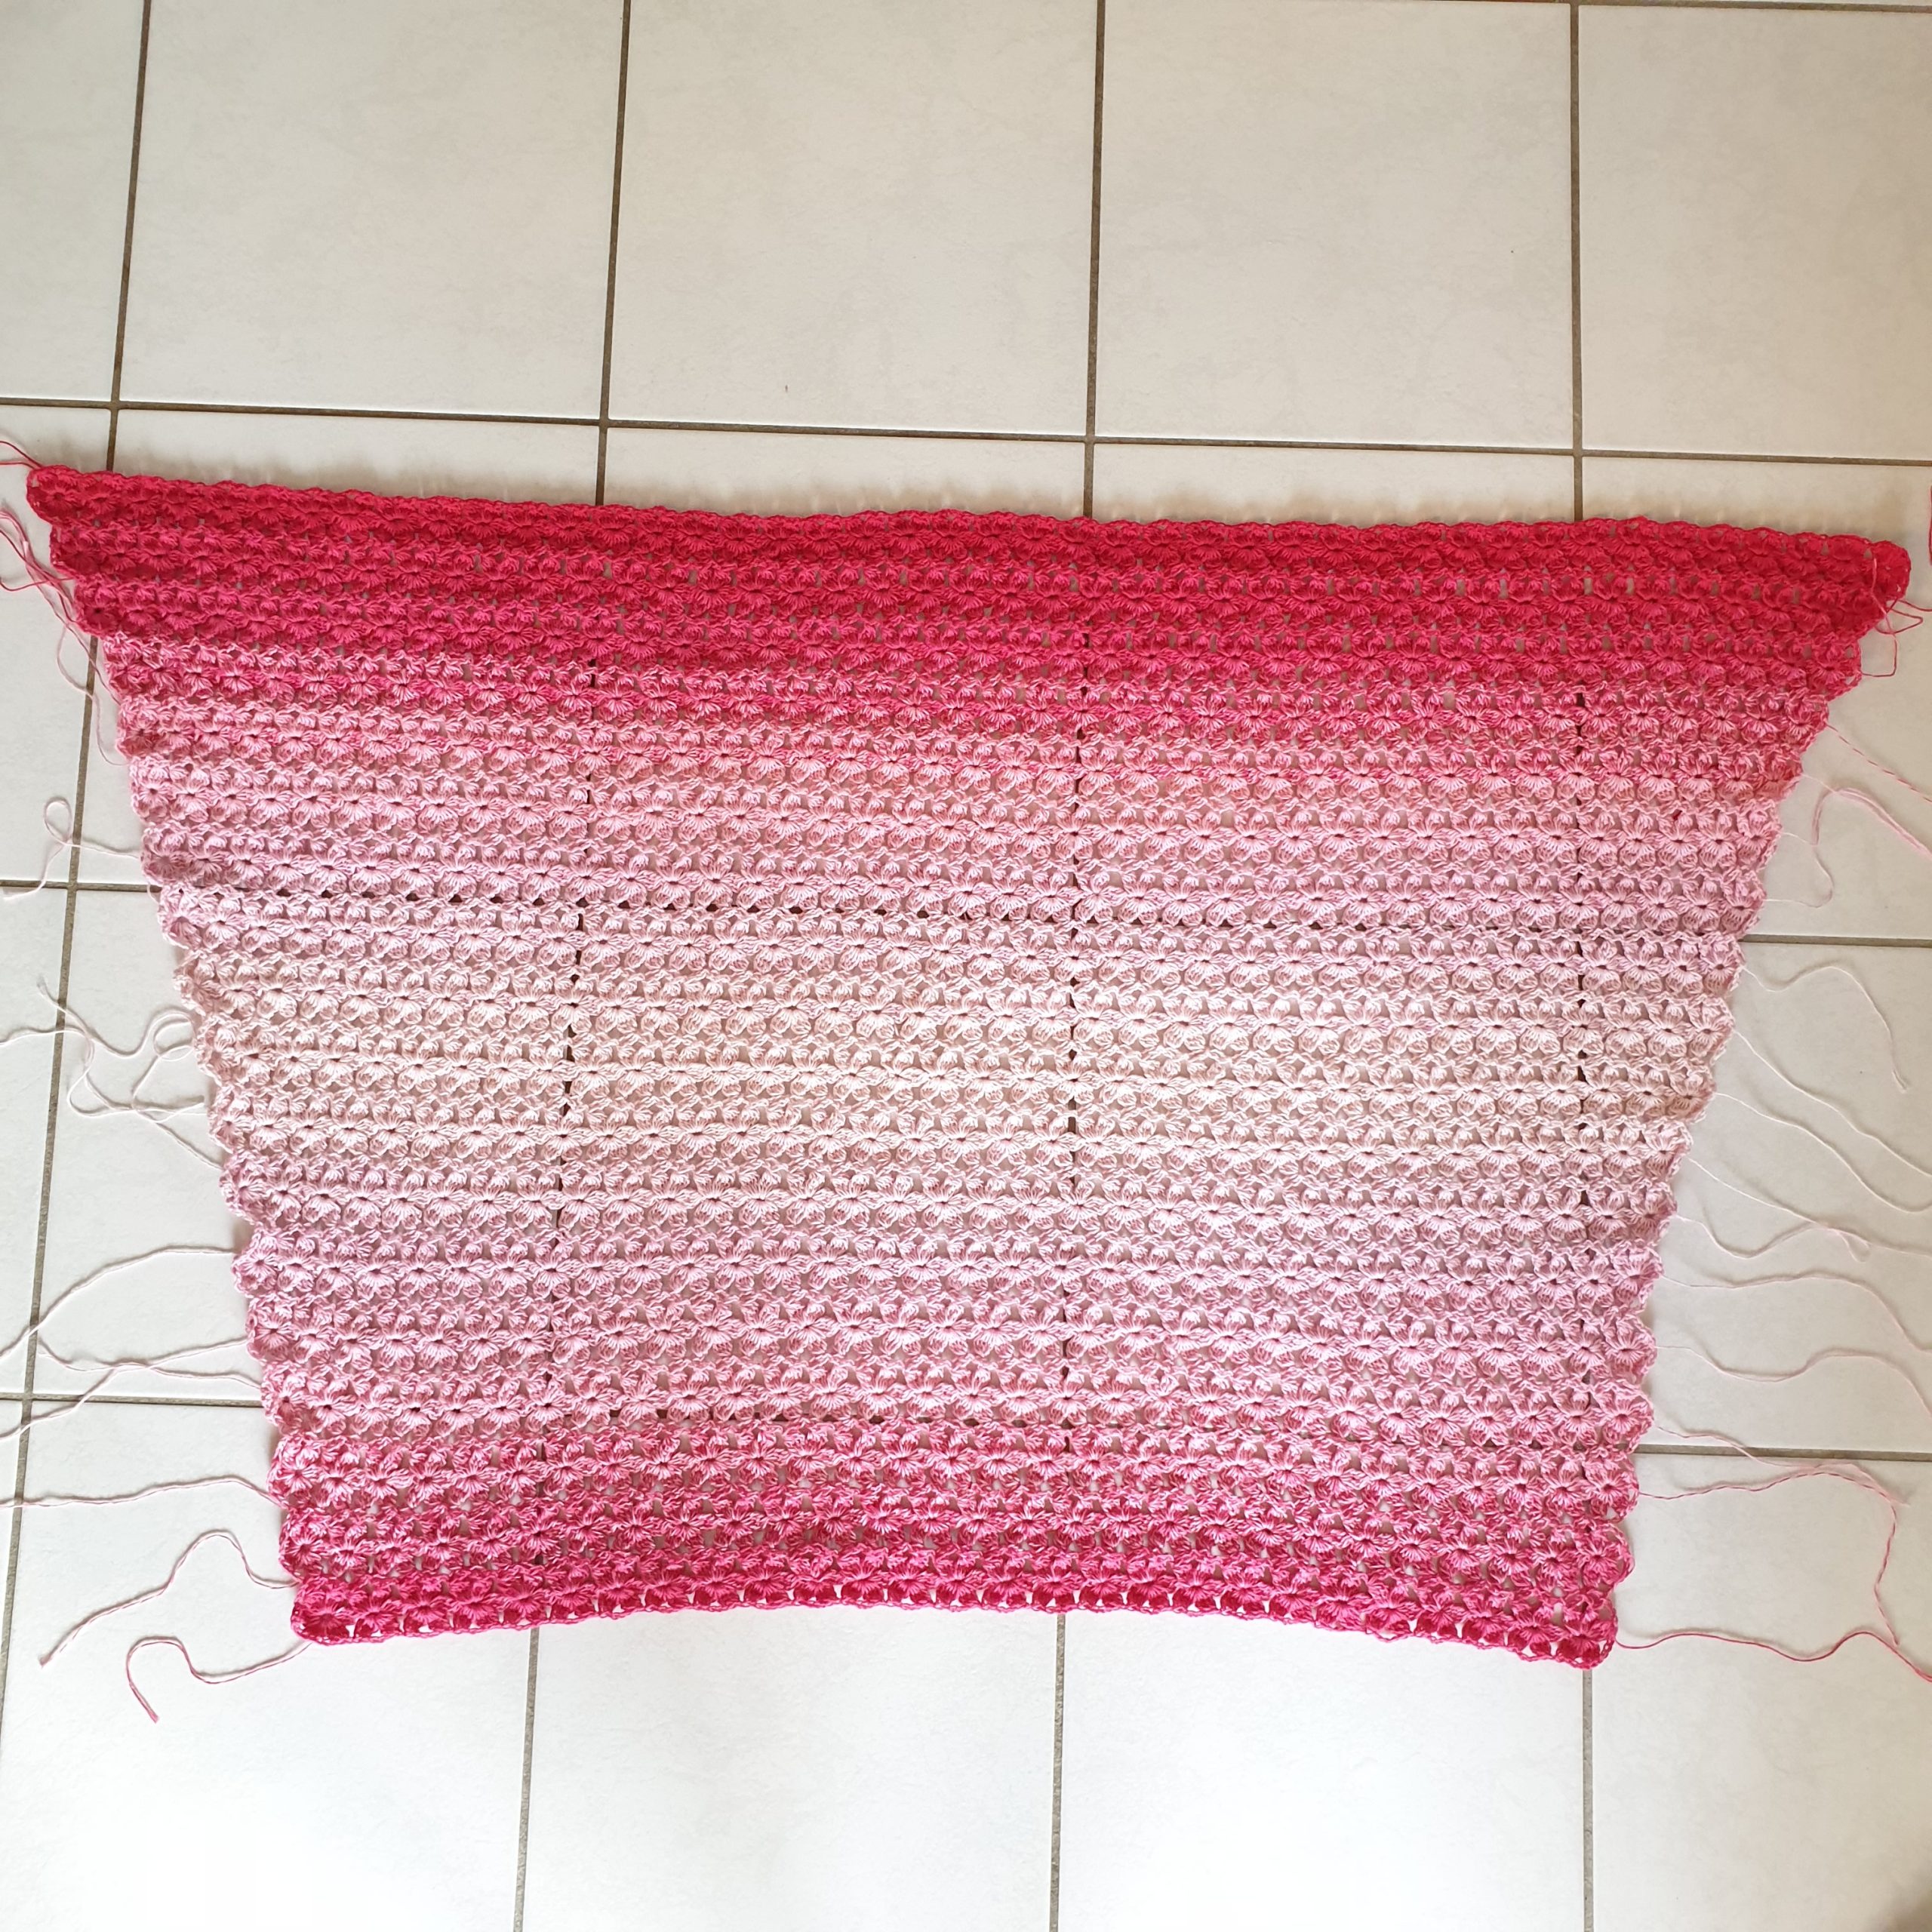
Put your work flat with the wrong side faceing up, fold in the corners as the picture shows.
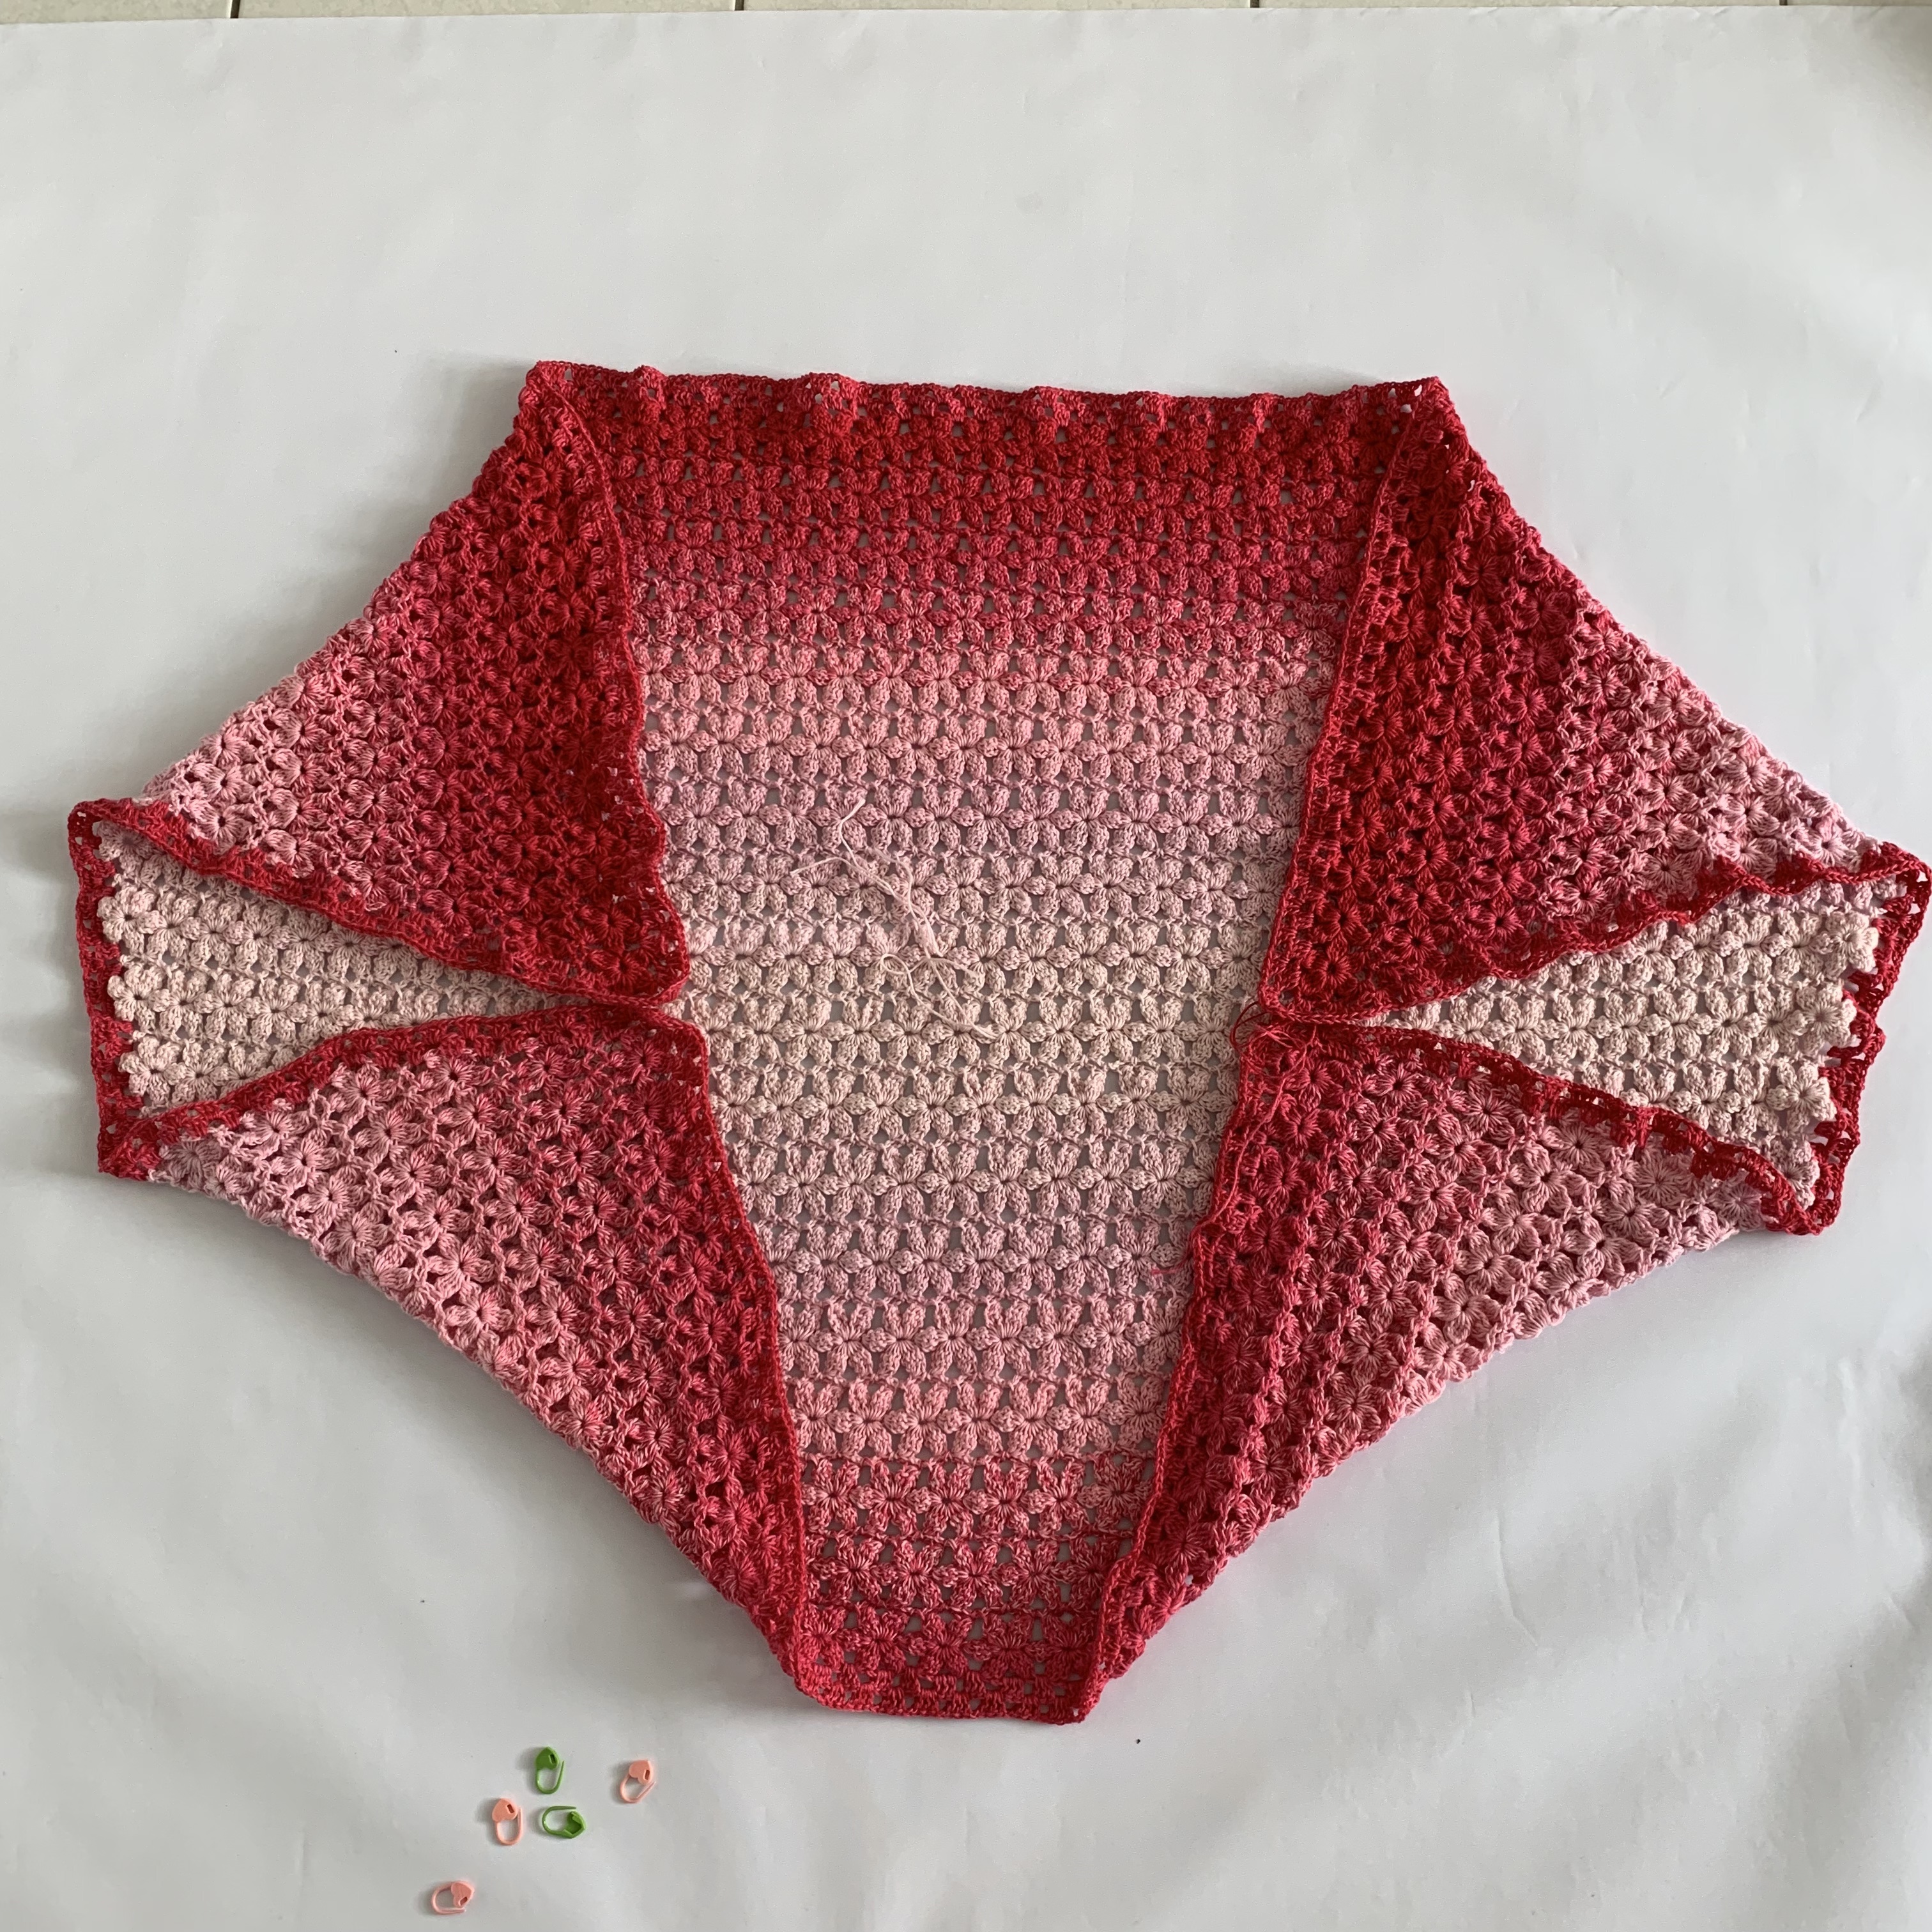
Attach a stitchmark where the corners meet and a stitchmark in the 15th chsp. Do this on both sides.
Seam or crochet together between the stitchmarks.
Fasten the ends.
Now we should work the egding around the collar and the sleeves.
To have the color on the remaining whirl evenly spread, I crochet one row at the time along the collar and sleeves.
Make one row with Whirlette and one row with Whirl.
The Collar:
Row 1: Whirlette. Start with a standing tr or ch 3, in one of the corners where you attached the corners together, tr2tog (first tr in first chsp, second tr in the second chsp), make another tr in the second corner chsp, 3 tr in every chsp until you reach the other side where you attached the corners together, (1 tr, tr2tog, 1 tr) 3 tr in every chsp, repeat around, slst in first st. Cut the yarn.
Row 2: Whirl. Start with a standing tr (or ch 3) between any of the tr groups, 2 tr in same sp*, sk 3 tr, 3 tr in next space* repeat *-* around, slst in first st. Cut the yarn.
Row 3: Whirlette. Repeat previous row.
Row 4: Whirl. Repeat row 2.
Row 5: Whirlette. Repeat row 2.
Row 6: Whirl. Repeat row 2.
Row 7: Whirlette. Start with a standing htr (or ch 2) in any st, 1 htr in every st around, slst in first st.
Row 8: Whirlette. Ch 2, 1 htr in every st around, slst in first st.
Row 9: Whirlette. Ch 1, 1 dc in same st, 1 dc in every st around, slst in first dc.
Row 10: Whirlette. Repeat previous row.
Row 11: Whirl. Repeat row 8.
Row 12: Whirl. Repeat row 8.
Row 13: Whirlette. Repeat row 8.
Row 14: Whirlette. Repeat row 8.
Row 15: Whirlette: Crabstitch around. Cut the yarn and fasten off.

Sleeves:
Row 1: Whirlette. Start with a standing tr or ch 3, in one of the spaces where you attached the sides together, tr2tog (first tr in first chsp, second tr in the second chsp), make another tr in the second chsp, 3 tr in every chsp around slst in first st. Cut the yarn.
Row 2: Whirl. Start with a standing tr (or ch 3) between any of the tr groups, 2 tr in same sp*, sk 3 tr, 3 tr in next space* repeat *-* around, slst in first st. Cut the yarn.
Row 3: Whirlette. Repeat previous row.
Row 4: Whirl. Repeat row 2.
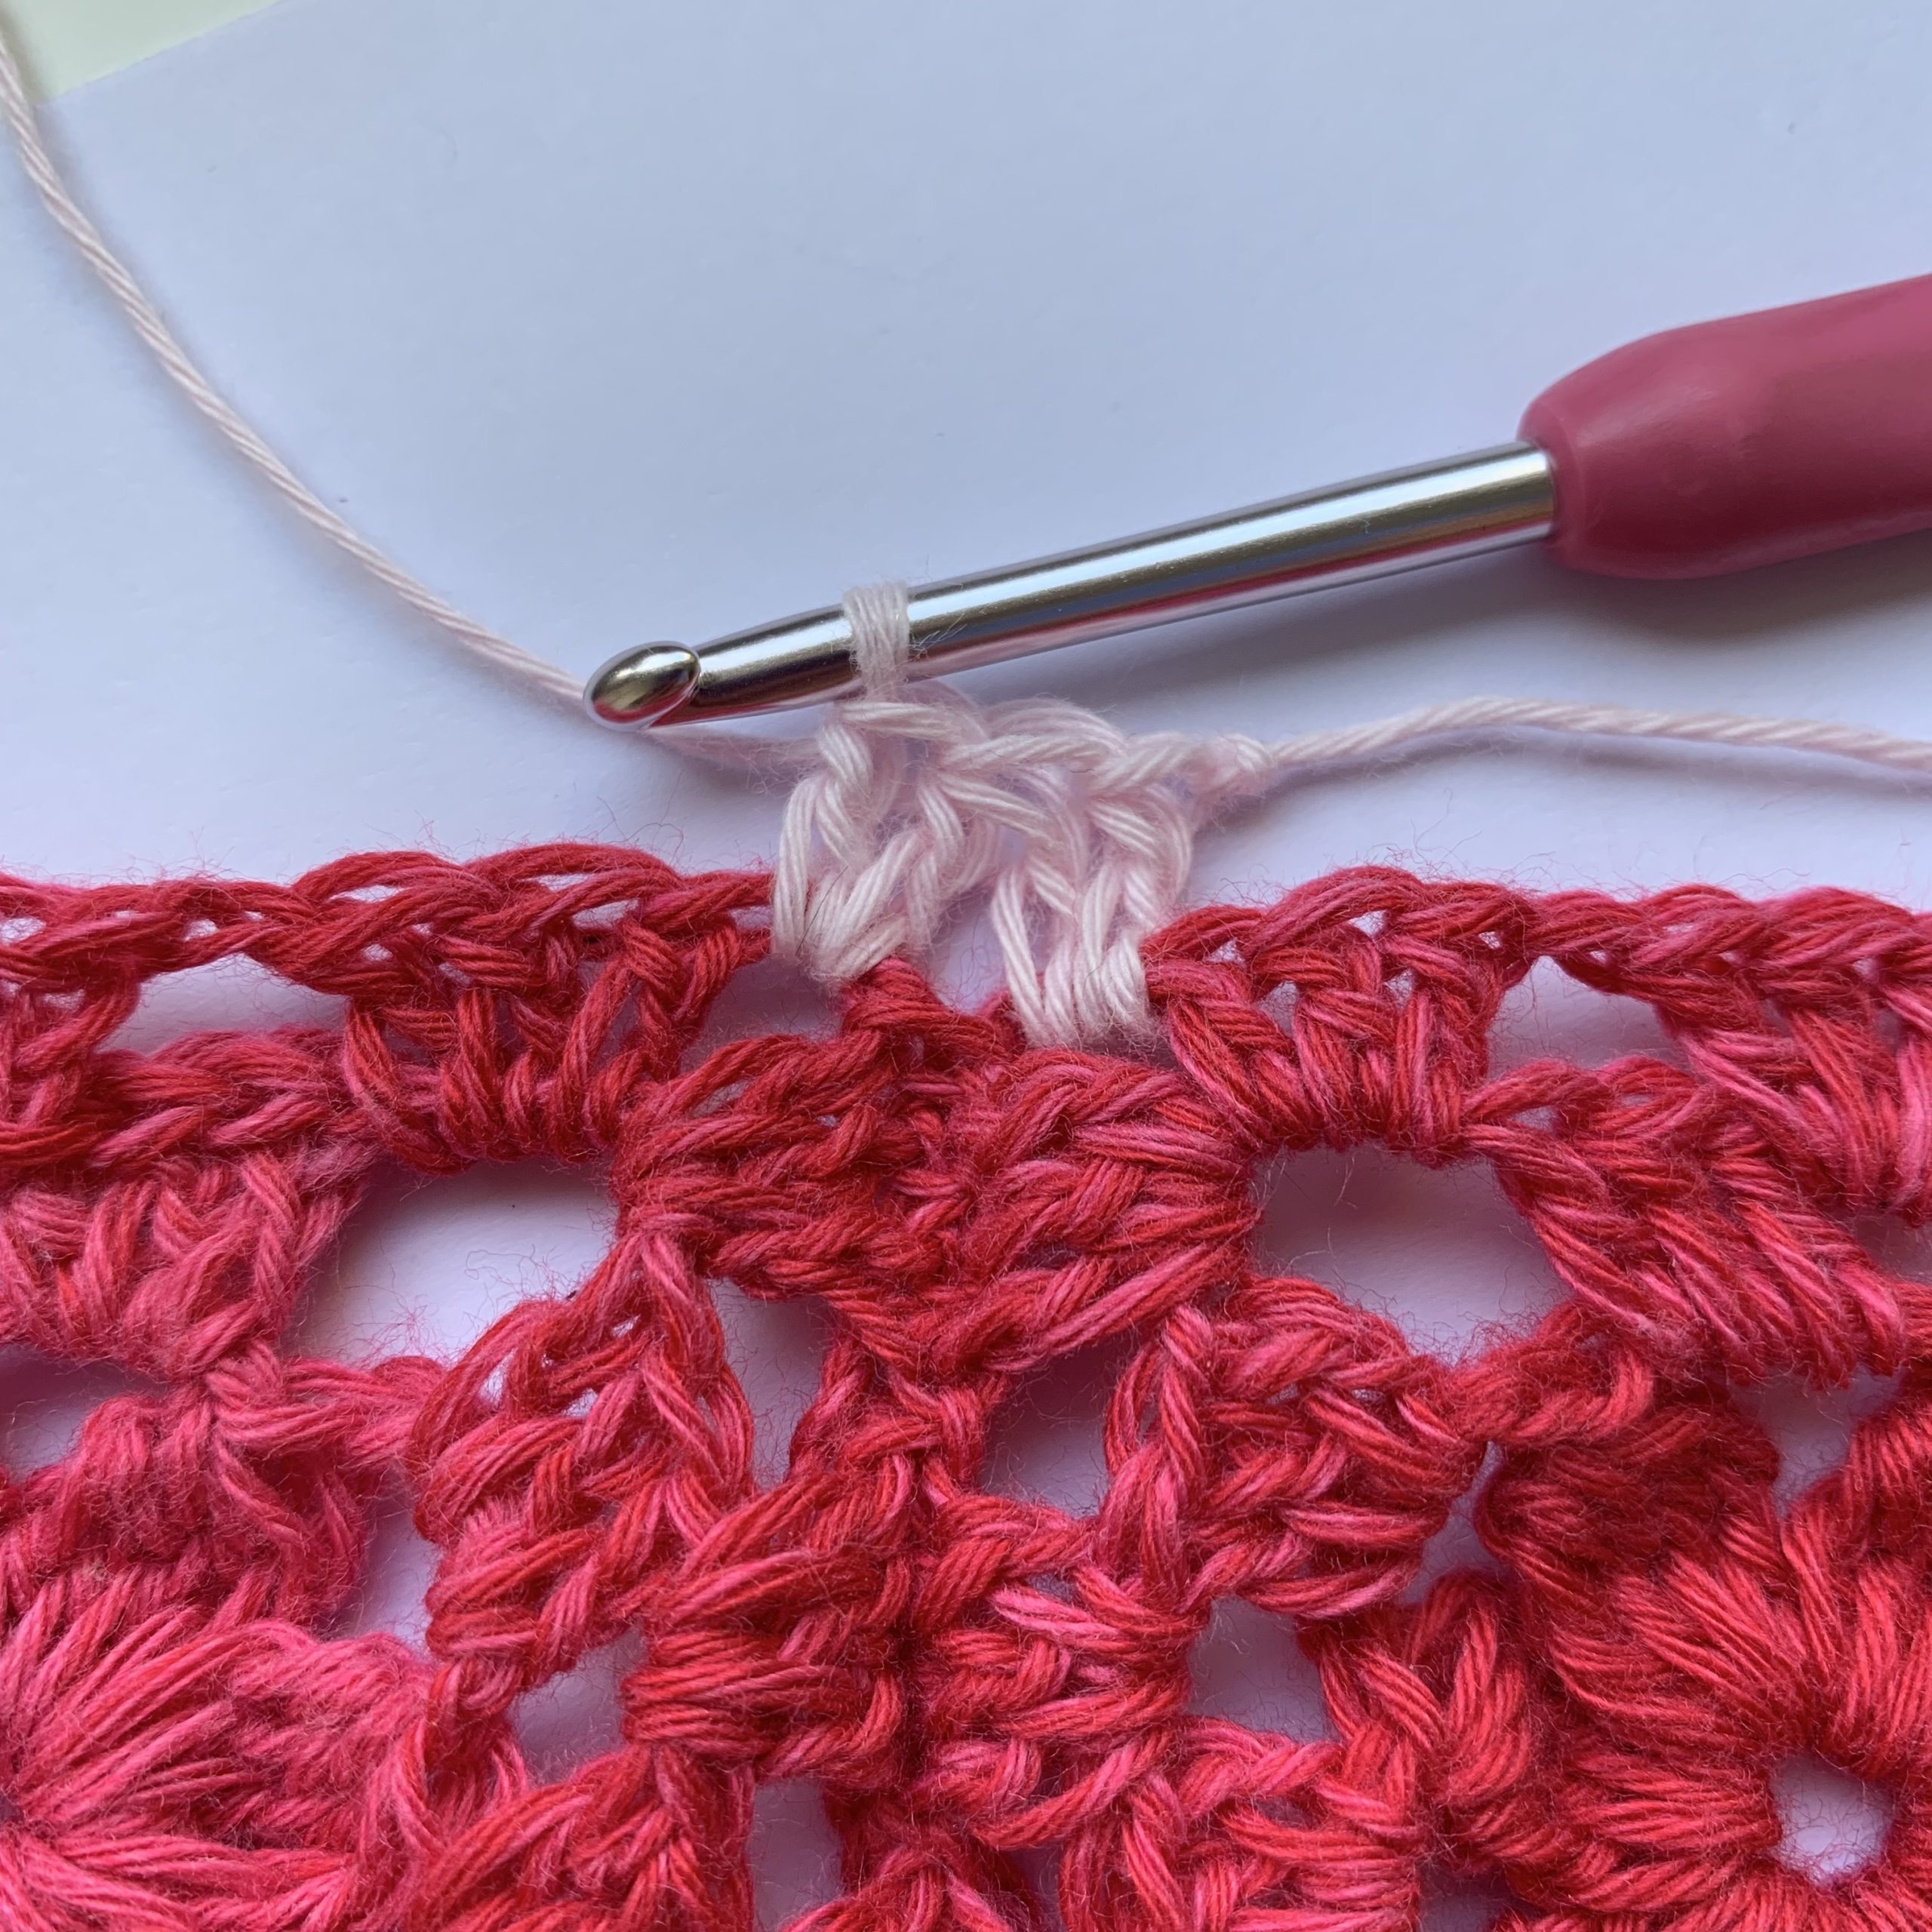
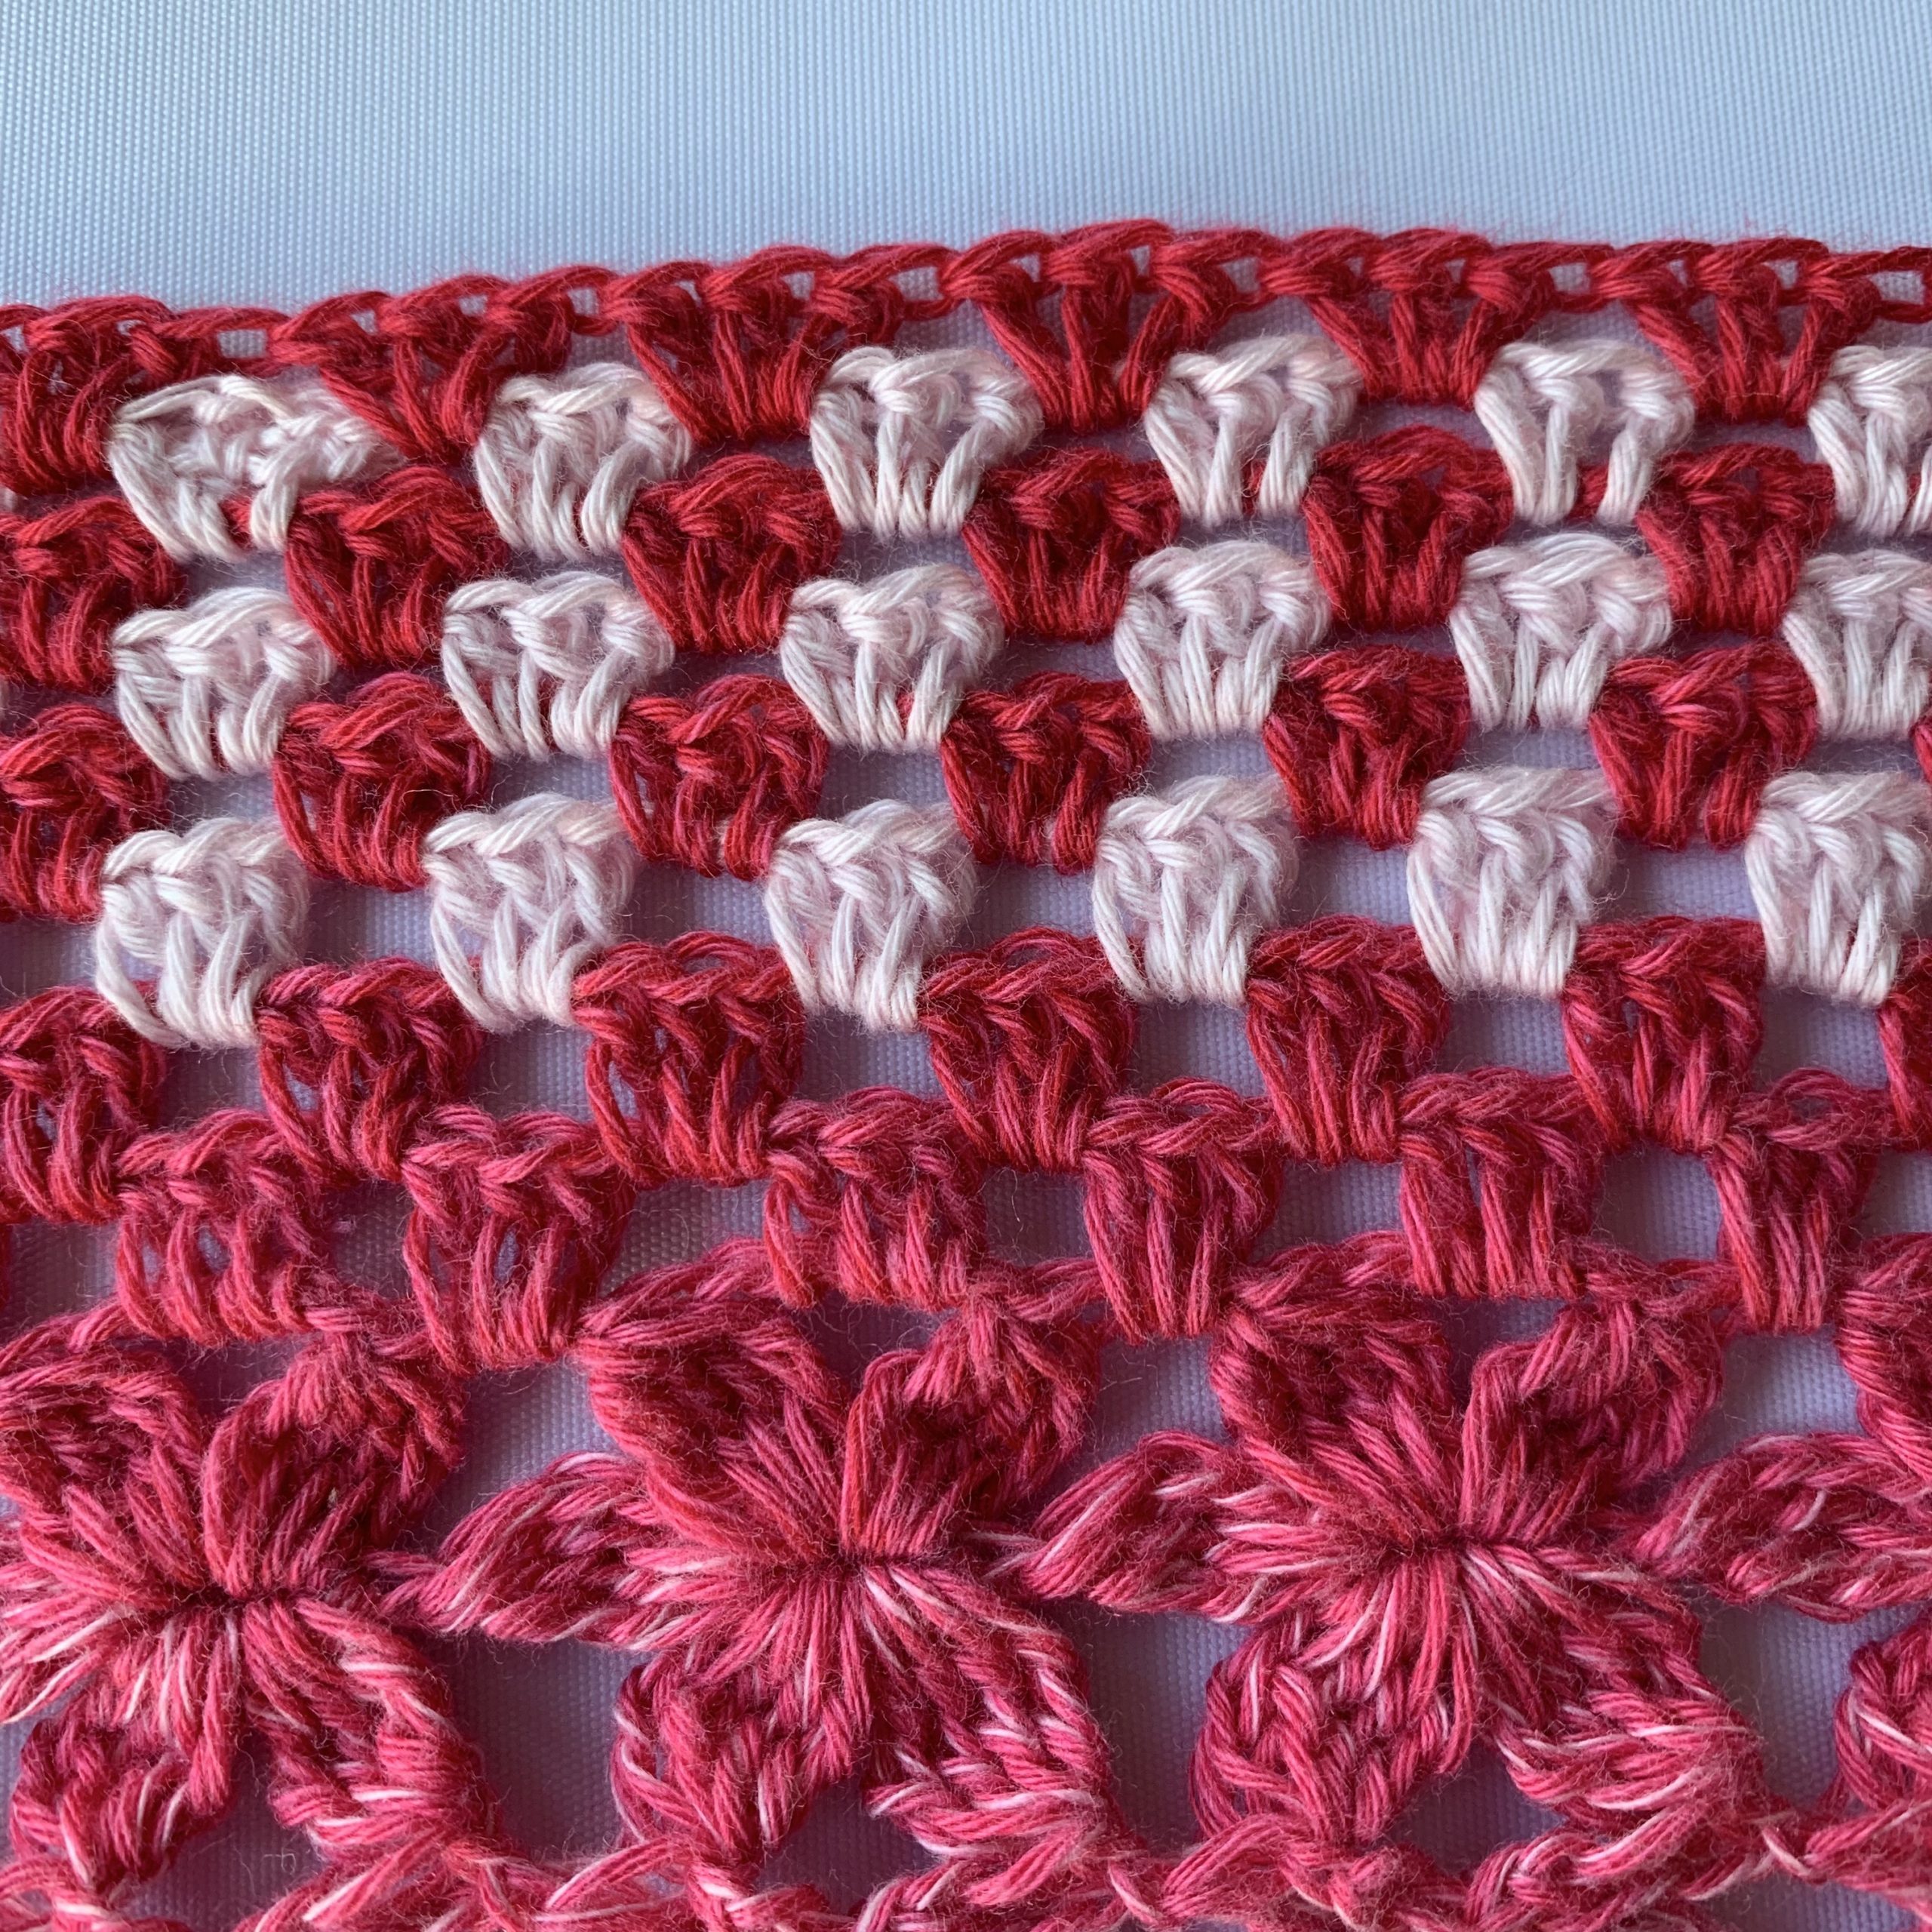
Row 5: Whirlette. Decrease with one tr every second tr group. See the picture.
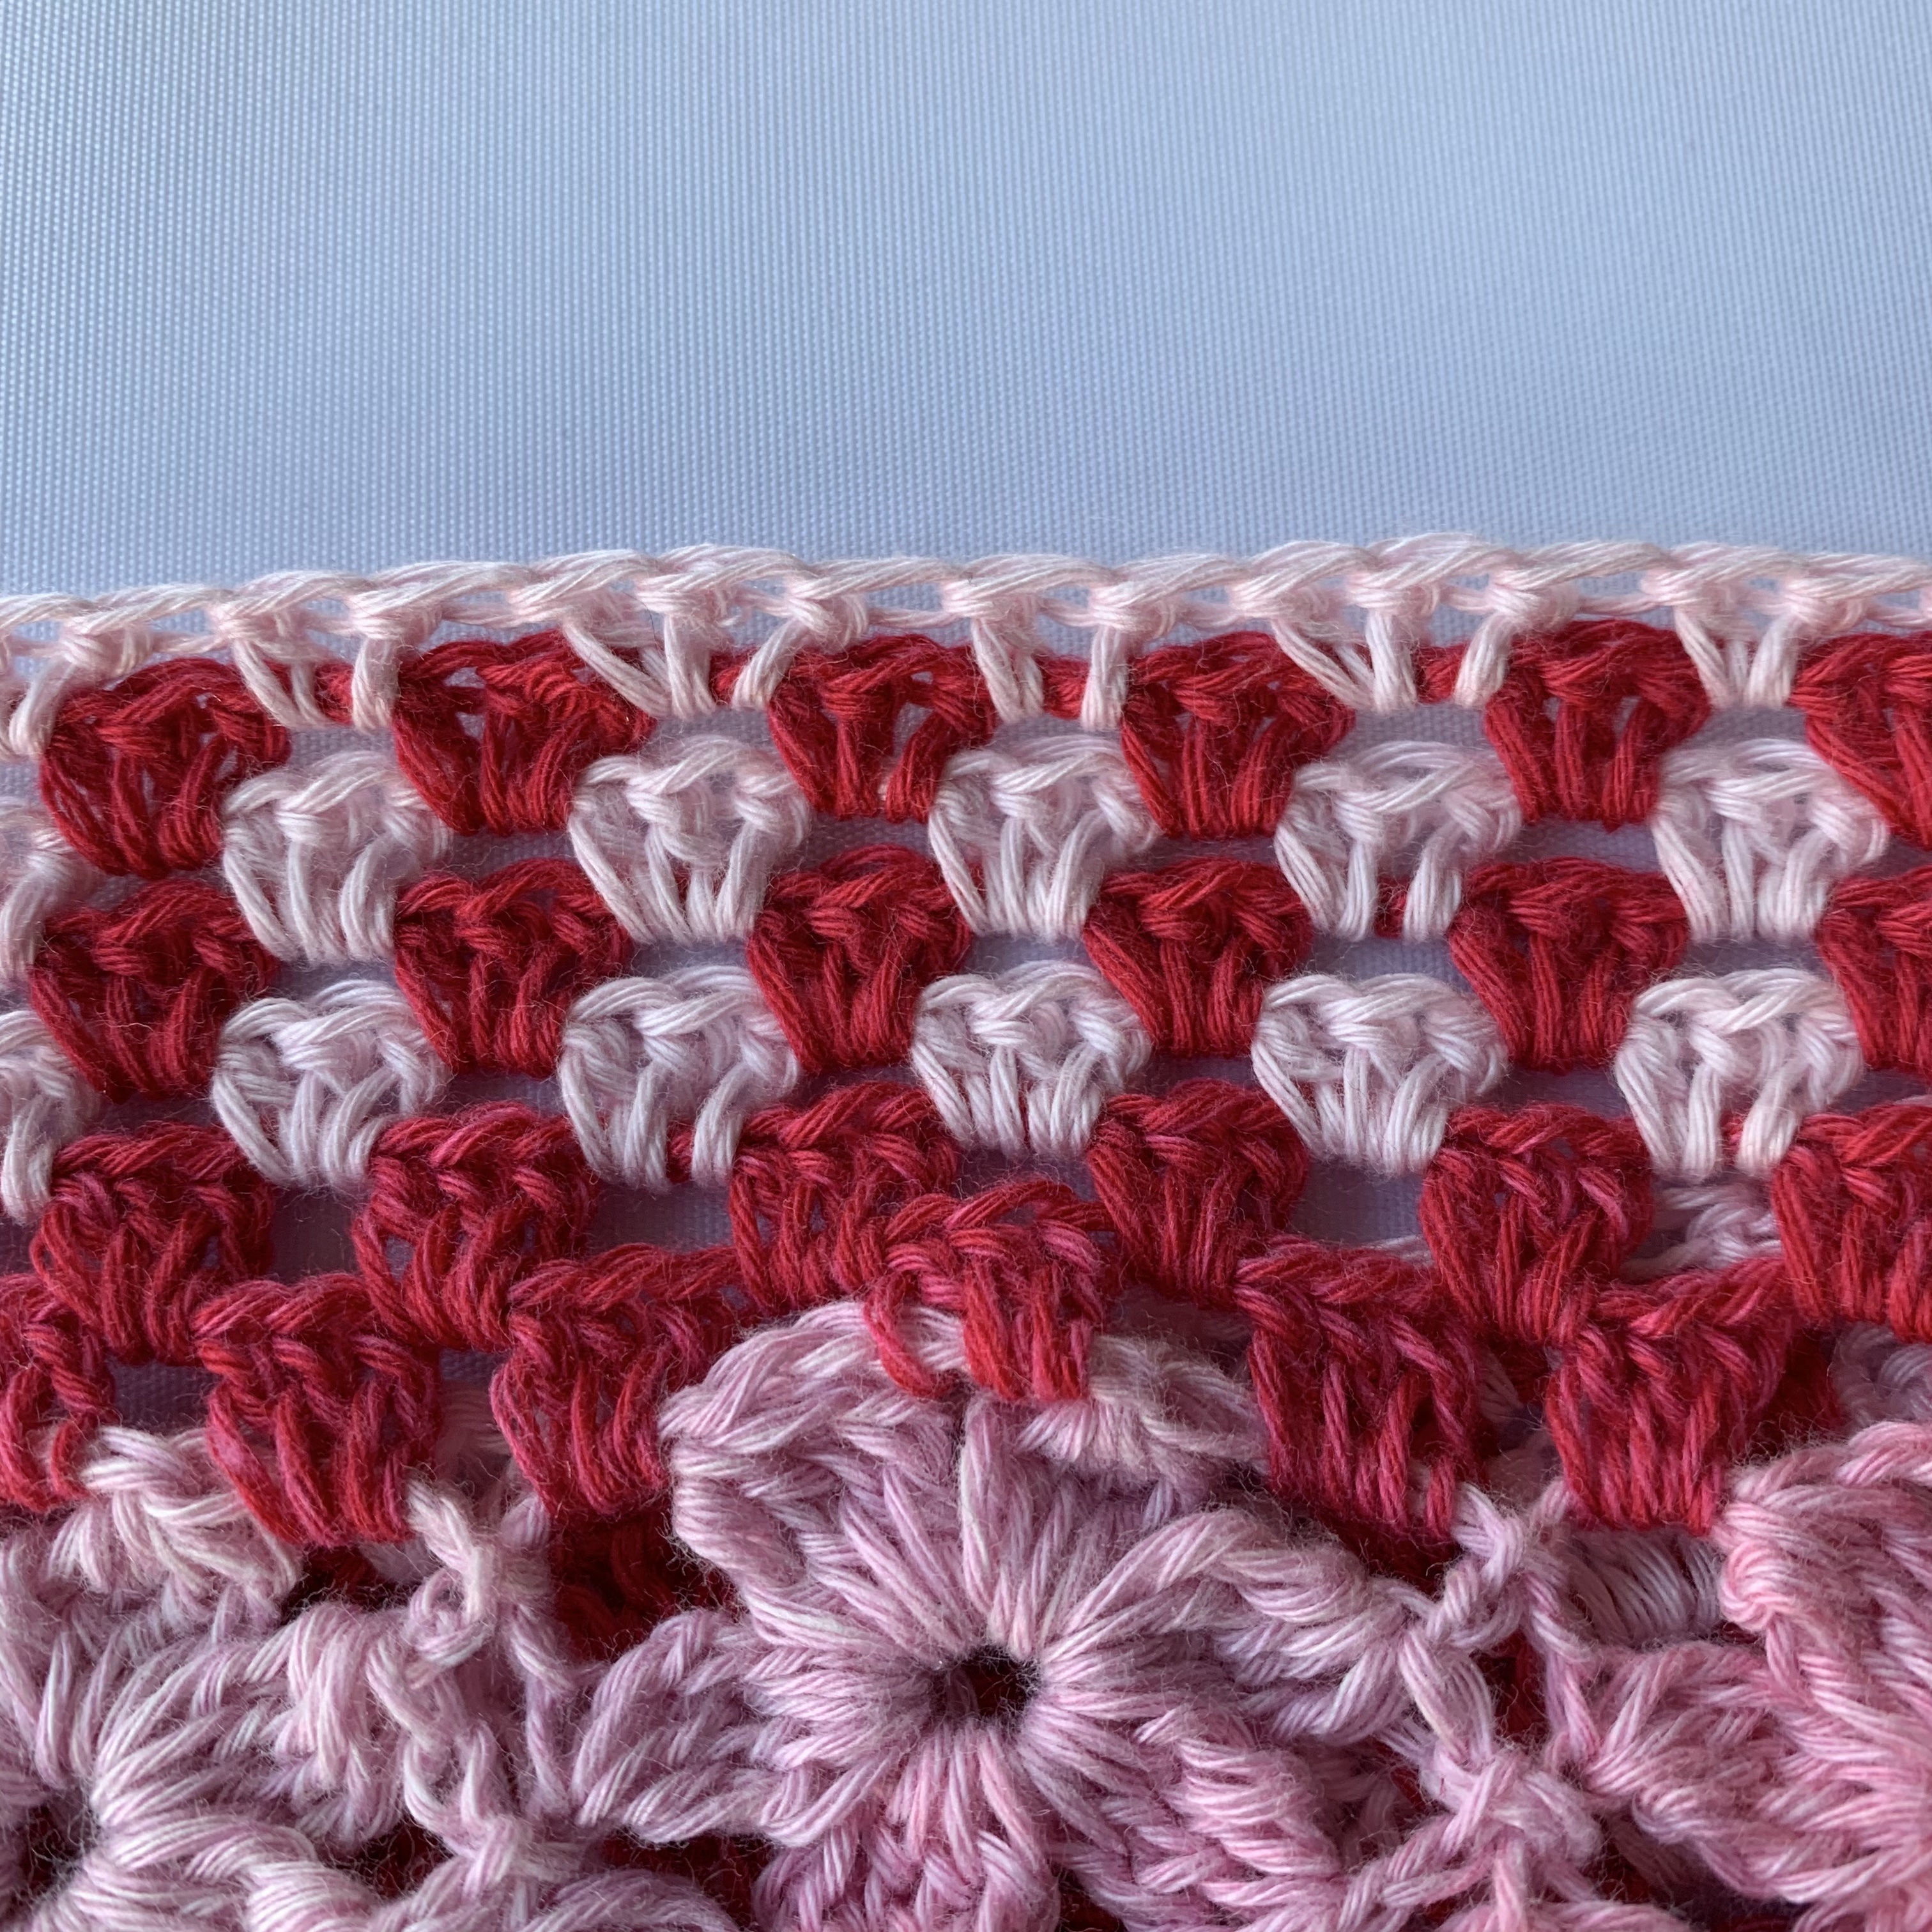
Row 6: Whirl. 2 tr in every sp around (one tr decrease in every tr group, see piture below).
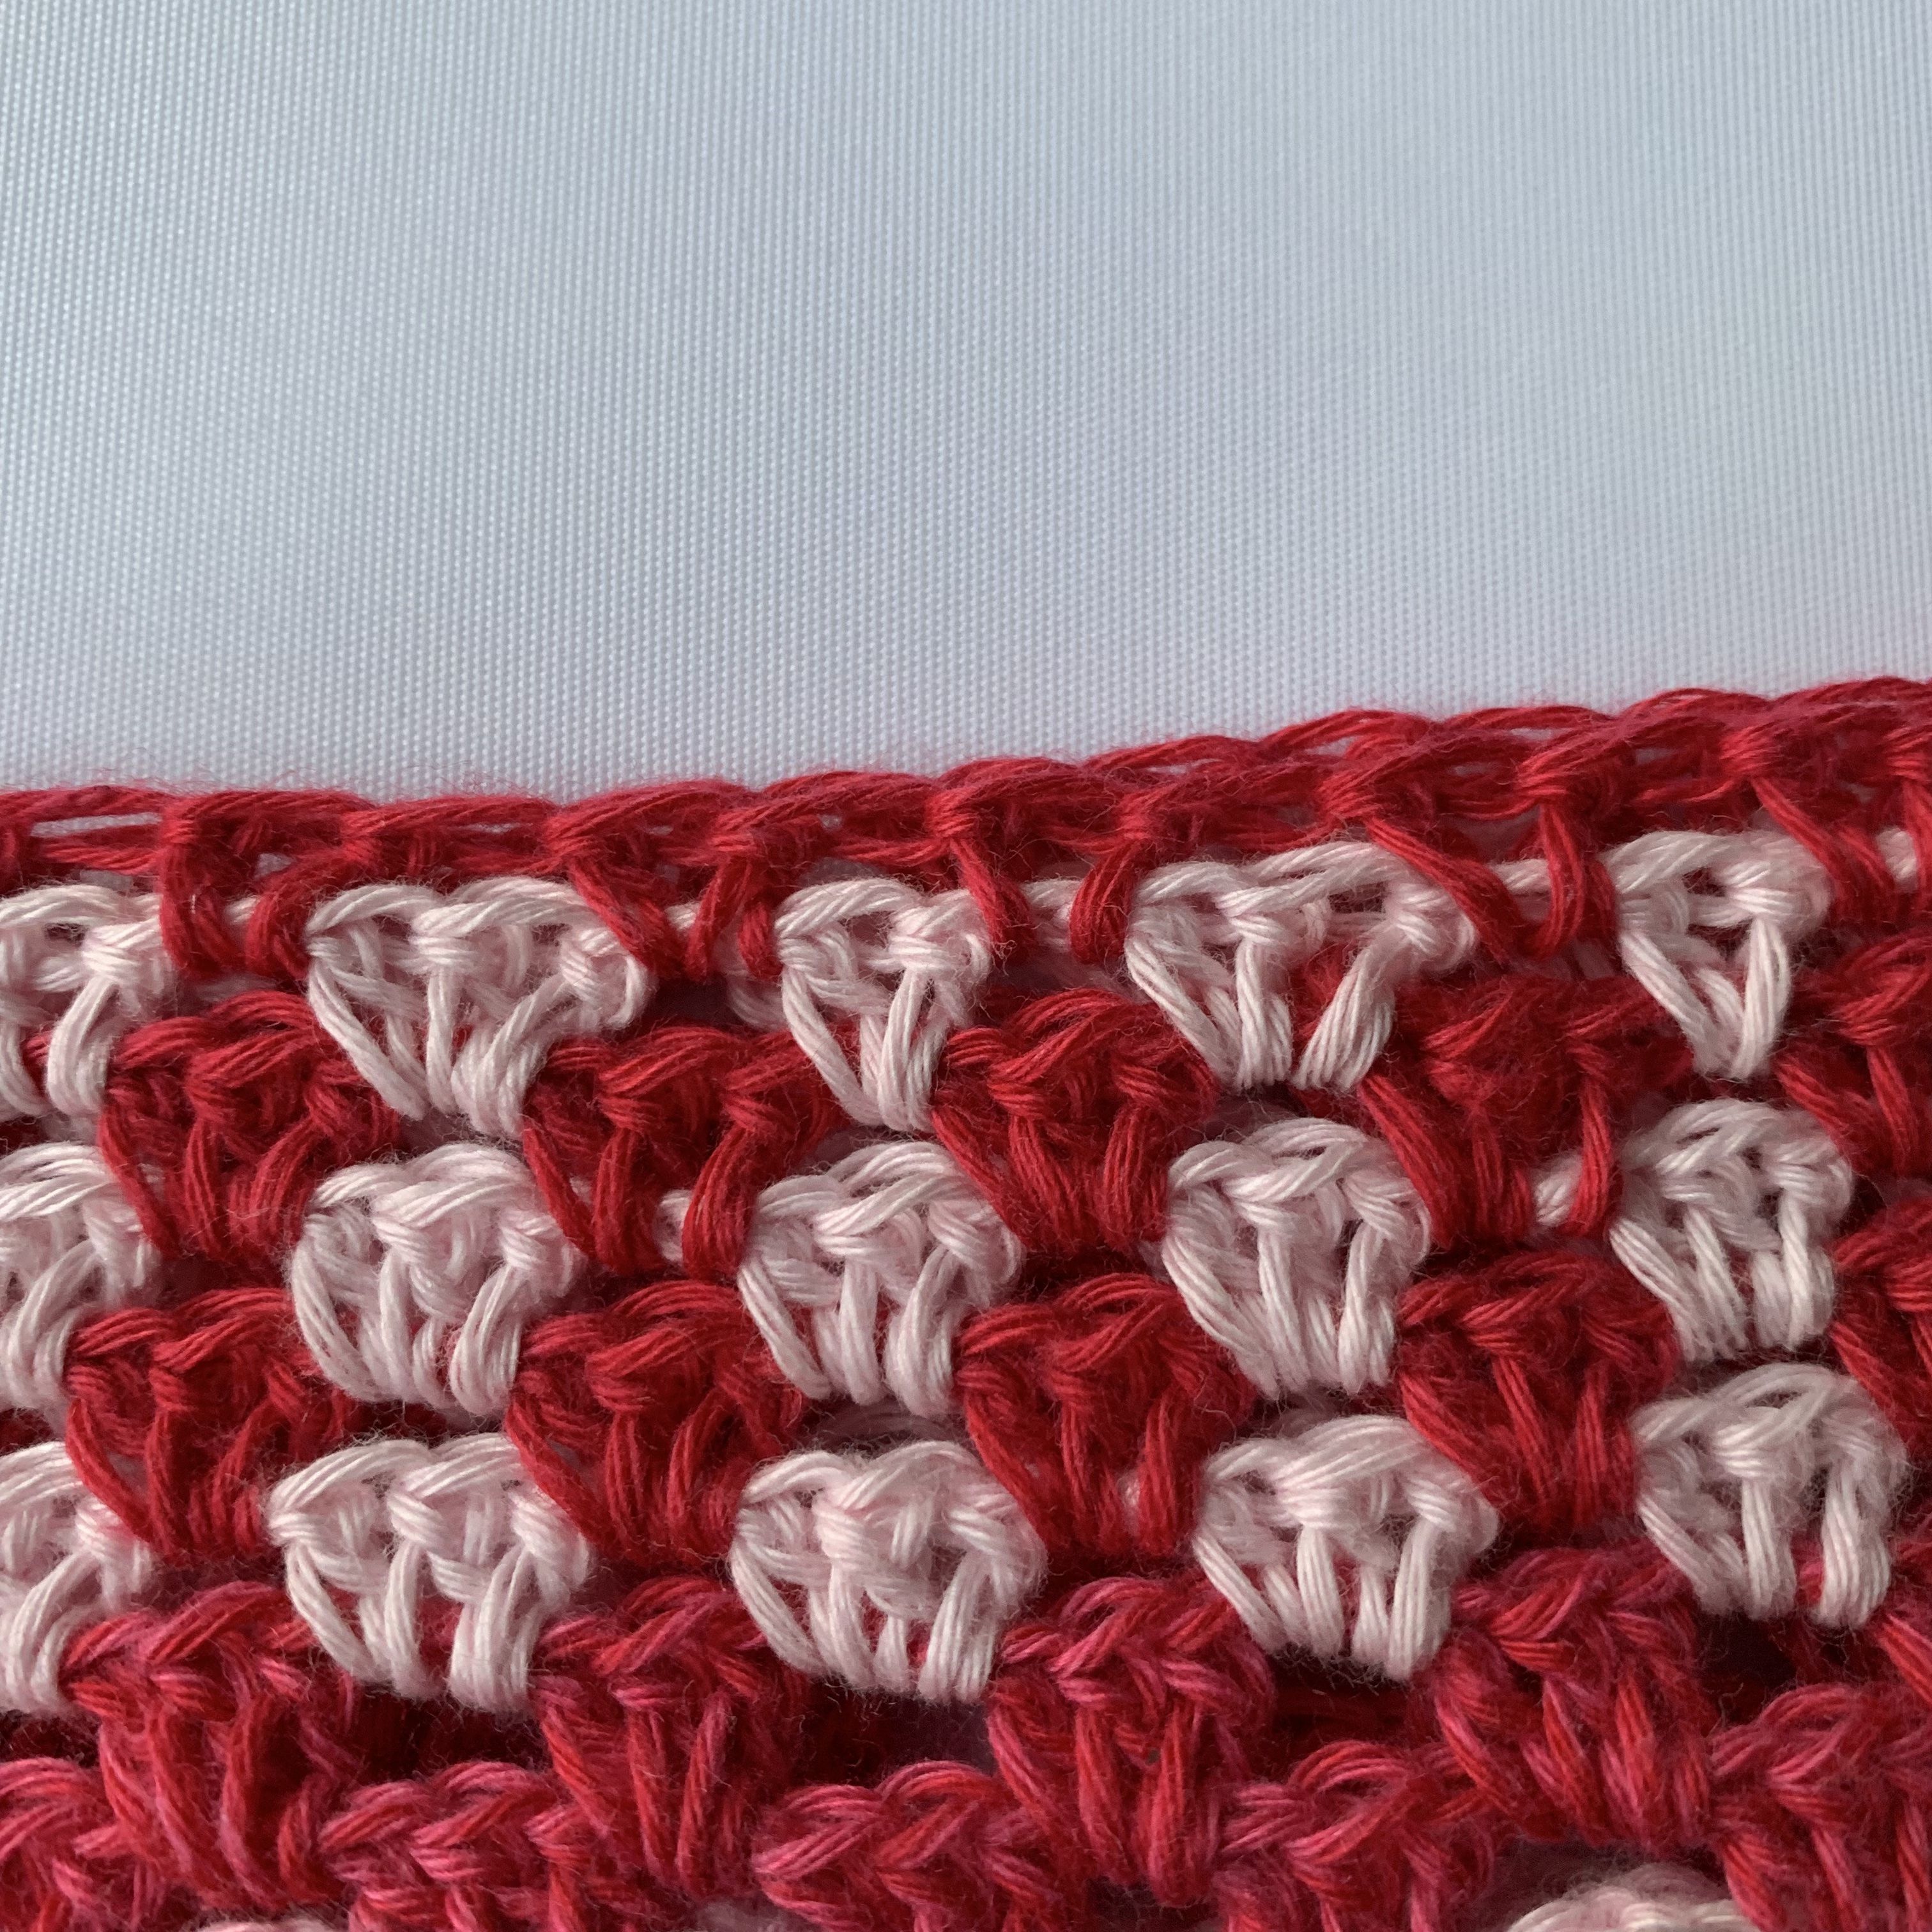
Row 7: Whirlette. Start with a standing htr (or ch 2) in any st, 1 htr in every st around, slst in first st.
Row 8: Whirlette. Ch 2, 1 htr in every st around, slst in first st.
Row 9: Whirlette. Ch 1, 1 dc in same st, 1 dc in every st around, slst in first dc.
Row 10: Whirlette. Repeat previous row.
Row 11: Whirl. Repeat row 8.
Row 12: Whirl. Repeat row 8.
Row 13: Whirlette. Repeat row 8.
Row 14: Whirlette. Repeat row 8.
Row 15: Whirlette: Crabstitch around. Cut the yarn and fasten off.

Happy Crocheting











1 comment
[…] English UK […]